CONTENTS

Copyright 2018 SPK Technologies LLC. All rights reserved.
Mobile Data Manager, SPK and the SPK logo are trademarks of SPK Technologies LLC. Android is the trademark of Google Inc in the US and other countries. SAP is the registered trademark of SAP AG, Germany. BarTender is the registered trade mark of Seagull Inc. Other product and brand names may be trademarks or registered trademarks of their respective owners.
SPK Technologies LLC assumes no responsibility for any damage or loss resulting from the use of this guide. SPK Technologies LLC assumes no responsibility for any loss or claims by third parties which may arise through the use of this product. SPK Technologies LLC assumes no responsibility for any damage or loss caused by use of the application outlined in this guide. To protect against data loss, be sure to make backup copies (on other media) of all important data.
Important: Please read the End User License Agreement for this product before using the software program(s). Using the software indicates that you accept the terms of the End User License Agreement.
SPK Technologies LLC continuously strive to improve their product. There may be certain differences between the user manual description and the software’s operation, depending on the software released for use. SPK Technologies LLC shall not be held legally responsible for such differences.
1. INTRODUCTION
Mobile Data Manager (MDM)
SPK Technologies Mobile Data Manager (referred to as app) is the most versatile application designed to collect and process shop floor or warehouse data in SAP. Mobile Data Manager is a native app developed in Android and can run on all devices with Android operating system with version 11 and above. The app is not available for download in Google play. End users will be provided with standalone installation files and instructions for installations. The app works in conjunction with the backend programs created in SAP delivered as part of overall MDM package. The app and back-end programs in SAP will generate necessary labels, if configured, through BarTender software.
About This Manual
This manual contains detailed information about SPK Mobile Data Manager app. The manual is intended as a reference tool in everyday work with the SPK Mobile Data Manager suite. This manual assumes a working knowledge of Android based mobile systems.
App Installation
The primary app named “SPK Account Manager” is available through download from www.spktech.net. The installation of the version of the MDM app approved for the customer on the device will be maintained through account manager app.
Software Installation
For installation of BarTender label printing software, refer to the user manual for the BarTender software.
Key Features
- Seamless integration with SAP ECC and S4/Hana.
-
Perform major shop floor or warehouse transactions such as:
-
Receipt of goods into inventory from:
- Purchase order
- Process order
- Production order
- Shipments (For Stock Transport Orders)
- Handling Units (For Stock Transport Orders)
-
Issue of goods from inventory for:
- Process order
- Production order
- Cost center
- Scrap
- Samples
-
Movement of goods through:
- Existing transfer order
- Transfer orders (Single & multi items)
- Transfer order for storage units
- Warehuse tasks for EWM
- Inventory inquiry
-
Creation of time tickets for:
- Quantity
- Time
-
Physical inventory results recording at:
- Inventory Management level
- Warehouse Management level for both ERP & EWM
-
Shipment of goods for WM & EWM through:
- Delivery
- Shipments
-
Receipt of goods into inventory from:
2. INITIAL SETUP
If the app is launched for the first time on the device, or after a revision upgrade will go through the initial setup.
The following initial setup needs to be completed for the application to work:
- Acceptance of “End User License Agreement”.
- The SAP server details.
Additional setup details such as transactional parameters are optional. If the settings are not defined, the app will go to the default settings screen at the startup.
The settings screen can also be brought up by tapping on the “Settings” on the top right corner of the screen.
To setup the SAP server details, the following details regarding the SAP server are needed:
- SAP Server Name
- SAP Server Port
- SSL Enabled
- SAP Client
Contact your SAP administrator to get the values for this.
Note: If the device is not registered in the network domain of the company, and the device is not able to resolve the server’s name, try the server IP address.
The transaction parameters such as plant, storage location, warehouse, etc., can be defined. These parameters will be used as default values when the app interacts with SAP. Sample setting details are shown below.


3. LOGGING IN
3.1 Launching the app
To launch the app, browse through the list of apps installed and click / tap on SAP Mobile Data Manager. The app, after performing the initialization, will show the login screen.
3.2 Logging in SAP

Note: Before the login, ensure the role “SAP_BC_WEBSERVICE_CONSUMER” is added to your SAP user profile. Contact your SAP administrator.
3.2.1 Select the environment to login The different environments are set up in the settings screen.
3.2.2 Select the preferred language in which to login Once selected, the information will be saved when the app is launched the next time.
3.2.3 Enter the SAP user id and press login.
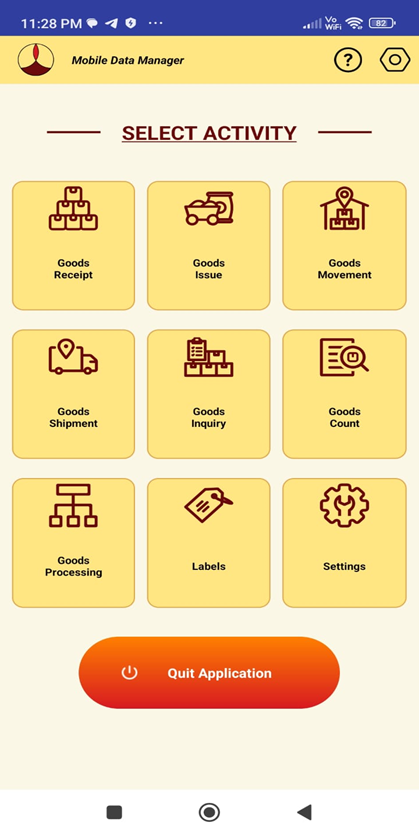
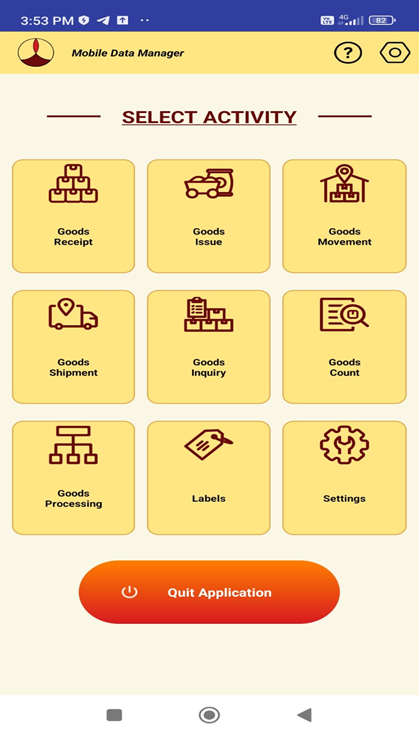
3.2.4 If the login credentials are correct, the main screen with the list of activities will be displayed.

3.2.5 If the login credentials are incorrect or the device is unable to communicate with the SAP server, an appropriate error message will be displayed.
3.2.6 Depending on the user authorization to perform various activities, the individual buttons in the main screen will either be enabled or disabled.
4. GOODS RECEIPT
4.1 PURCHASE ORDERS
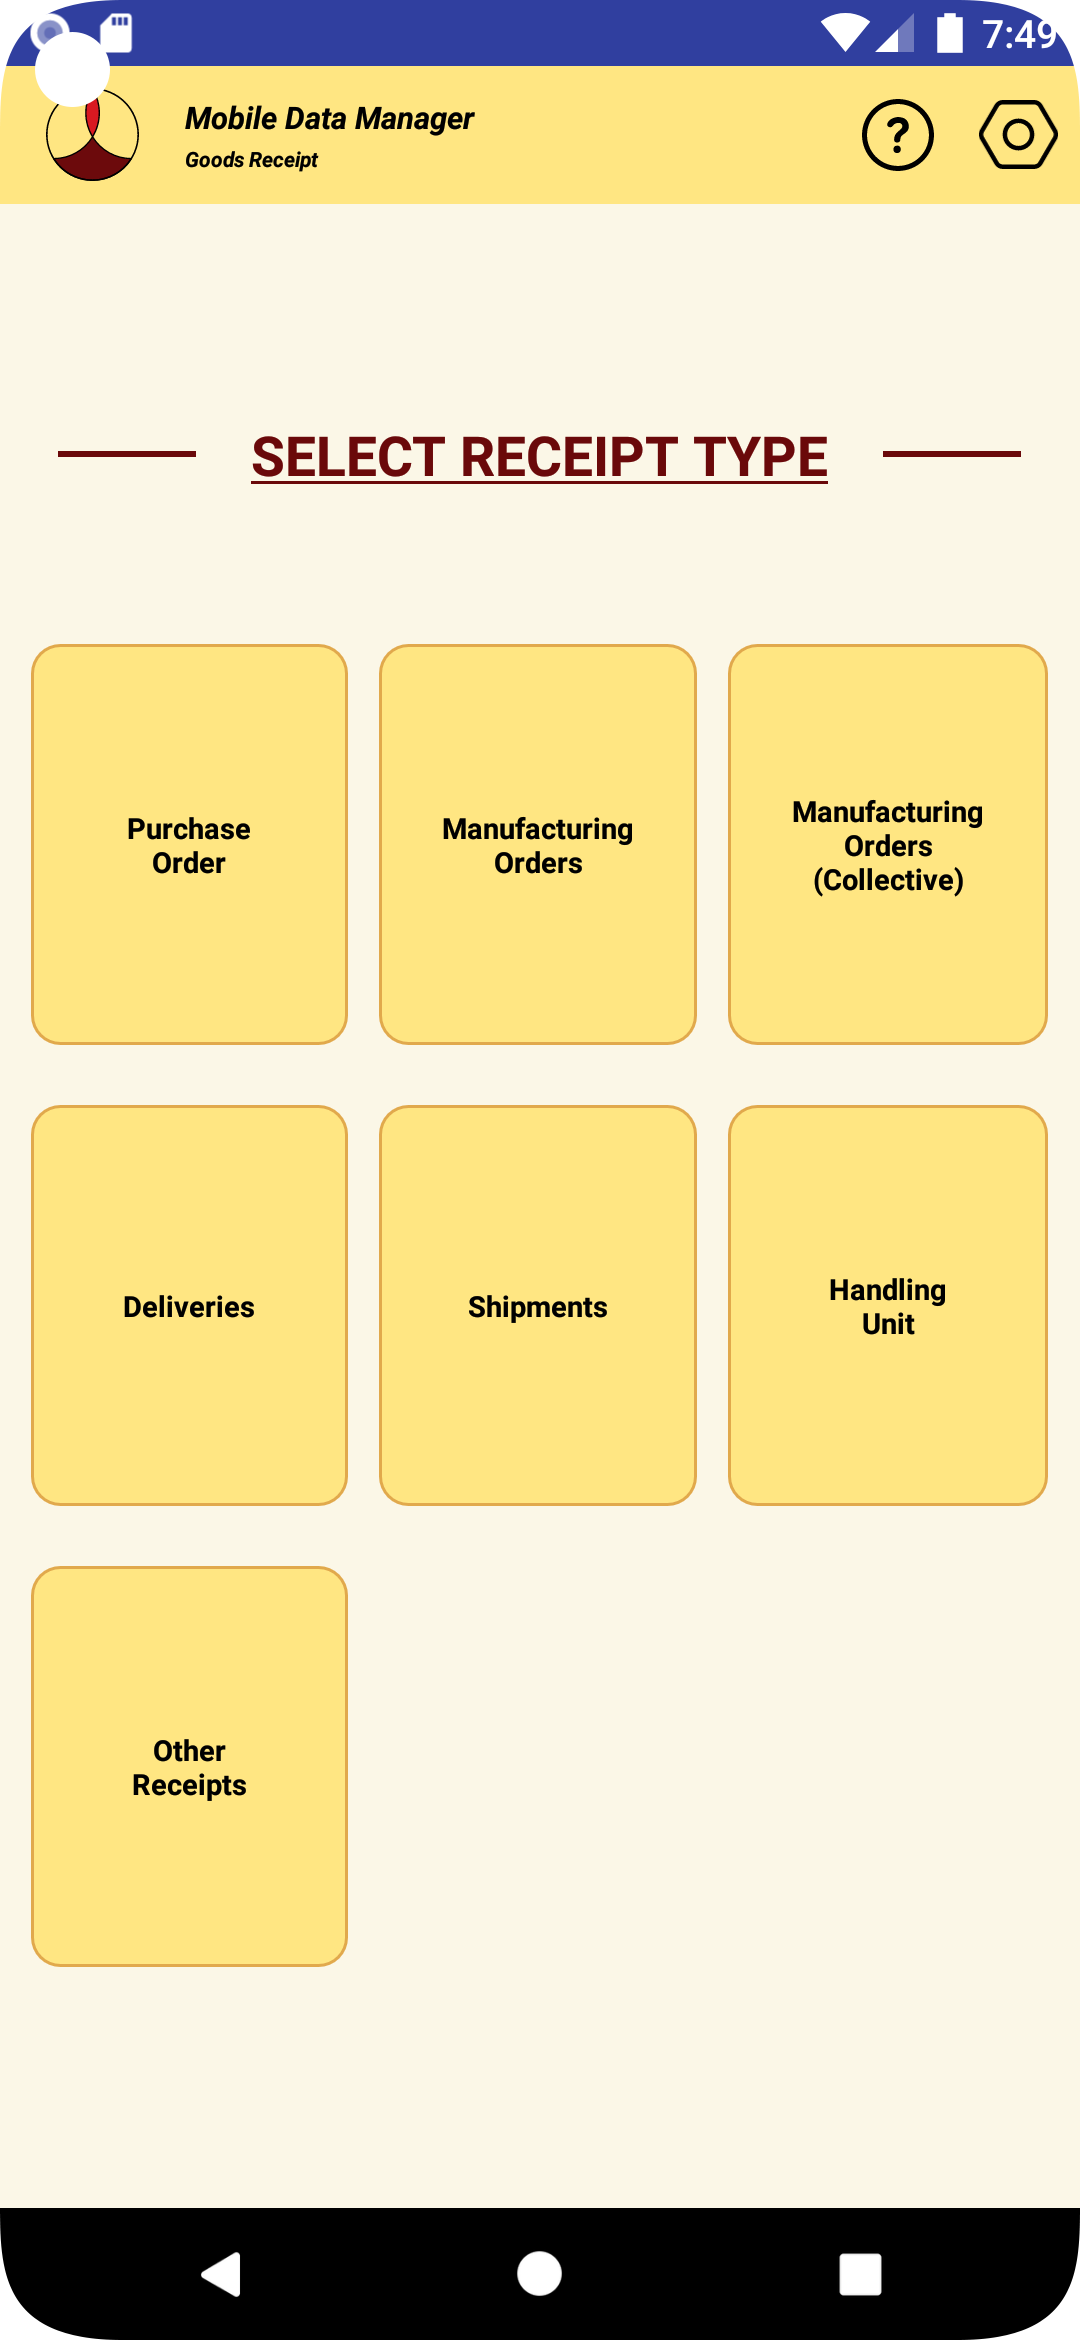
4.1.1 To receive materials into stock from a purchase order, select “Goods Receipt” from the main screen.

4.1.2 Select “Purchase Orders” from the receipt type screen.

4.1.3 The purchase order receipt screen as shown below will be displayed.

4.1.4 Enter the purchase order number and press enter. The purchase order if it exists in SAP, it will be downloaded. Header information such as vendor name, vendor number, purchasing org, etc., will be displayed in the header as shown in the image below.

4.1.5 To view the list of line items in the purchase order select “Line Items” tab header in the screen. By default the open lines (Without delivery complete indicator set) will be displayed. Information such as PO line number, material, description, order quantity, received quantity will be displayed.

4.1.6 To see the list of all line items select “All Lines” option. All the lines in the PO will be displayed. The delivery complete indicator will show whether the line is open or complete.

4.1.7 To receive goods into stock, select the line item against which the receipt needs to be made.

4.1.8 The line item selected will be highlighted as shown in the picture above.
4.1.9 To receive the line item, select the “Receive” tab header in the screen.

4.1.10 Details of the line item selected will be displayed in the top of the screen.
4.1.11 On the bottom of the screen, the mandatory inputs that are needed to make the receipt will be displayed. The type of mandatory inputs needed will be set in SAP by the system administrator.
4.1.12 The optional other inputs needed when making the receipt can be entered by clicking the “Other Inputs” button.

4.1.13 The type of optional inputs that can be entered will be set in SAP by the SAP administrator.
4.1.14 Enter the mandatory inputs required for each field.

4.1.15 Once the values of mandatory and optional inputs are entered, click on the “Receive” button.
4.1.16 If any of the fields entered doesn’t match with the values of the PO line selected or any mandatory inputs were missing, the appropriate error message will be displayed.
4.1.17 If the transaction in SAP is successful, the material document number that is created will be displayed.

4.1.18 If the transaction fails for some reason, the appropriate error message will be displayed.
4.1.19 If the label printing is configured for the transaction, the label will be printed.
4.1.20 After the transaction the data in the receiving screen will be cleared and the purchased order line items will be refreshed.
4.1.21 If no further receipts are planned, pressing the back button will take back to the main activity screen.
4.2 MANUFACTURING ORDERS
4.2.1 To receive materials into stock from a production or process order, select “Goods Receipt” from main screen.

4.2.2 Select “Manufacturing Orders” from the receipt type screen.

4.2.3 The manufacturing order receipt screen as shown below will be displayed.

4.2.4 Enter the work order number and press enter. The work order if it exists in SAP, it will be downloaded. Header information such as created date, due date, plant, etc., will be displayed in the header as shown in the image below.

4.2.5 To view the list of products and co-products items in the work order select “Line Items” tab header in the screen. Information such as material, description, order quantity, received quantity, etc., will be displayed.

4.2.6 To receive goods into stock, select the line item against which the receipt needs to be made.

4.2.7 The line item selected will be highlighted as shown in the picture above.
4.2.8 To receive the line item, select the “Receive” tab header in the screen.

4.2.9 Details of the line item selected will be displayed in the top of the screen.
4.2.10 On the bottom of the screen, the mandatory inputs that are needed to make the receipt will be displayed. The type of mandatory inputs needed will be set in SAP by the system administrator.
4.2.11 The optional other inputs needed when making the receipt can be entered by clicking the “Other Inputs” button.

4.2.12 The type of optional inputs that can be entered will be set in SAP by the SAP administrator.
4.2.13 Enter the mandatory inputs required for each field.

4.2.14 Once the values of mandatory and optional inputs are entered, click on the “Receive” button.
4.2.15 If any of the fields entered doesn’t match with the values of the line selected or any mandatory inputs were missing, the appropriate error message will be displayed.
4.2.16 If the transaction in SAP is successful, the material document number that is created will be displayed.

4.2.17 If the transaction fails for some reason, the appropriate error message will be displayed.
4.2.18 If the label printing is configured for the transaction, the label will be printed.
4.2.19 After the transaction the data in the receiving screen will be cleared and the purchased order line items will be refreshed.
4.2.20 If no further receipts are planned, pressing the back button will take back to the main activity screen.
4.3 MANUFACTURING ORDERS (COLLECTIVE)
4.3.1 To receive materials into stock from a production or process order, select “Goods Receipt” from main screen.
4.4 DELIVERIES
4.4.1 CREATE DELIVERY DOCUMENT
4.4.2 RECEIVE DELIVERY DOCUMENT
4.4.2.1 To receive materials into stock from a delivery, select “Goods Receipt” from main screen.
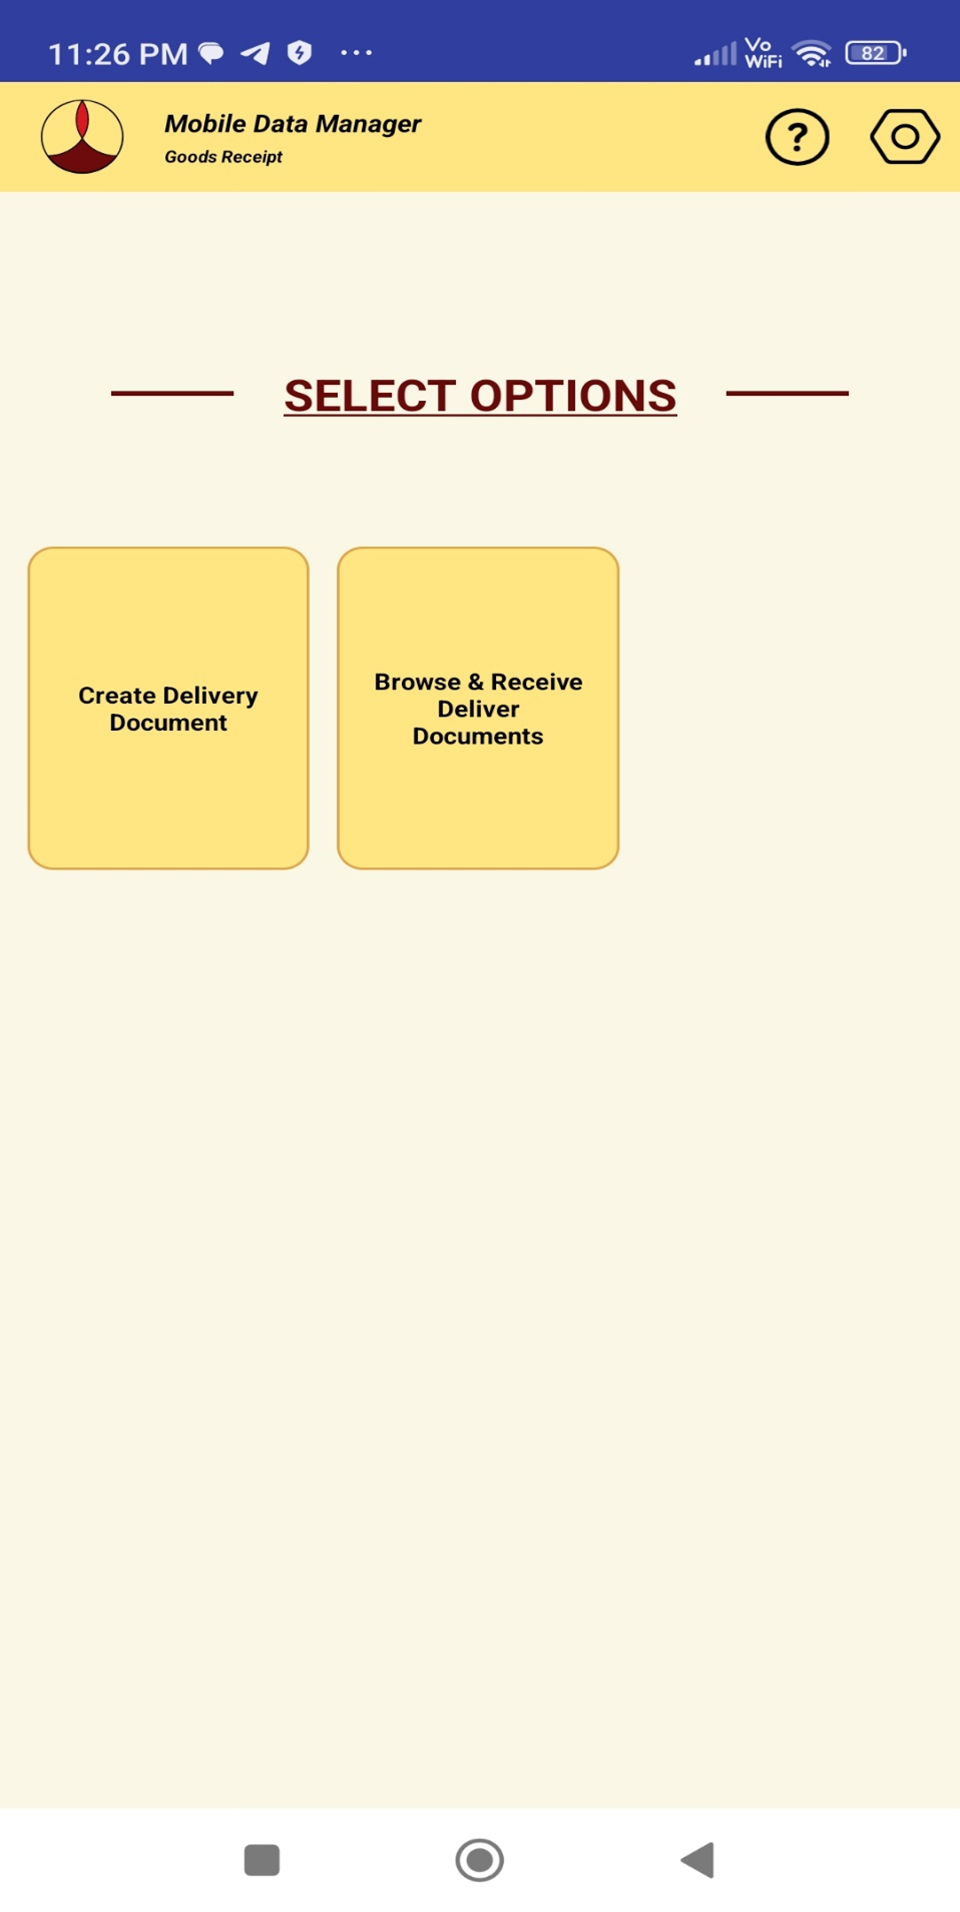
4.4.2.2 Select "Deliveries" from the receipt type screen.

4.4.2.3 Select "Browse & Receive Delivery Documents" from the select options screen.
4.4.2.4 Enter the criteria to search and download the list of delivery documents
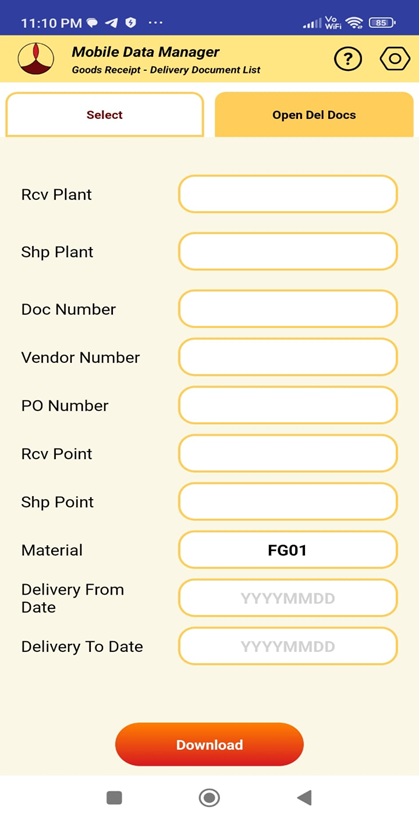
4.4.2.5 Upon entering the criteria(s) press the download button. All delivery documents that meet the criteria will be downloaded and listed in the "Open Del Docs" tab as shown
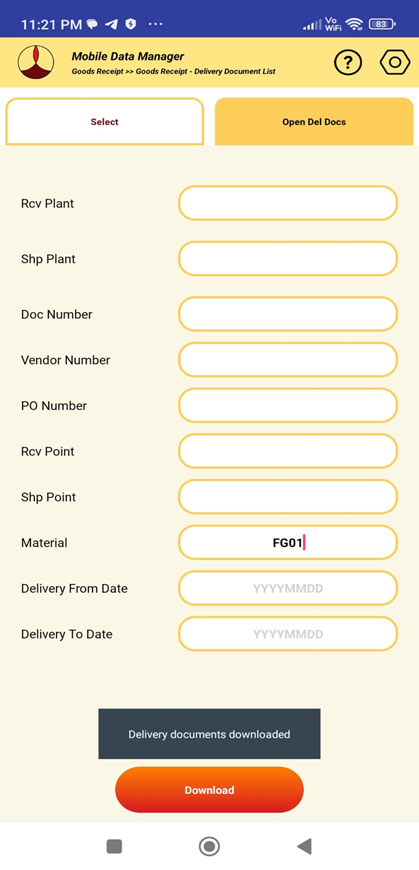
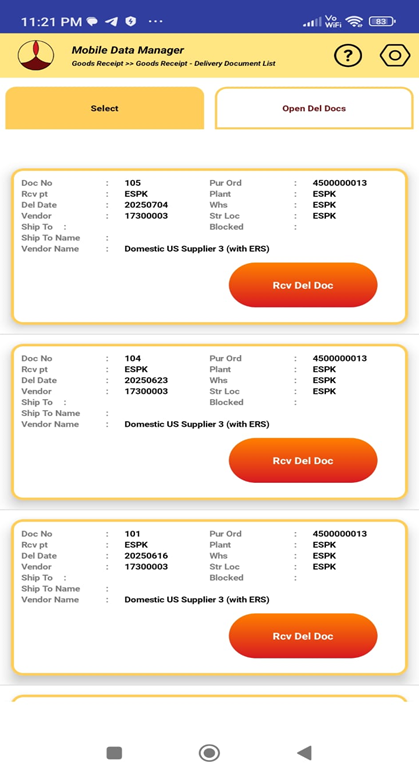
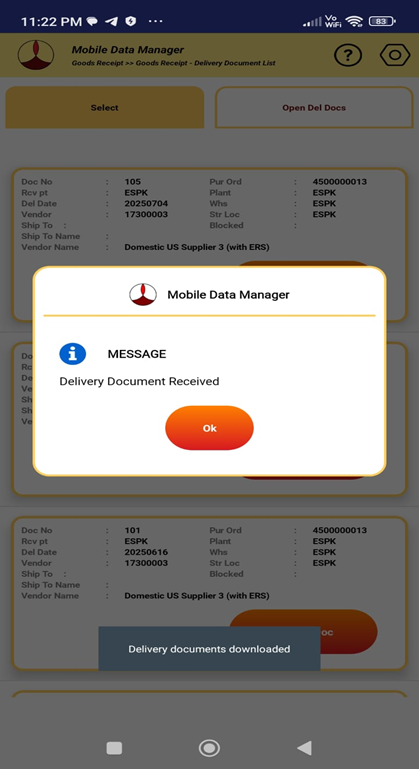
4.4.2.6 To receive the delivery document press the "Rcv Del Doc" of the corresponding delivery document. If the receipt is sucessfull, the message of "Delivery Document Received" will be displayed. If unsucessfull due to any errors, the error message will be displayed.
4.5 SHIPMENTS (FOR STO)
4.5.1 To receive materials into stock from a shipment pertaining to stock transport order, select “Goods Receipt” from main screen.
4.6 HANDLING UNITS (FOR STO)
4.6.1 To receive materials into stock from a handling unit pertaining to stock transport order, select “Goods Receipt” from main screen.
4.7 OTHER RECEIPTS
4.7.1 To perform other receipts (transfer postings), select “Goods Receipt” from main screen.

4.7.2 Select “Other Receipts” from the receipt type screen.
4.7.3 The list of movement type codes available will be displayed as shown below will be displayed.
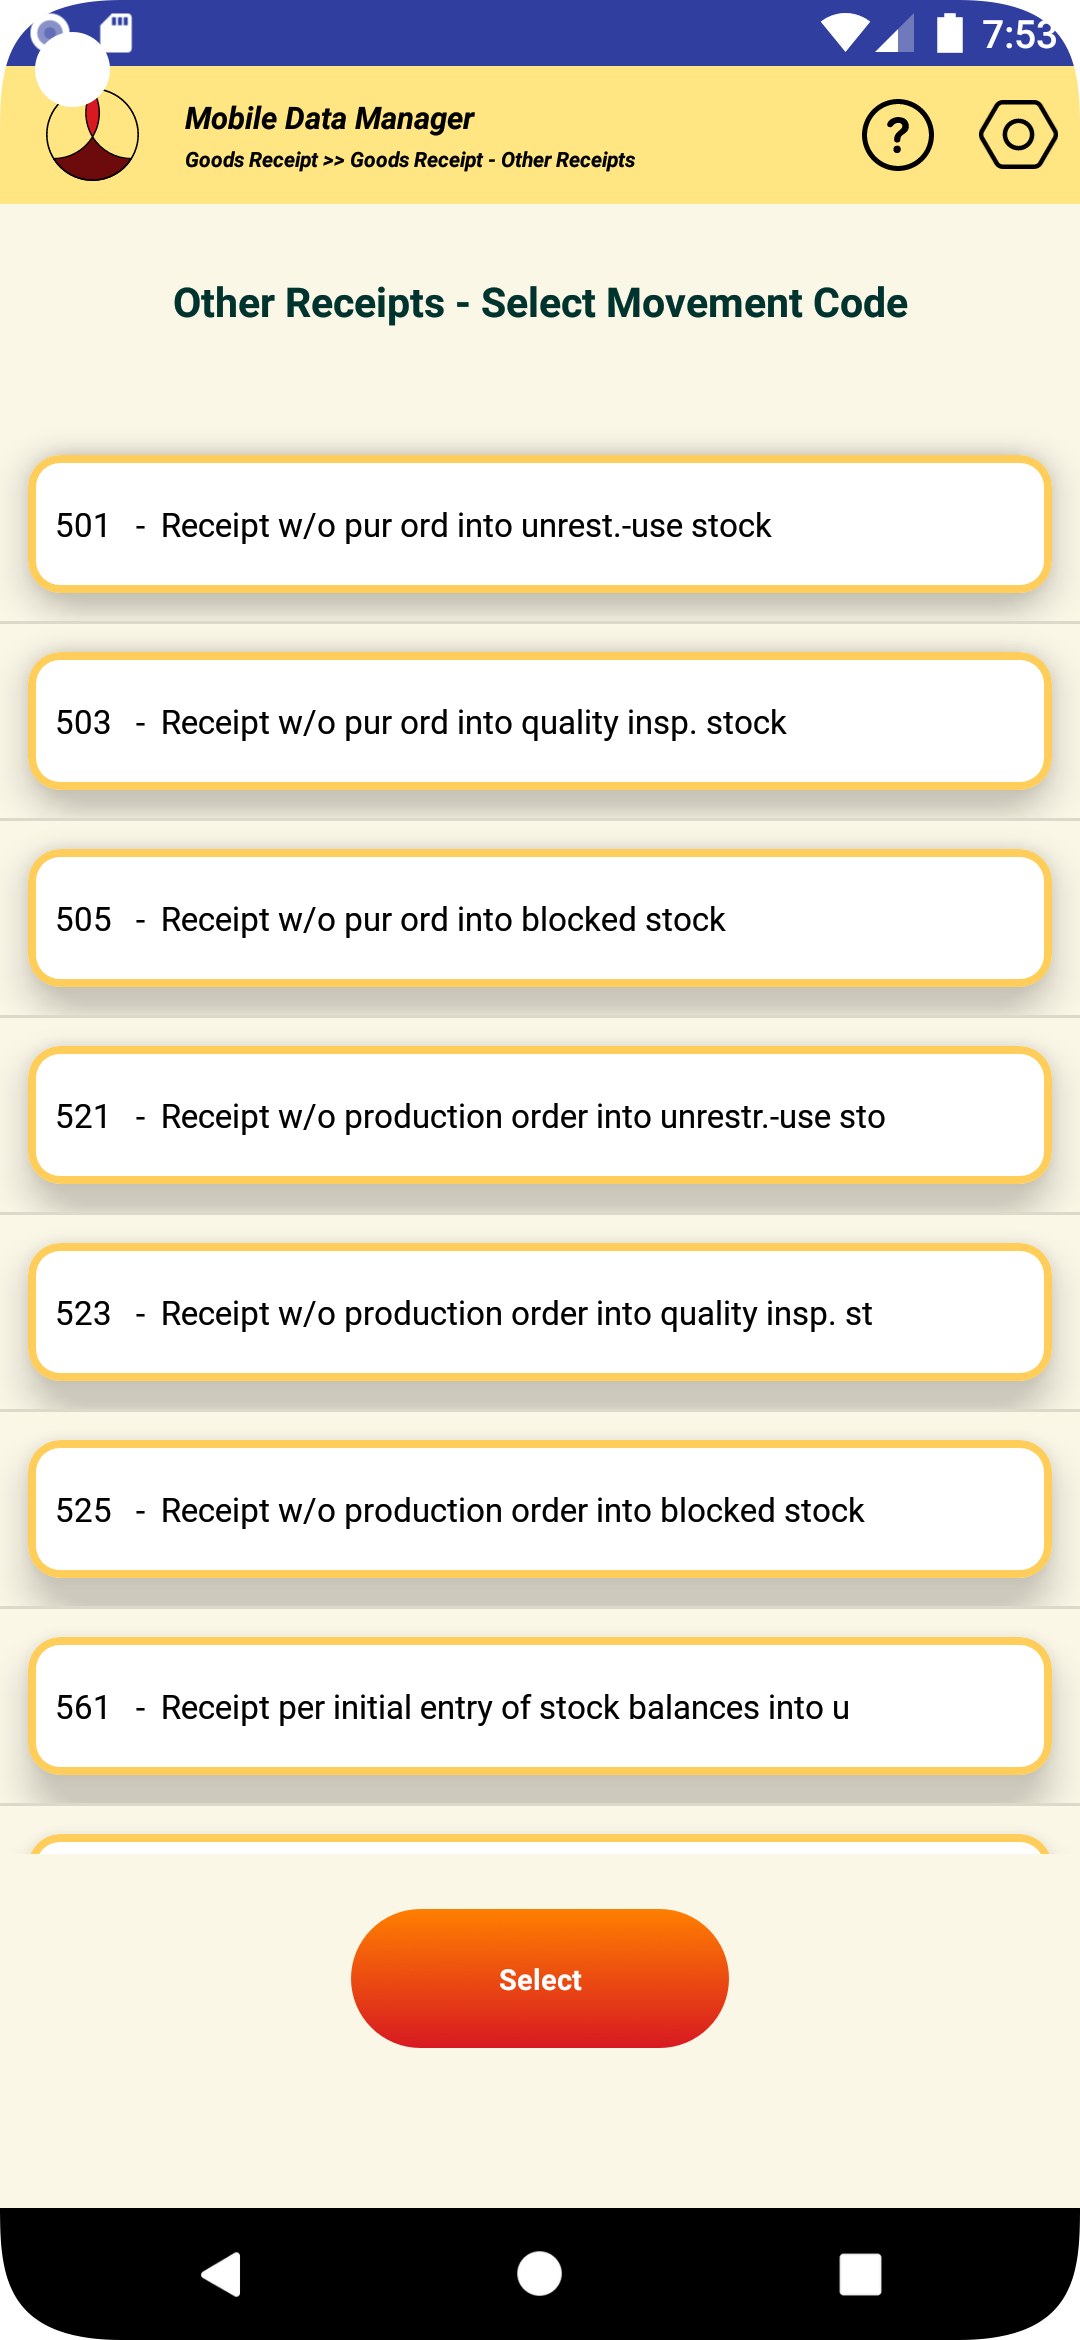
4.7.4 Select the movement type that is desired and press the select button in the bottom as shown in the image below.
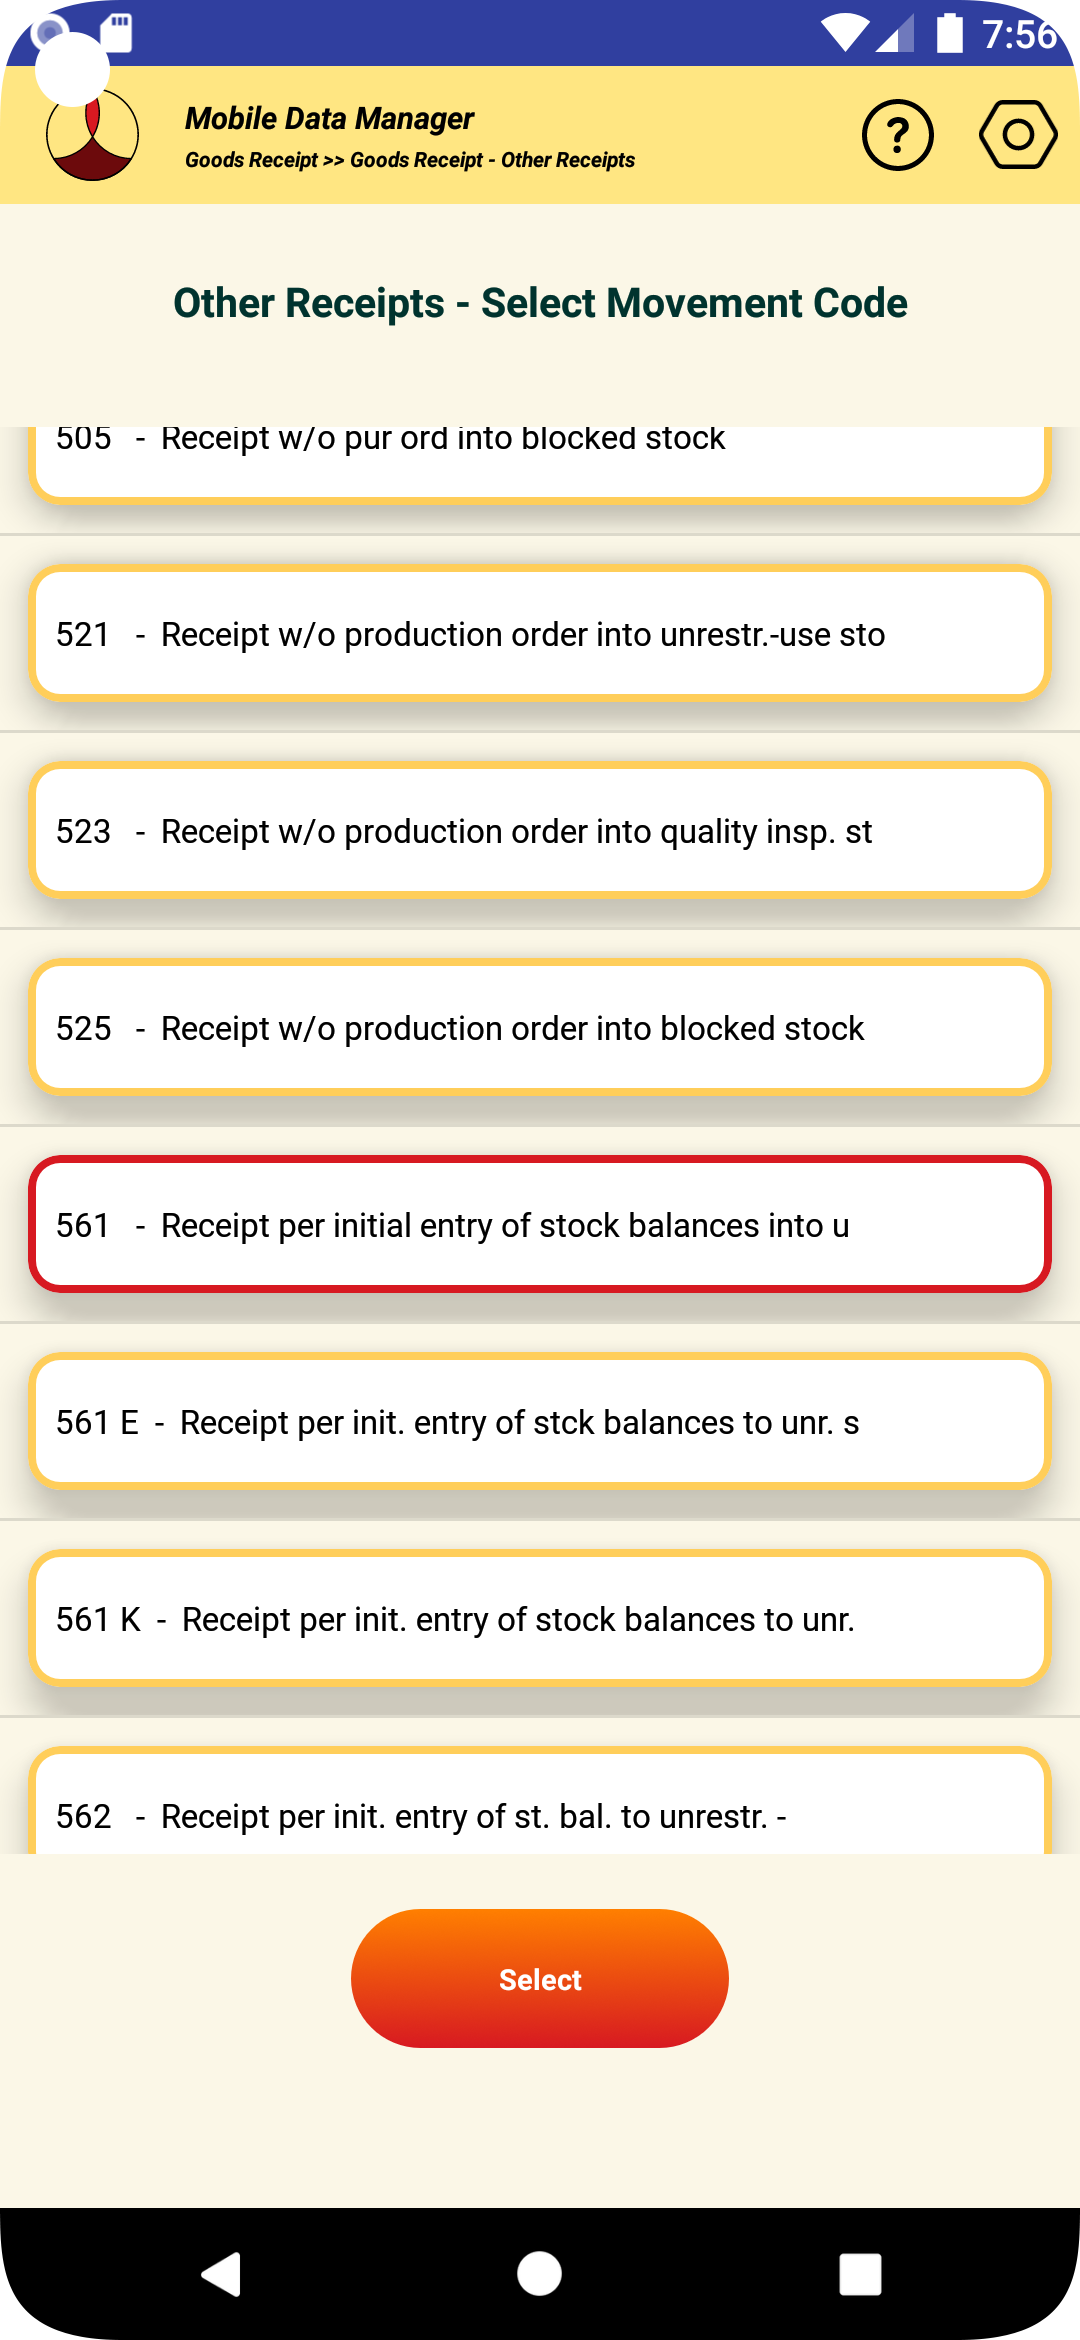
4.7.5 The input fields that are necessary to complete the transaction will be displayed as shown in the image below. Some of the fields may be mandatory depending on the configuration done by the administrator.
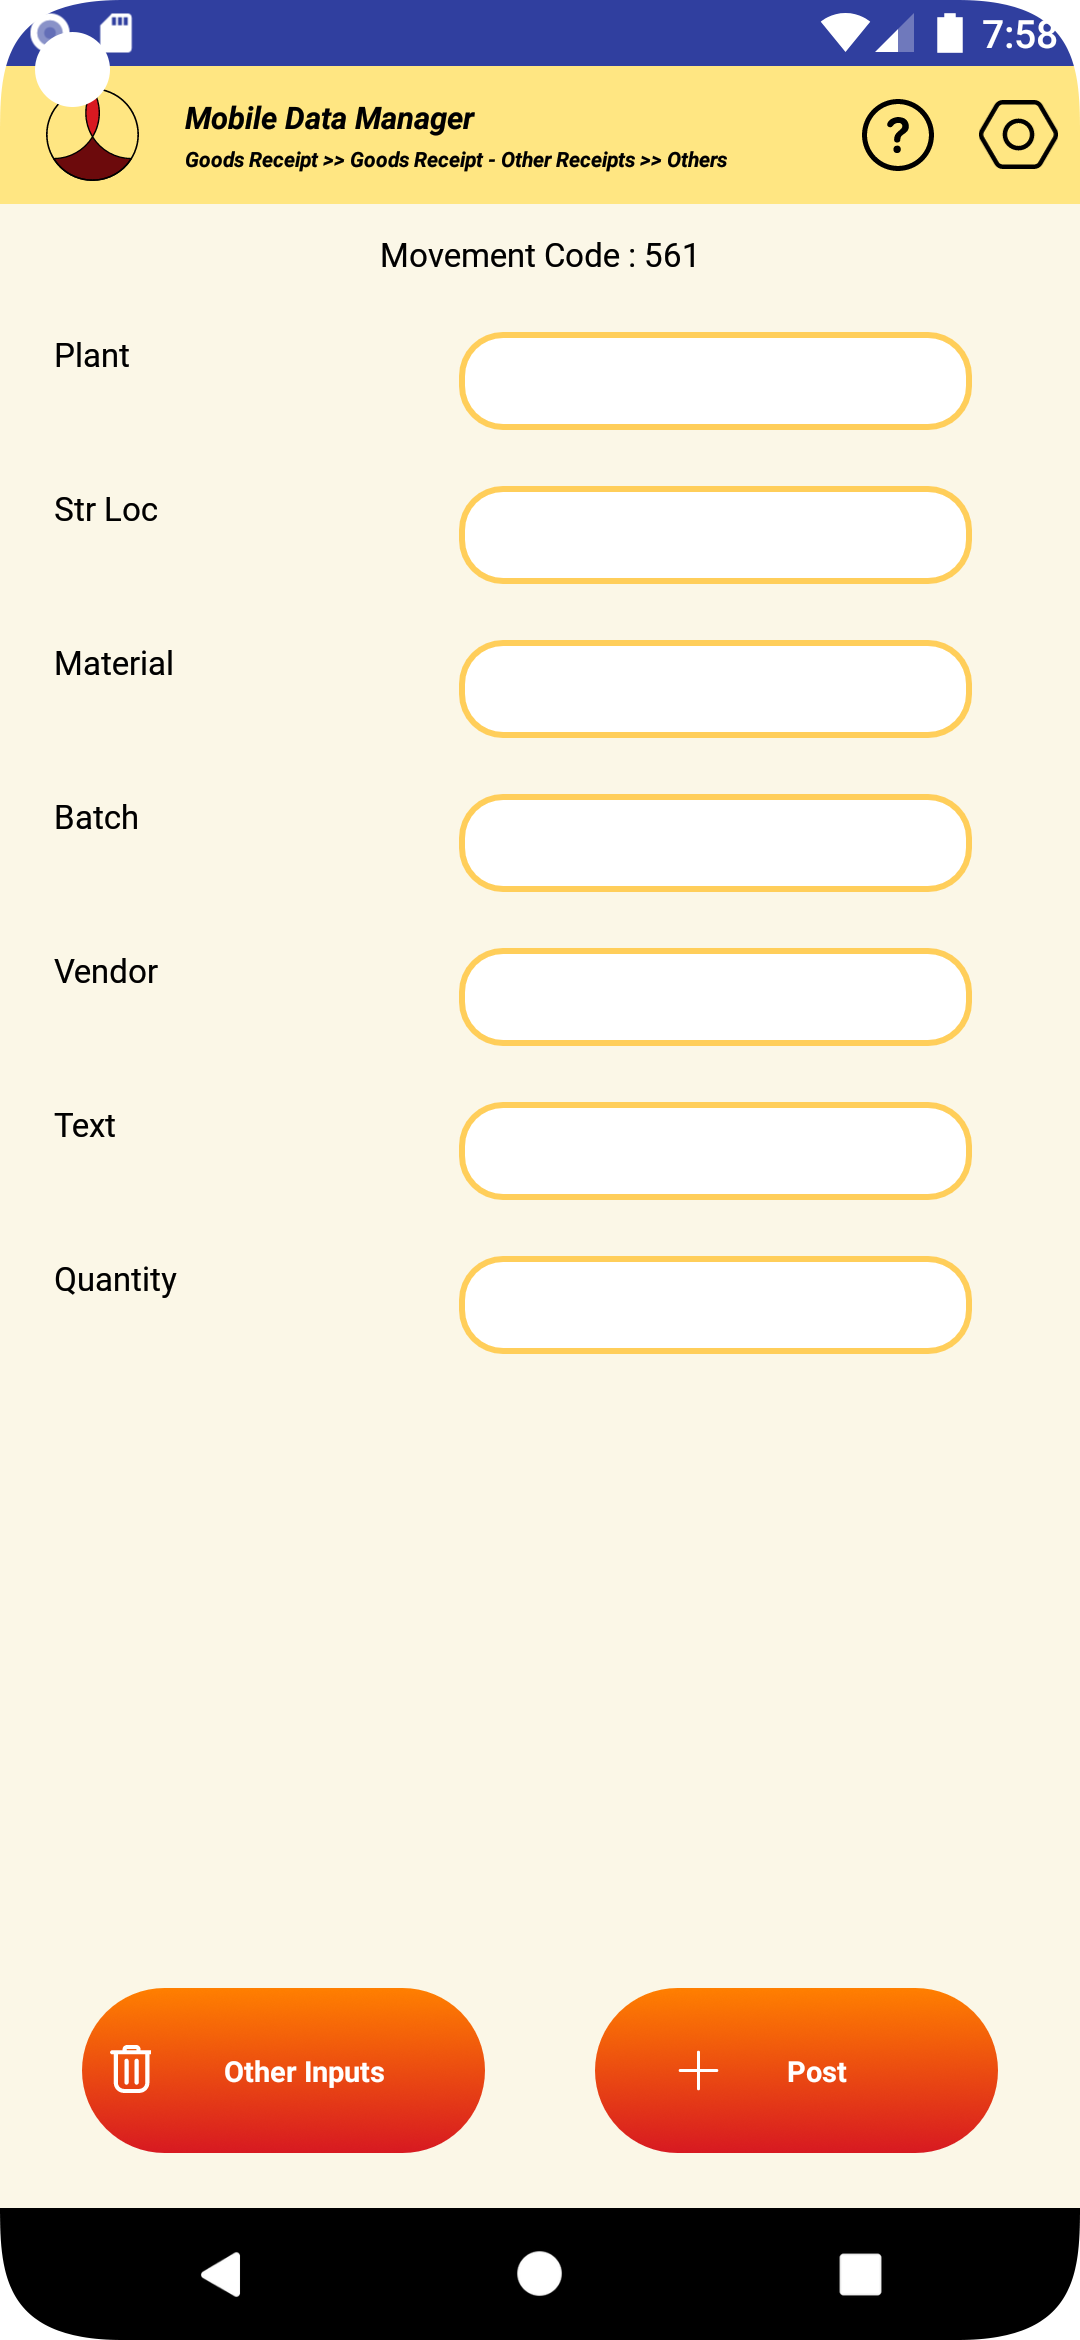
4.7.6 Complete the inputs and click on the post button to perform the transaction as shown in the image below.
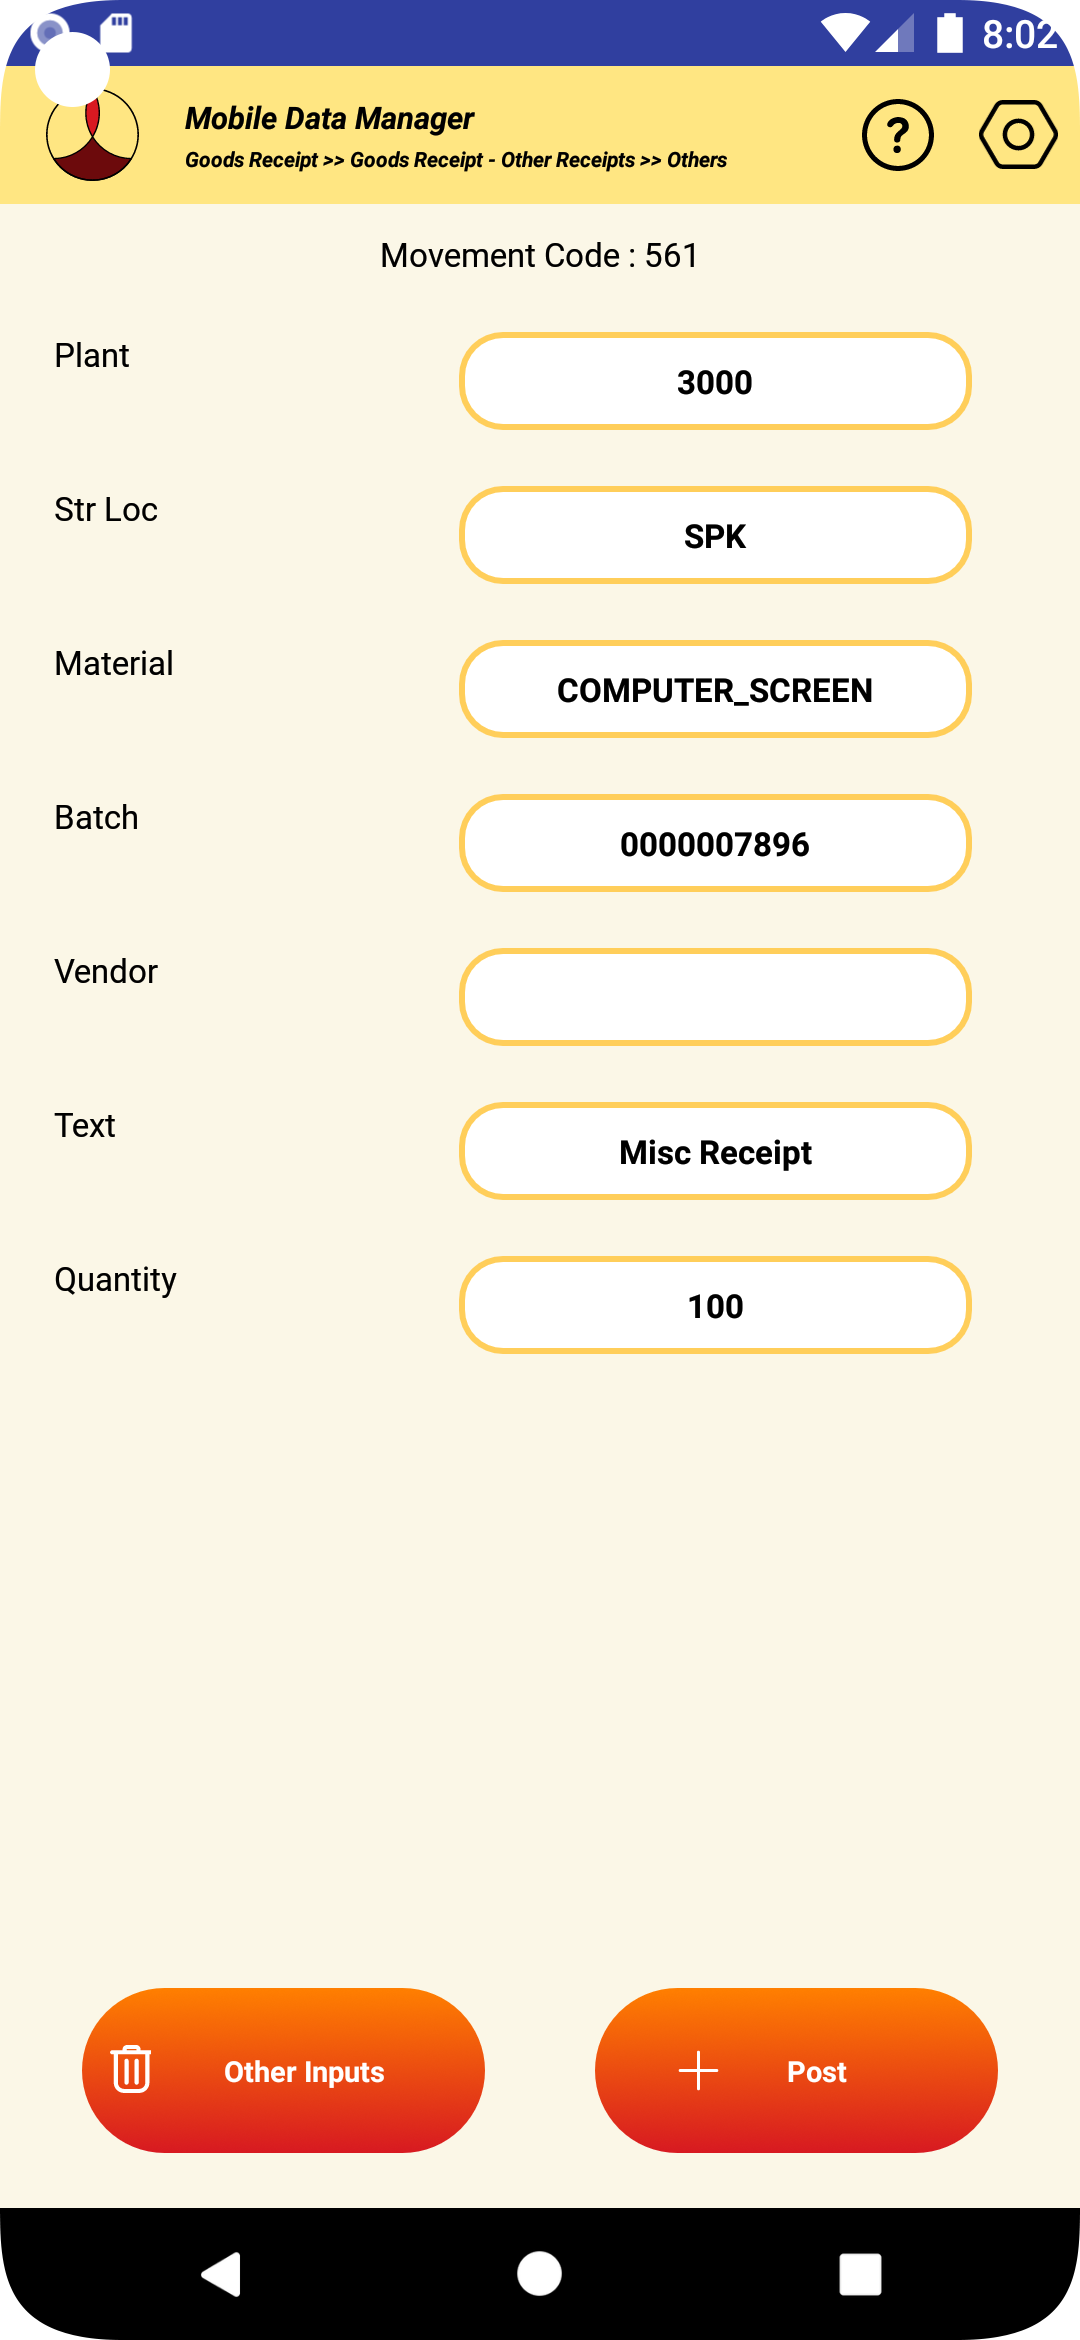
4.7.7 If the transaction in SAP is successful, the material document number that is created will be displayed.
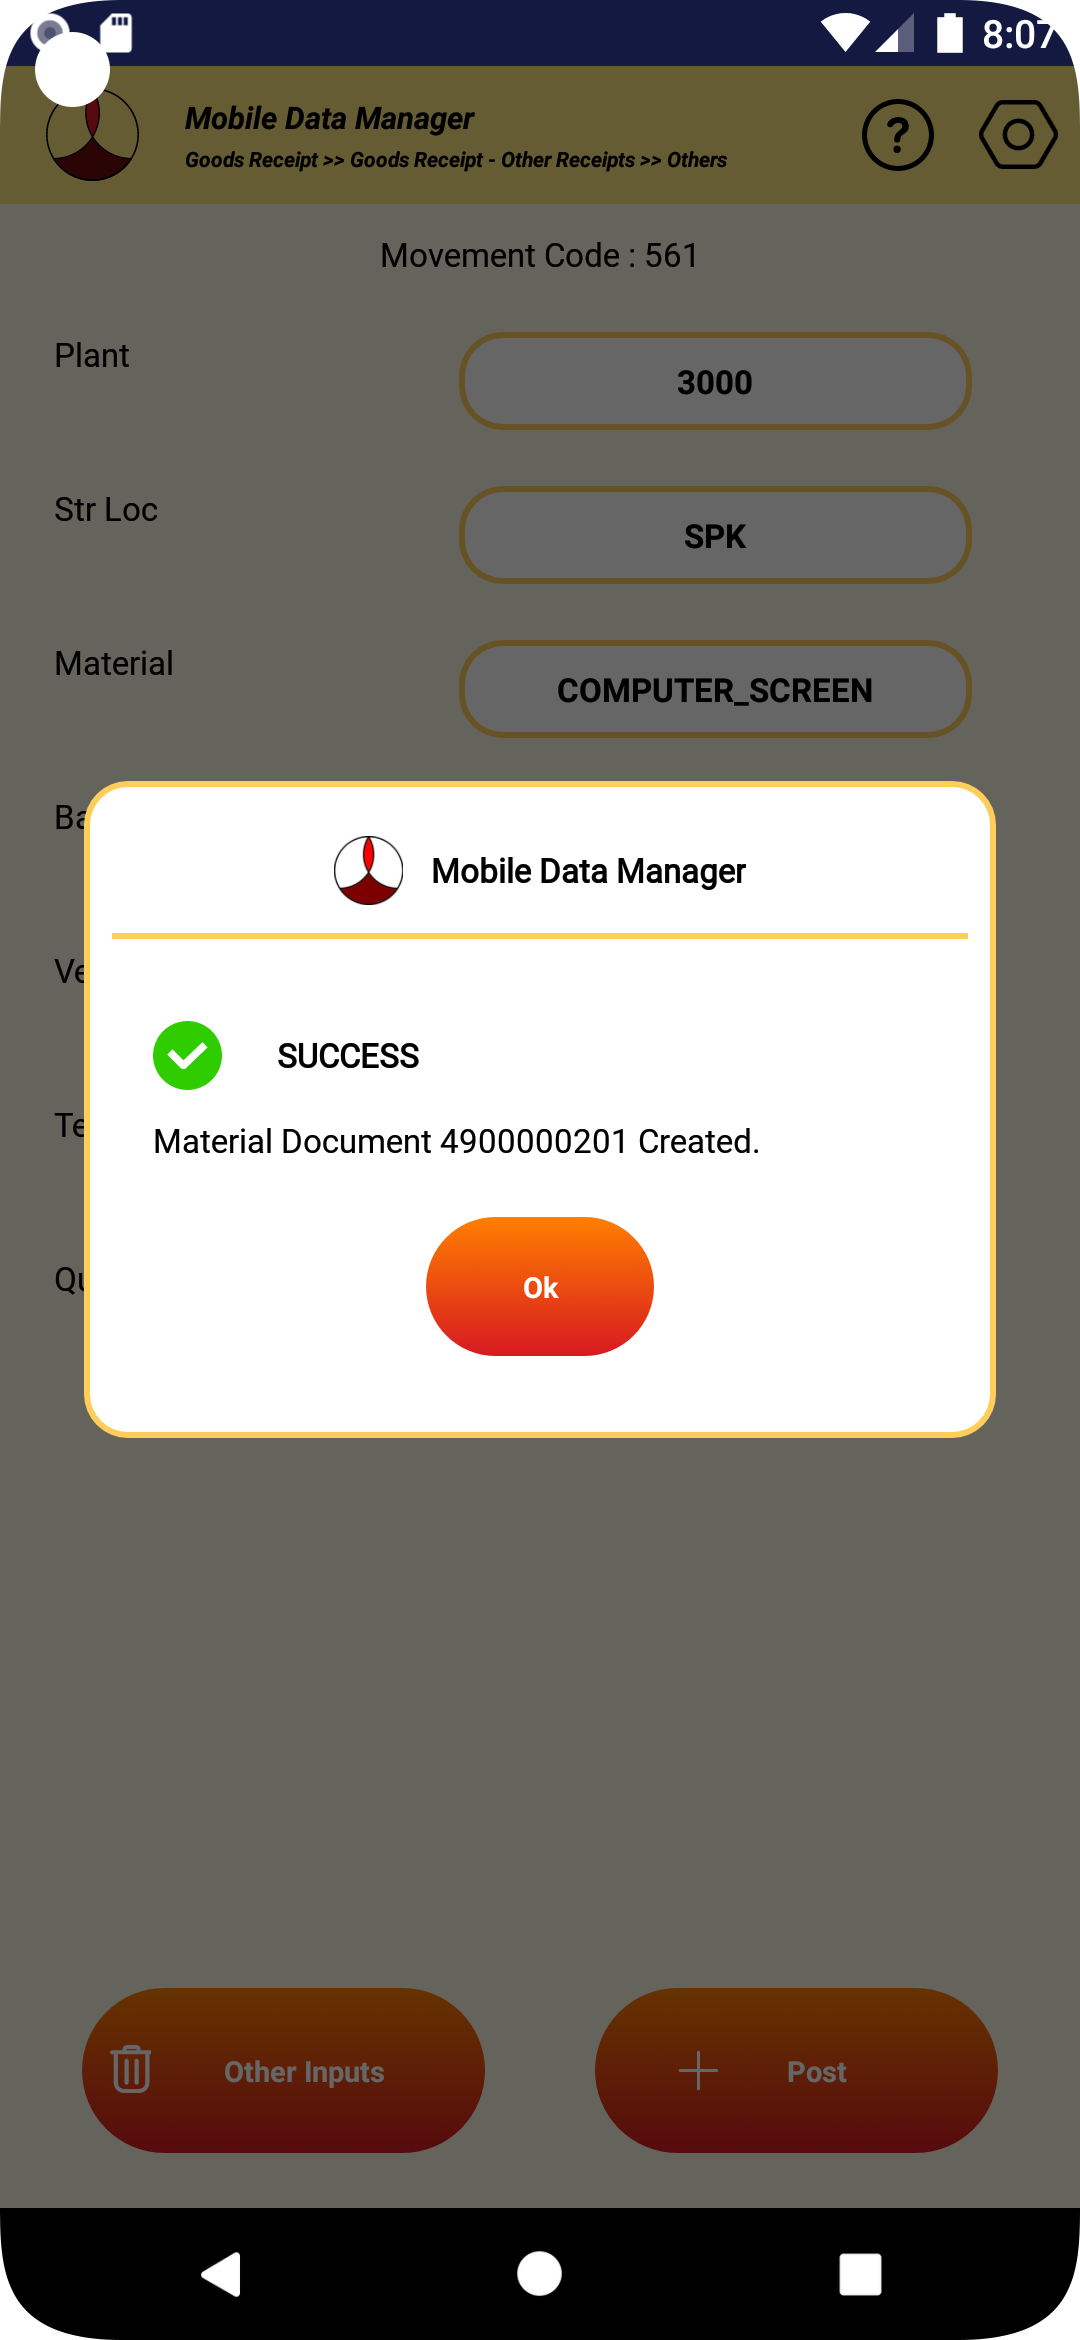
4.7.8 If the transaction fails for some reason, the appropriate error message will be displayed.
4.7.9 If the label printing is configured for the transaction, the label will be printed.
4.7.10 After the transaction the data in the receiving screen will be cleared.
4.7.11 If no further receipts are planned, pressing the back button will take back to the main activity screen.
5. GOODS ISSUE
5.1 ORDERS
5.1.1 RESERVED WITHOUT INVENTORY SELECTION
5.1.1.1 In the goods issue from reservation without inventory selection, the user can issue multiple items in one single material document.
5.1.1.2 The material being issued has to match the values in the work order reservation. For example, the parameters such as batch number, plant, storage location, warehouse, etc., has to match the exact value specified in the reservation.
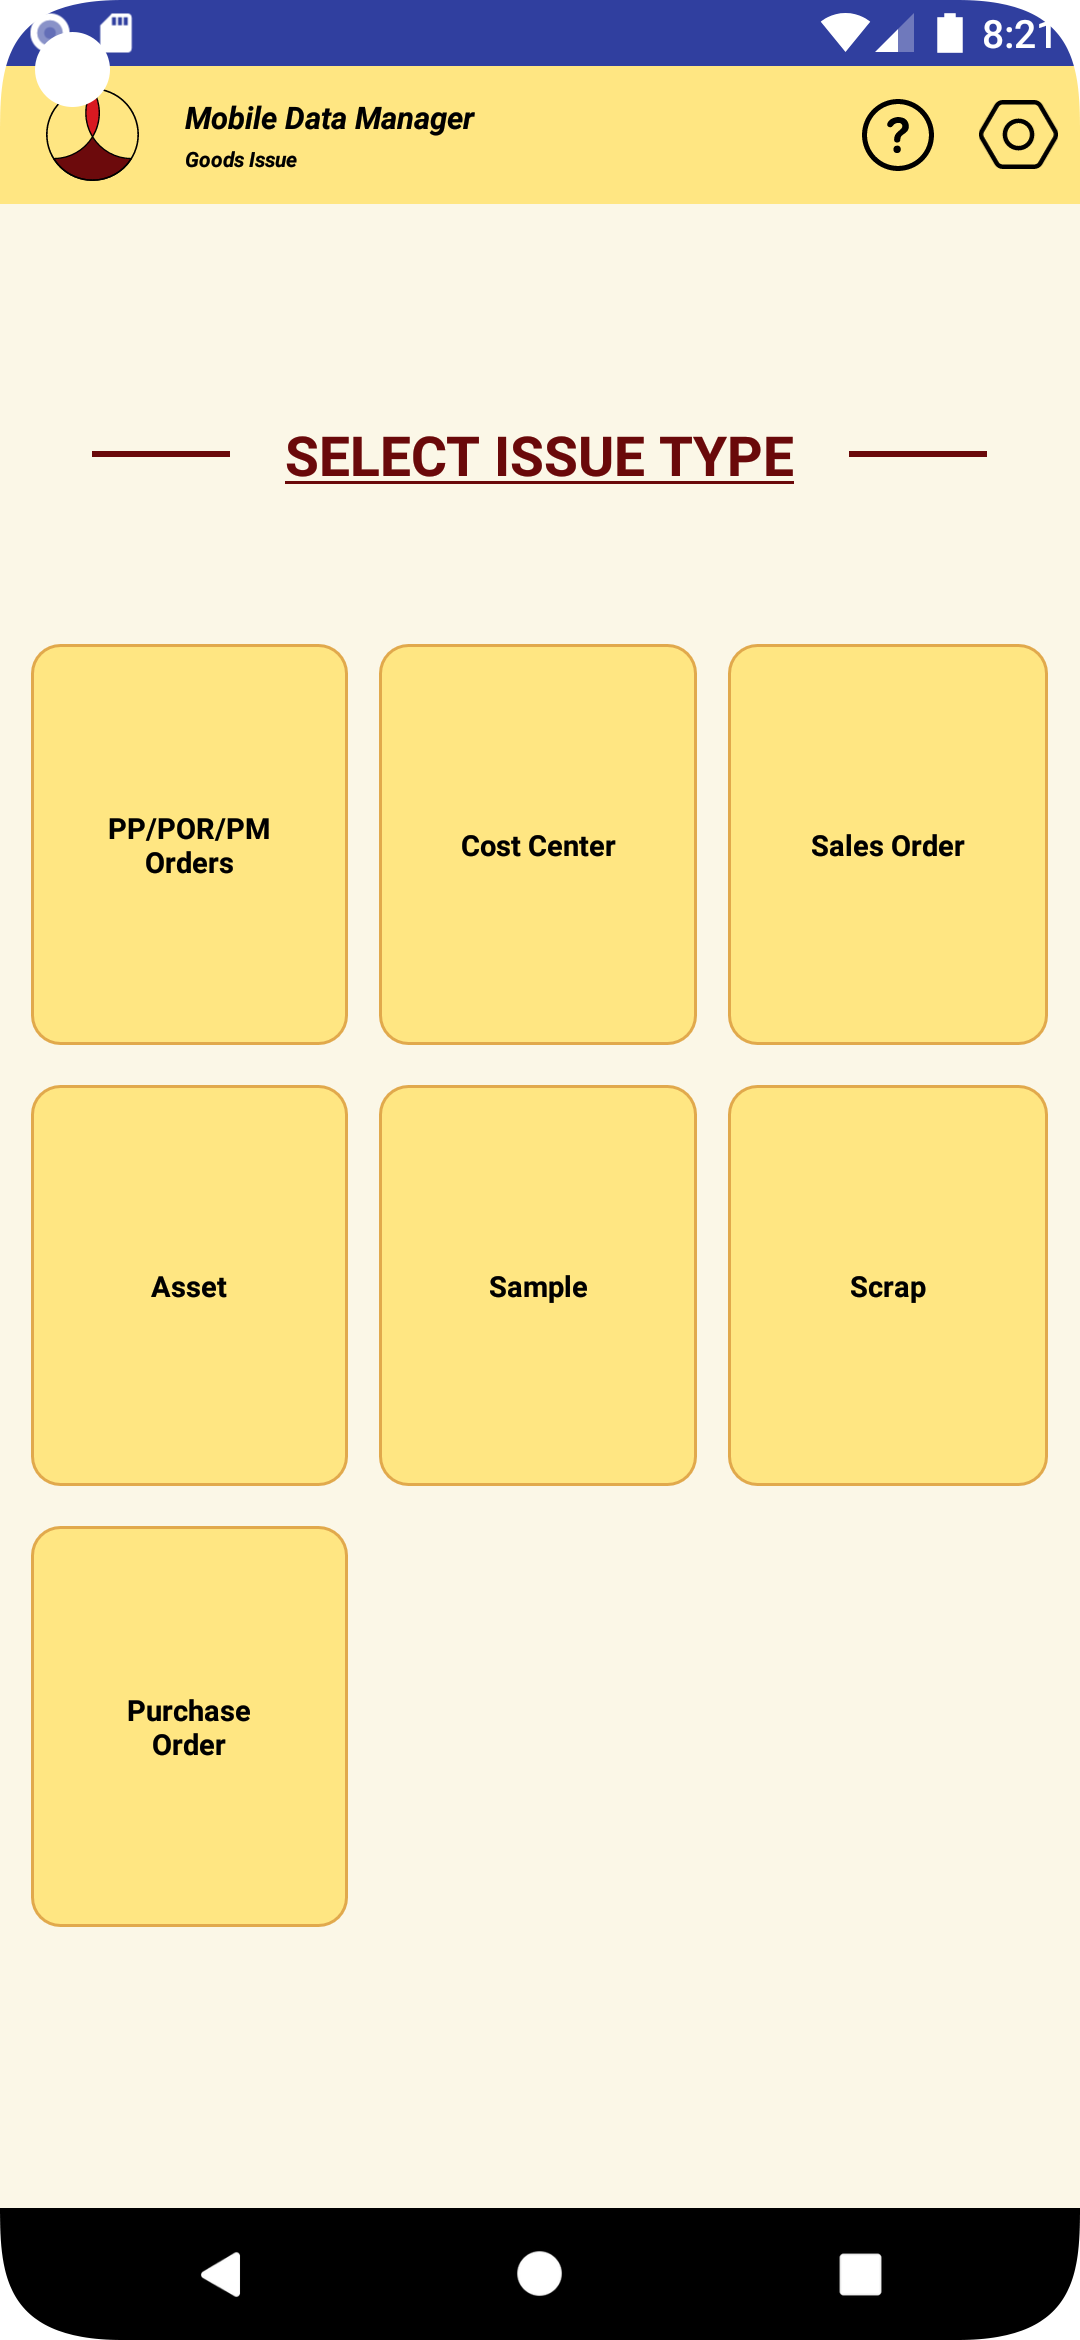
5.1.1.3 To perform the transaction from the main screen select “Goods Issue”

5.1.1.4 Select “PP/POR/PM Orders” from the issue type screen.

5.1.1.5 Select reserved without inventory selection

5.1.1.6 The goods issue screen as shown below will be displayed.

5.1.1.7 Enter the work order number and press enter. The work order if it exists in SAP, it will be downloaded. Header information such as material being produced in the order, revision number, due date, etc., will be displayed in the header as shown in the image below.

5.1.1.8 To issue the materials present in the order reservation, select the “Materials” tab header in the screen.

5.1.1.9 The materials in the reservation will be displayed as shown in the picture above.
5.1.1.10 To issue the material, enter the input value of quantity to issue, batch (if batch managed material) and whether the issue is final or not.
5.1.1.11 The expected value for the material will also be displayed for each item in the reservation.

5.1.1.12 After the values are entered, click on the “Issue” button.
5.1.1.13 If the transaction in SAP is successful, the material document number that is created will be displayed.

5.1.1.14 If the transaction fails for some reason, the appropriate error message will be displayed.
5.1.1.15 If the label printing is configured for the transaction, the label will be printed.
5.1.1.16 After the transaction the data in the screen will be cleared.
5.1.1.17 If no further issues are planned, pressing the back button will take back to the previous screen.
5.1.2 RESERVED WITH INVENTORY SELECTION
5.1.2.1 In the goods issue from reservation with inventory selection, the user can issue one material at a time.
5.1.2.2 The material being issued has to match the values in the work order reservation. For example, the parameters such as batch number, plant, storage location, warehouse, etc., has to match the exact value specified in the reservation.
5.1.2.3 To perform the transaction from the main screen select “Goods Issue”

5.1.2.4 Select “PP/POR/PM Orders” from the issue type screen.

5.1.2.5 Select reserved with inventory selection.

5.1.2.6 The goods issue screen as shown below will be displayed.

5.1.2.7 Enter the work order number and press enter. The work order if it exists in SAP, it will be downloaded. Header information such as material being produced in the order, revision number, due date, etc., will be displayed in the header as shown in the image below.

5.1.2.8 To view the list of materials to be issued in the work order per the list in the order reservation select “Material” tab header in the screen. Information such as material, description, plant, storage location, warehouse, etc., will be displayed.

5.1.2.9 To issue the material, select the line item against which the issue needs to be made.

5.1.2.10 The line item selected will be highlighted as shown in the picture above.
5.1.2.11 Select the “Inventory” tab header in the screen to see the list of inventories available for the material matching to the details specified in the order reservation.

5.1.2.12 Select the inventory line that is to be issued. The selected inventory line will be highlighted as shown in the picture below.

5.1.2.13 To issue the line item, select the “issue” tab header in the screen.

5.1.2.14 Details of the inventory line item selected will be displayed in the top of the screen.
5.1.2.15 On the bottom of the screen, the mandatory inputs that are needed to make the receipt will be displayed. The type of mandatory inputs needed will be set in SAP by the system administrator.
5.1.2.16 The optional other inputs needed when making the receipt can be entered by clicking the “Other Inputs” button.
5.1.2.17 The type of optional inputs that can be entered will be set in SAP by the SAP administrator.
5.1.2.18 Enter the mandatory inputs required for each field.

5.1.2.19 Once the values of mandatory and optional inputs are entered, click on the “Issue” button.
5.1.2.20 If any of the fields entered doesn’t match with the values of the line selected or any mandatory inputs were missing, the appropriate error message will be displayed.
5.1.2.21 If the transaction in SAP is successful, the material document number that is created will be displayed.

5.1.2.22 If the transaction fails for some reason, the appropriate error message will be displayed.
5.1.2.23 If the label printing is configured for the transaction, the label will be printed.
5.1.2.24 After the transaction the data in the screen will be cleared and the material list items will be refreshed.
5.1.2.25 If no further issues are planned, pressing the back button will take back to the order issue type screen
5.1.3 UN-RESERVED
5.1.3.1 In this screen, materials that are not present in the reservation can be issued to the work order.
5.1.3.2 To perform the transaction from the main screen select “Goods Issue”

5.1.3.3 Select “PP/POR/PM Orders” from the issue type screen.

5.1.3.4 Select “Un-reserved” from the issue type screen.

5.1.3.5 The goods issue screen as shown below will be displayed.

5.1.3.6 Enter the parameters of the material to be issued to the order. An example is shown below,

5.1.3.7 The optional other inputs needed when making the receipt can be entered by clicking the “Other Inputs” button.
5.1.3.8 After the values are entered, click on the “Issue” button.
5.1.3.9 If the transaction in SAP is successful, the material document number that is created will be displayed.

5.1.3.10 If the transaction fails for some reason, the appropriate error message will be displayed.
5.1.3.11 If the label printing is configured for the transaction, the label will be printed.
5.1.3.12 After the transaction the data in the screen will be cleared.
5.1.3.13 If no further issues are planned, pressing the back button will take back to the order issue type screen.
5.2 COST CENTER
5.2.1.1 In this screen, material can be issued to an cost center.
5.2.1.2 To perform the transaction from the main screen select “Goods Issue”

5.2.1.3 Select “Cost Center” from the issue type screen.

5.2.1.4 The goods issue screen as shown below will be displayed.

5.2.1.5 Enter the parameters of the material to be issued to the order. An example is shown below,

5.2.1.6 The optional other inputs needed when making the receipt can be entered by clicking the “Other Inputs” button.
5.2.1.7 After the values are entered, click on the “Issue” button.
5.2.1.8 If the transaction in SAP is successful, the material document number that is created will be displayed.

5.2.1.9 If the transaction fails for some reason, the appropriate error message will be displayed.
5.2.1.10 If the label printing is configured for the transaction, the label will be printed.
5.2.1.11 After the transaction the data in the screen will be cleared.
5.2.1.12 If no further issues are planned, pressing the back button will take back to the issue type screen.
5.3 SALES ORDER
5.3.1 In this screen, material can be issued to an sales order.
5.3.2 To perform the transaction from the main screen select “Goods Issue”
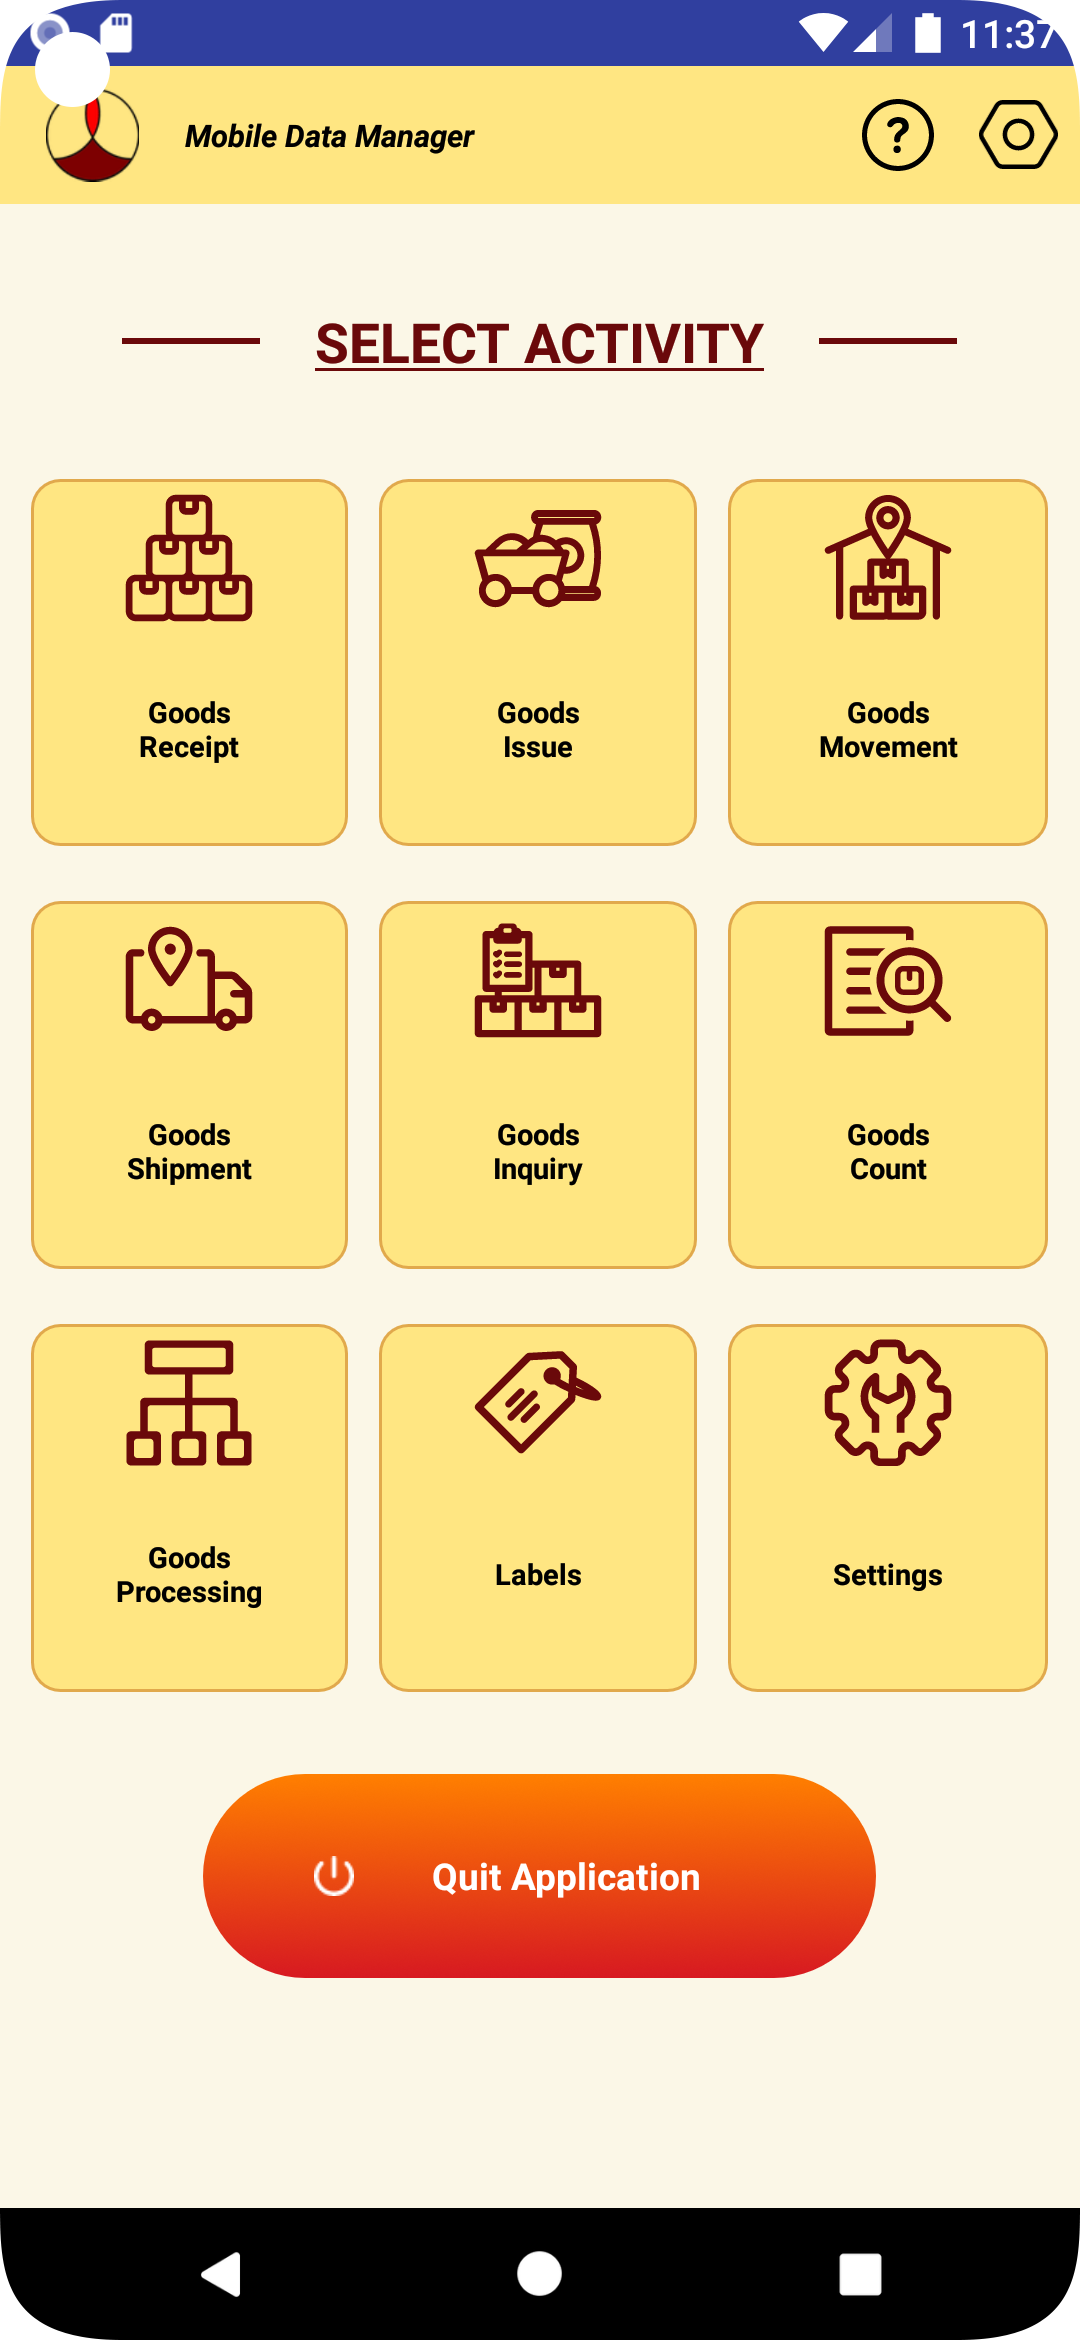
5.3.3 Select “Sales Orders” from the issue type screen.

5.3.4 The goods issue screen as shown below will be displayed.
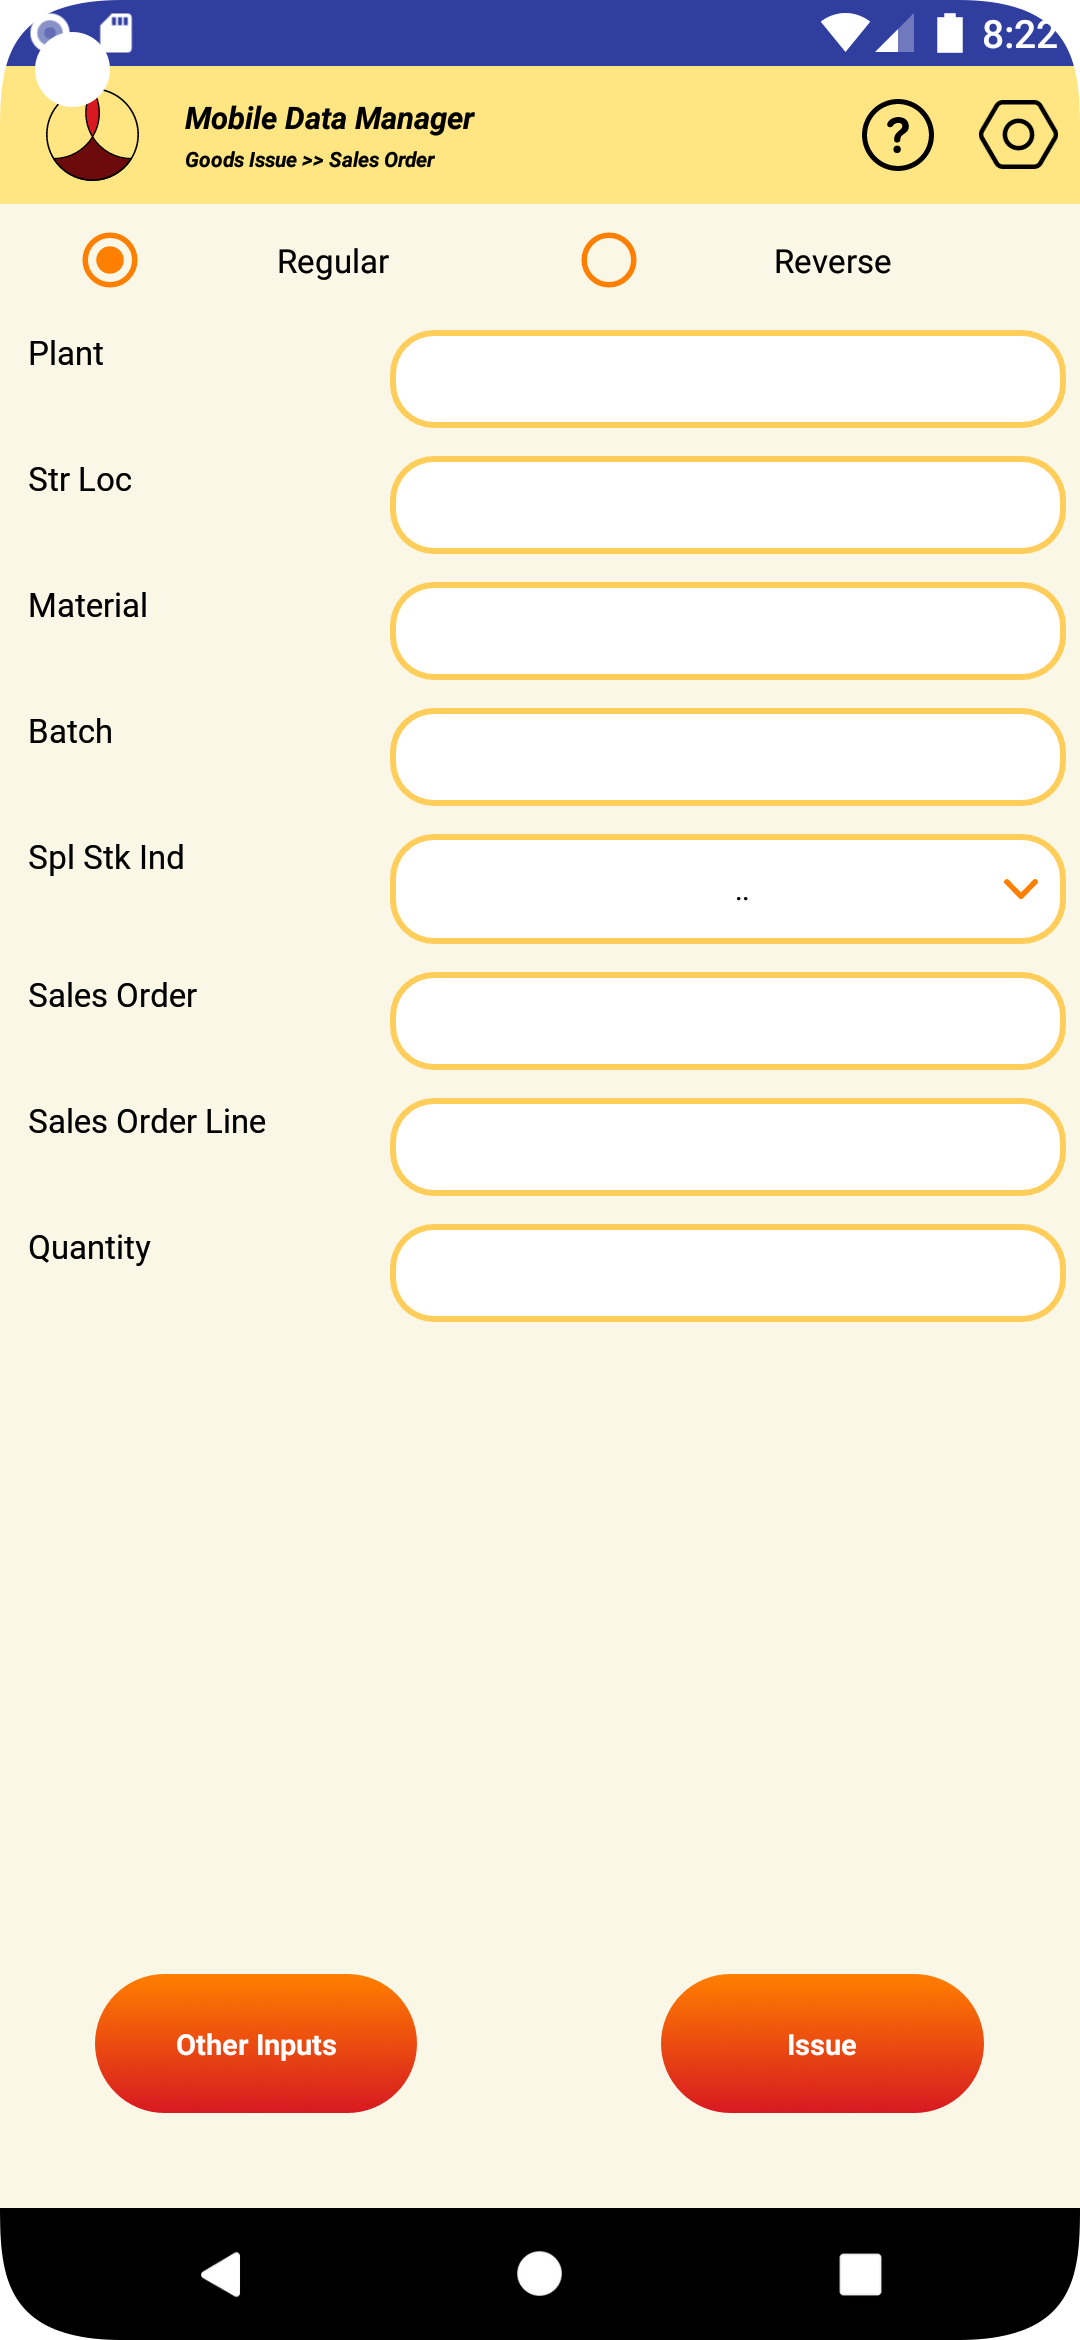
5.3.5 Enter the parameters of the material to be issued to the order. An example is shown below,
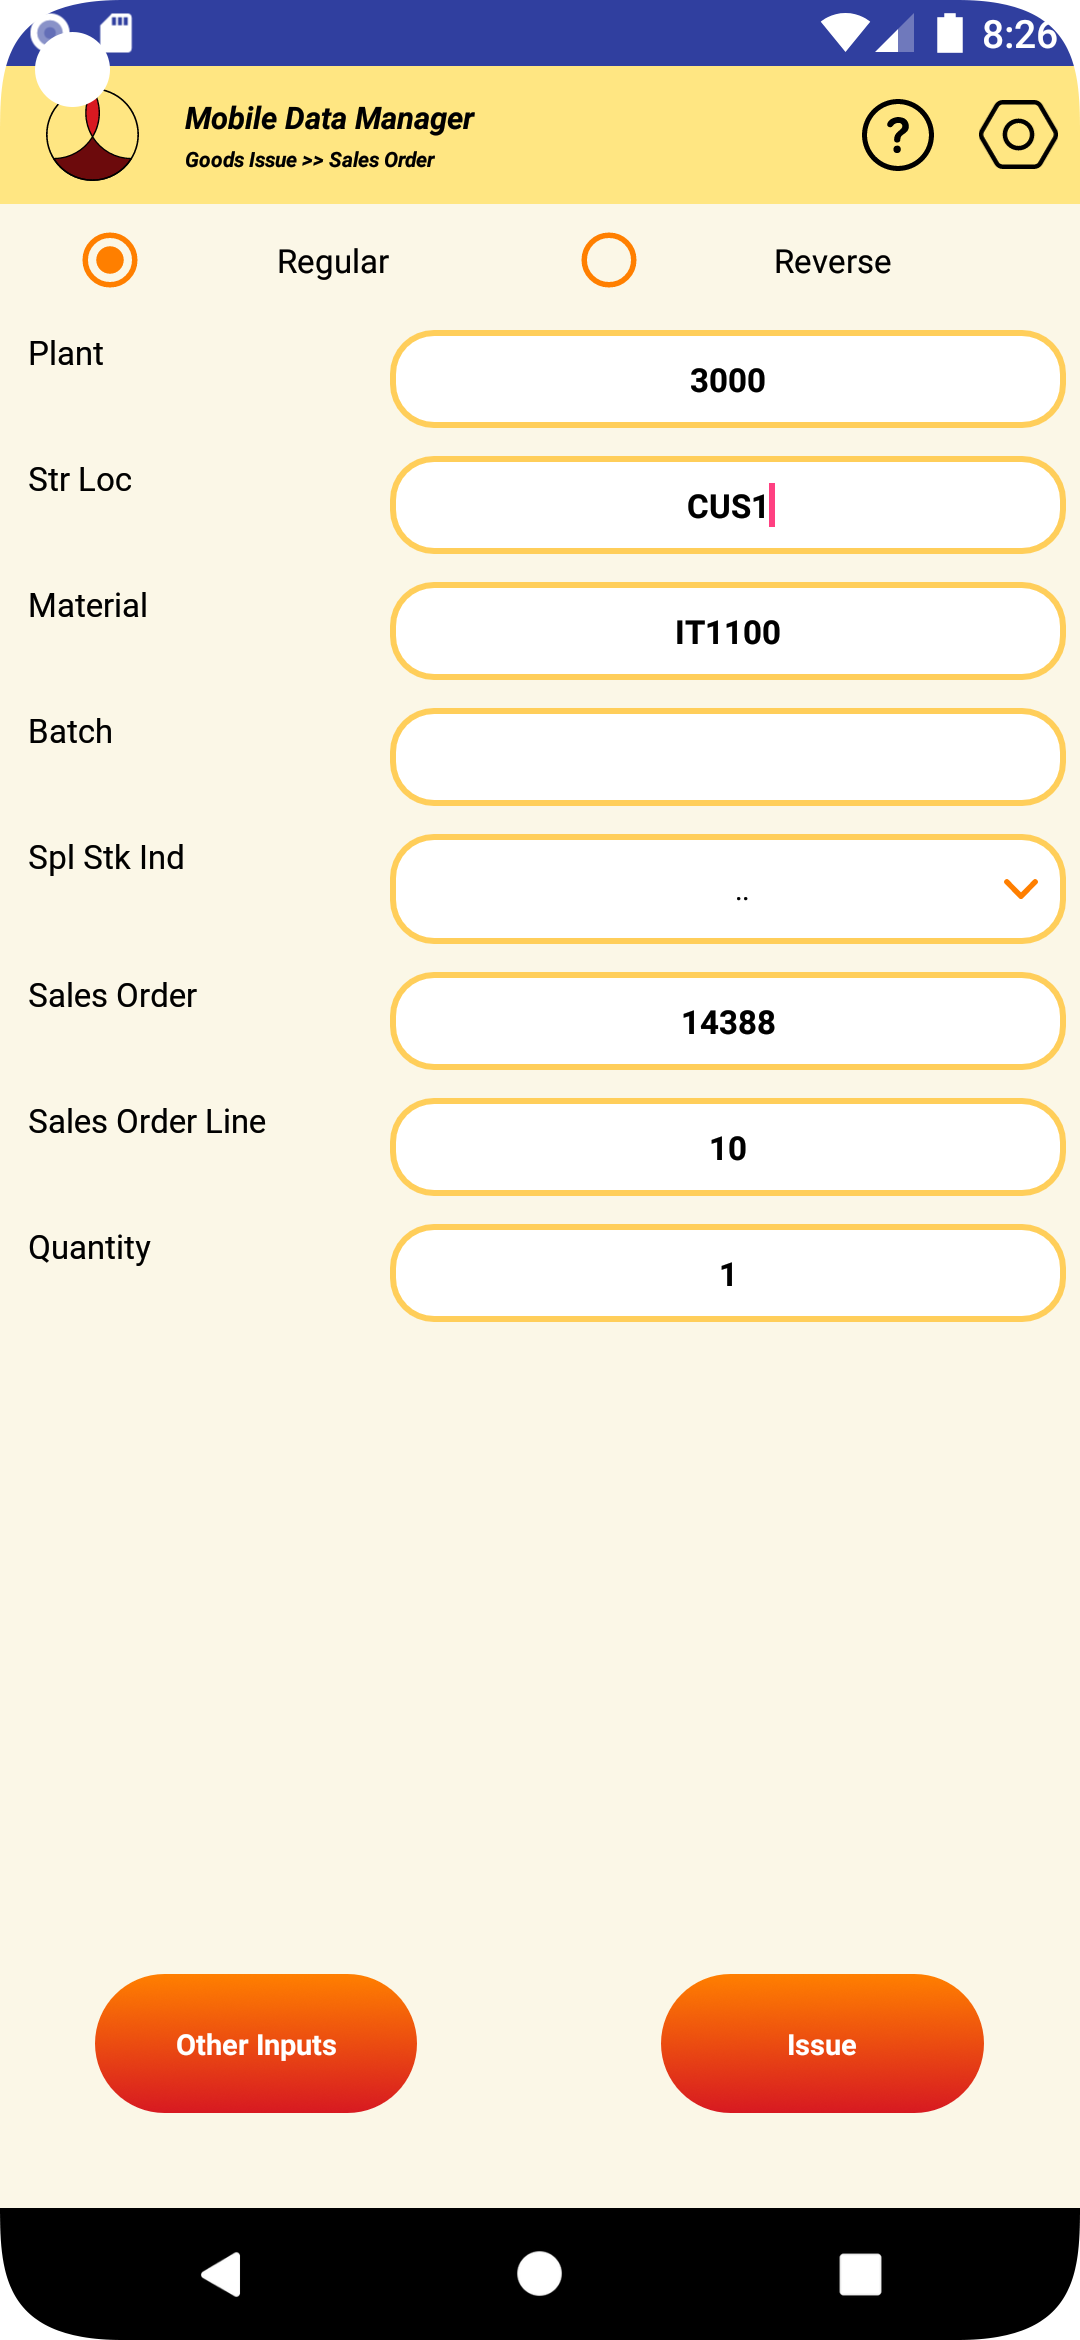
5.3.6 The optional other inputs needed when making the receipt can be entered by clicking the “Other Inputs” button.
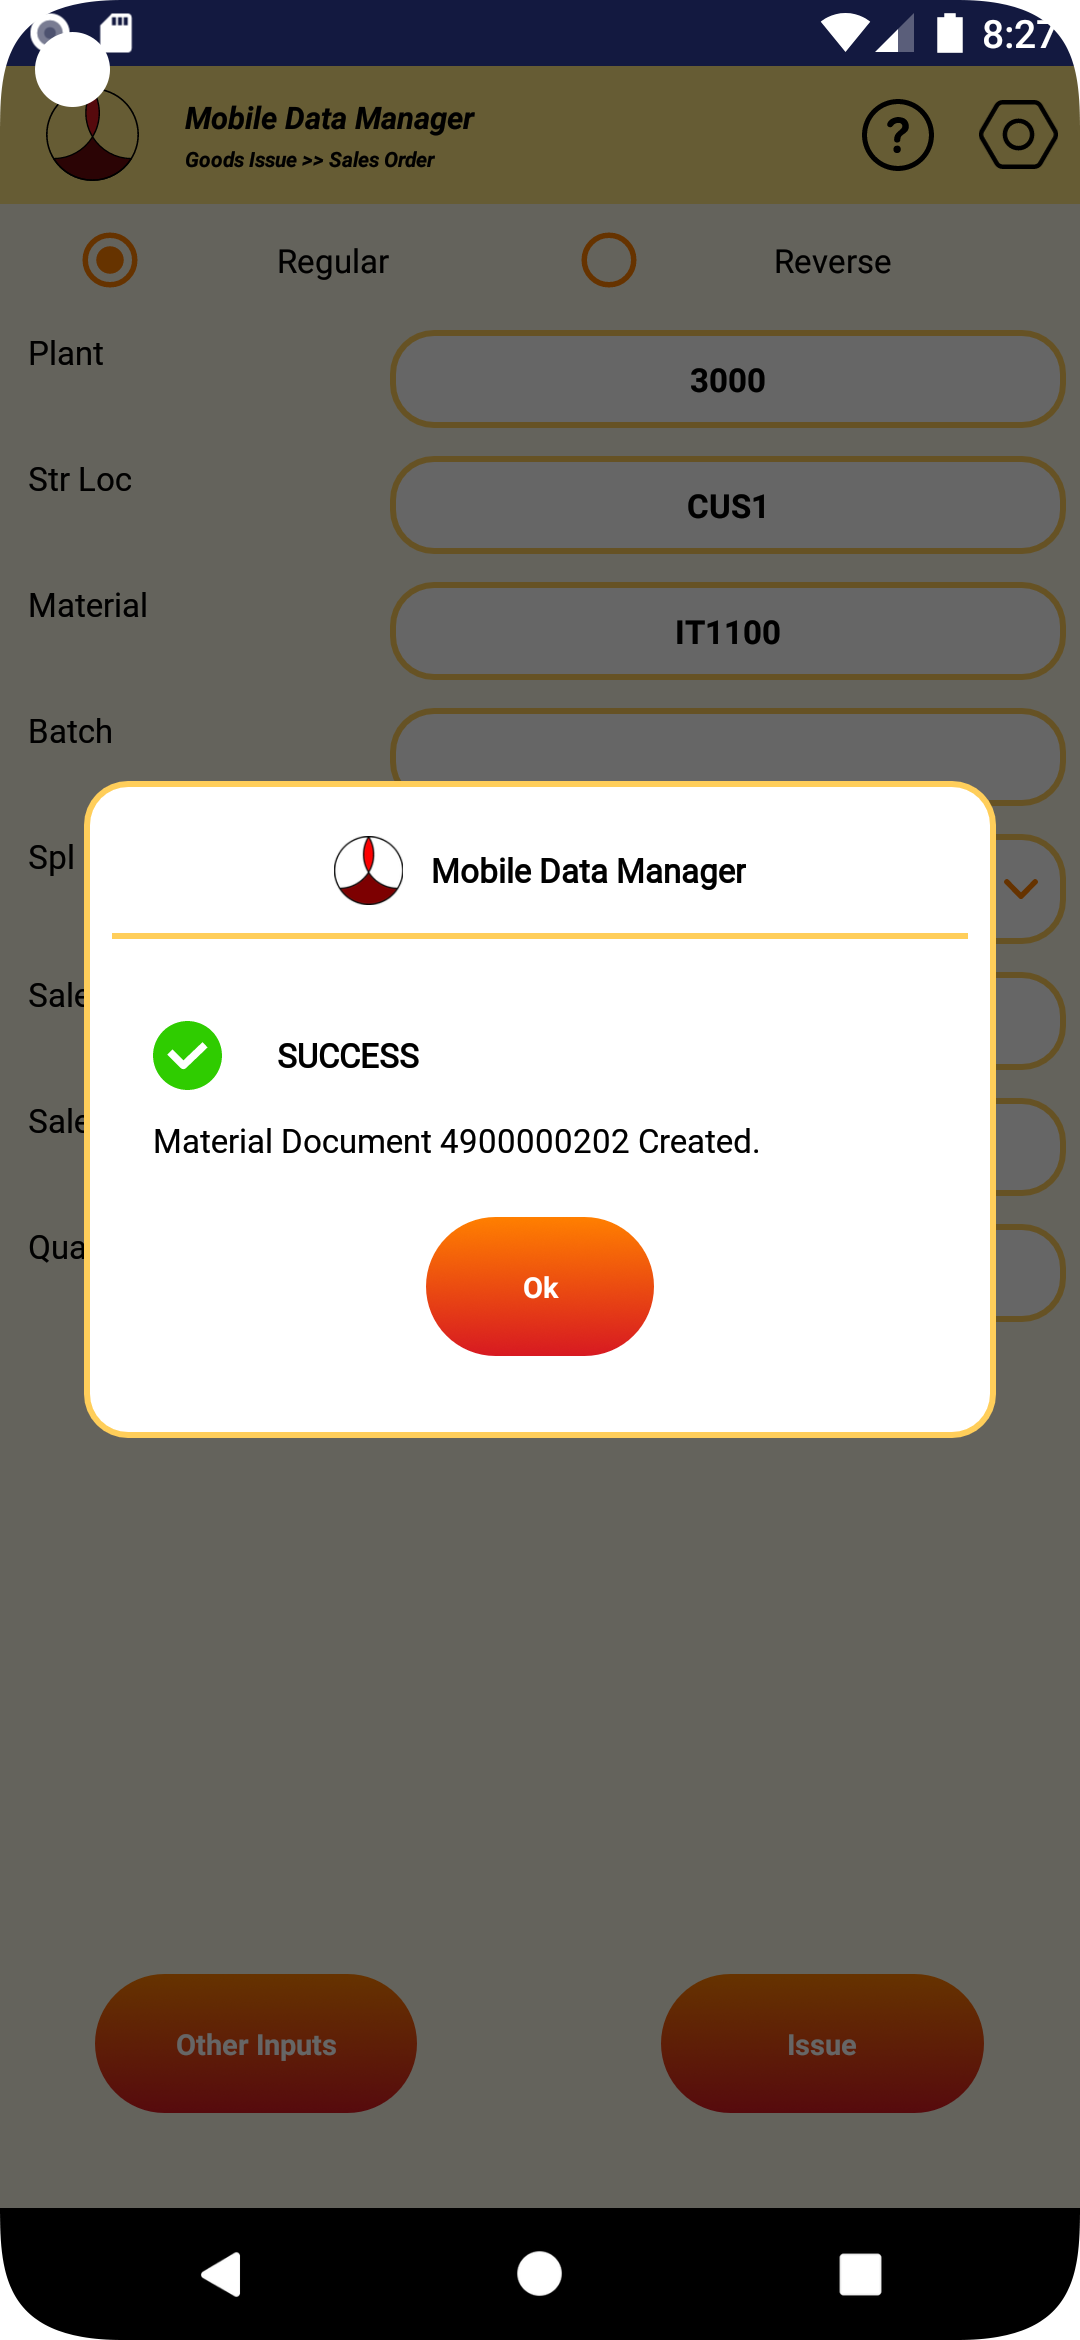
5.3.7 After the values are entered, click on the “Issue” button.
5.3.8 If the transaction in SAP is successful, the material document number that is created will be displayed.
5.3.9 If the transaction fails for some reason, the appropriate error message will be displayed.
5.3.10 If the label printing is configured for the transaction, the label will be printed.
5.3.11 After the transaction the data in the screen will be cleared.
5.3.12 If no further issues are planned, pressing the back button will take back to the issue type screen.
5.5 SAMPLE
5.5.1 In this screen, material can be issued to an sample.
5.5.2 To perform the transaction from the main screen select “Goods Issue”

5.5.3 Select “Sample” from the issue type screen.
5.5.4 The goods issue screen as shown below will be displayed.

5.5.5 Enter the parameters of the material to be issued to the order. An example is shown below,

5.5.6 The optional other inputs needed when making the receipt can be entered by clicking the “Other Inputs” button.
5.5.7 After the values are entered, click on the “Issue” button.
5.5.8 If the transaction in SAP is successful, the material document number that is created will be displayed.
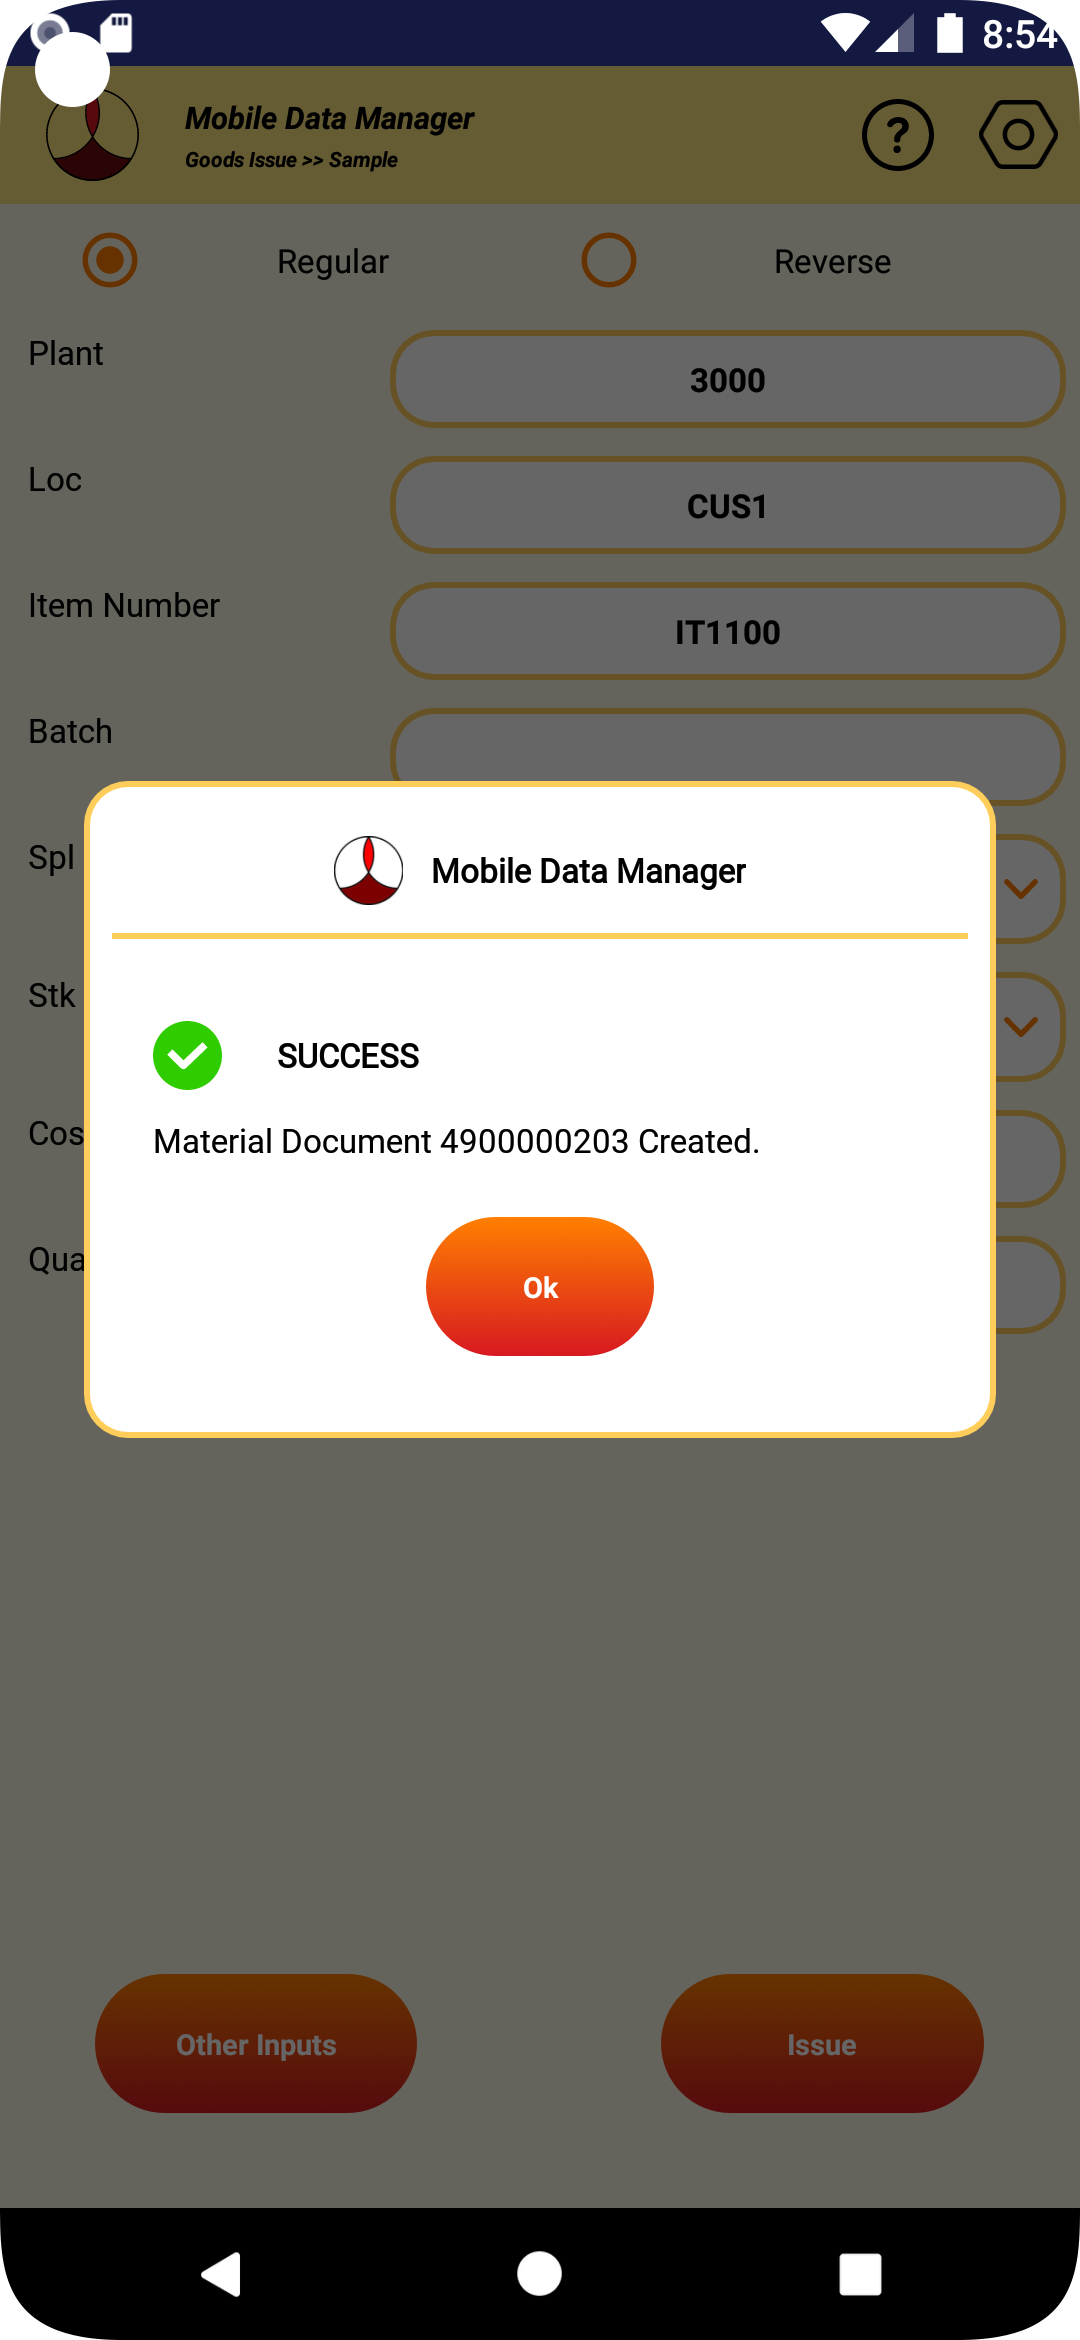
5.5.9 If the transaction fails for some reason, the appropriate error message will be displayed.
5.5.10 If the label printing is configured for the transaction, the label will be printed.
5.5.11 After the transaction the data in the screen will be cleared.
5.5.12 If no further issues are planned, pressing the back button will take back to the issue type screen.
5.6 SCRAP
5.6.1 In this screen, material can be issued to scrap.
5.6.2 To perform the transaction from the main screen select “Goods Issue”

5.6.3 Select “Scrap” from the issue type screen.

5.6.4 The goods issue screen as shown below will be displayed.
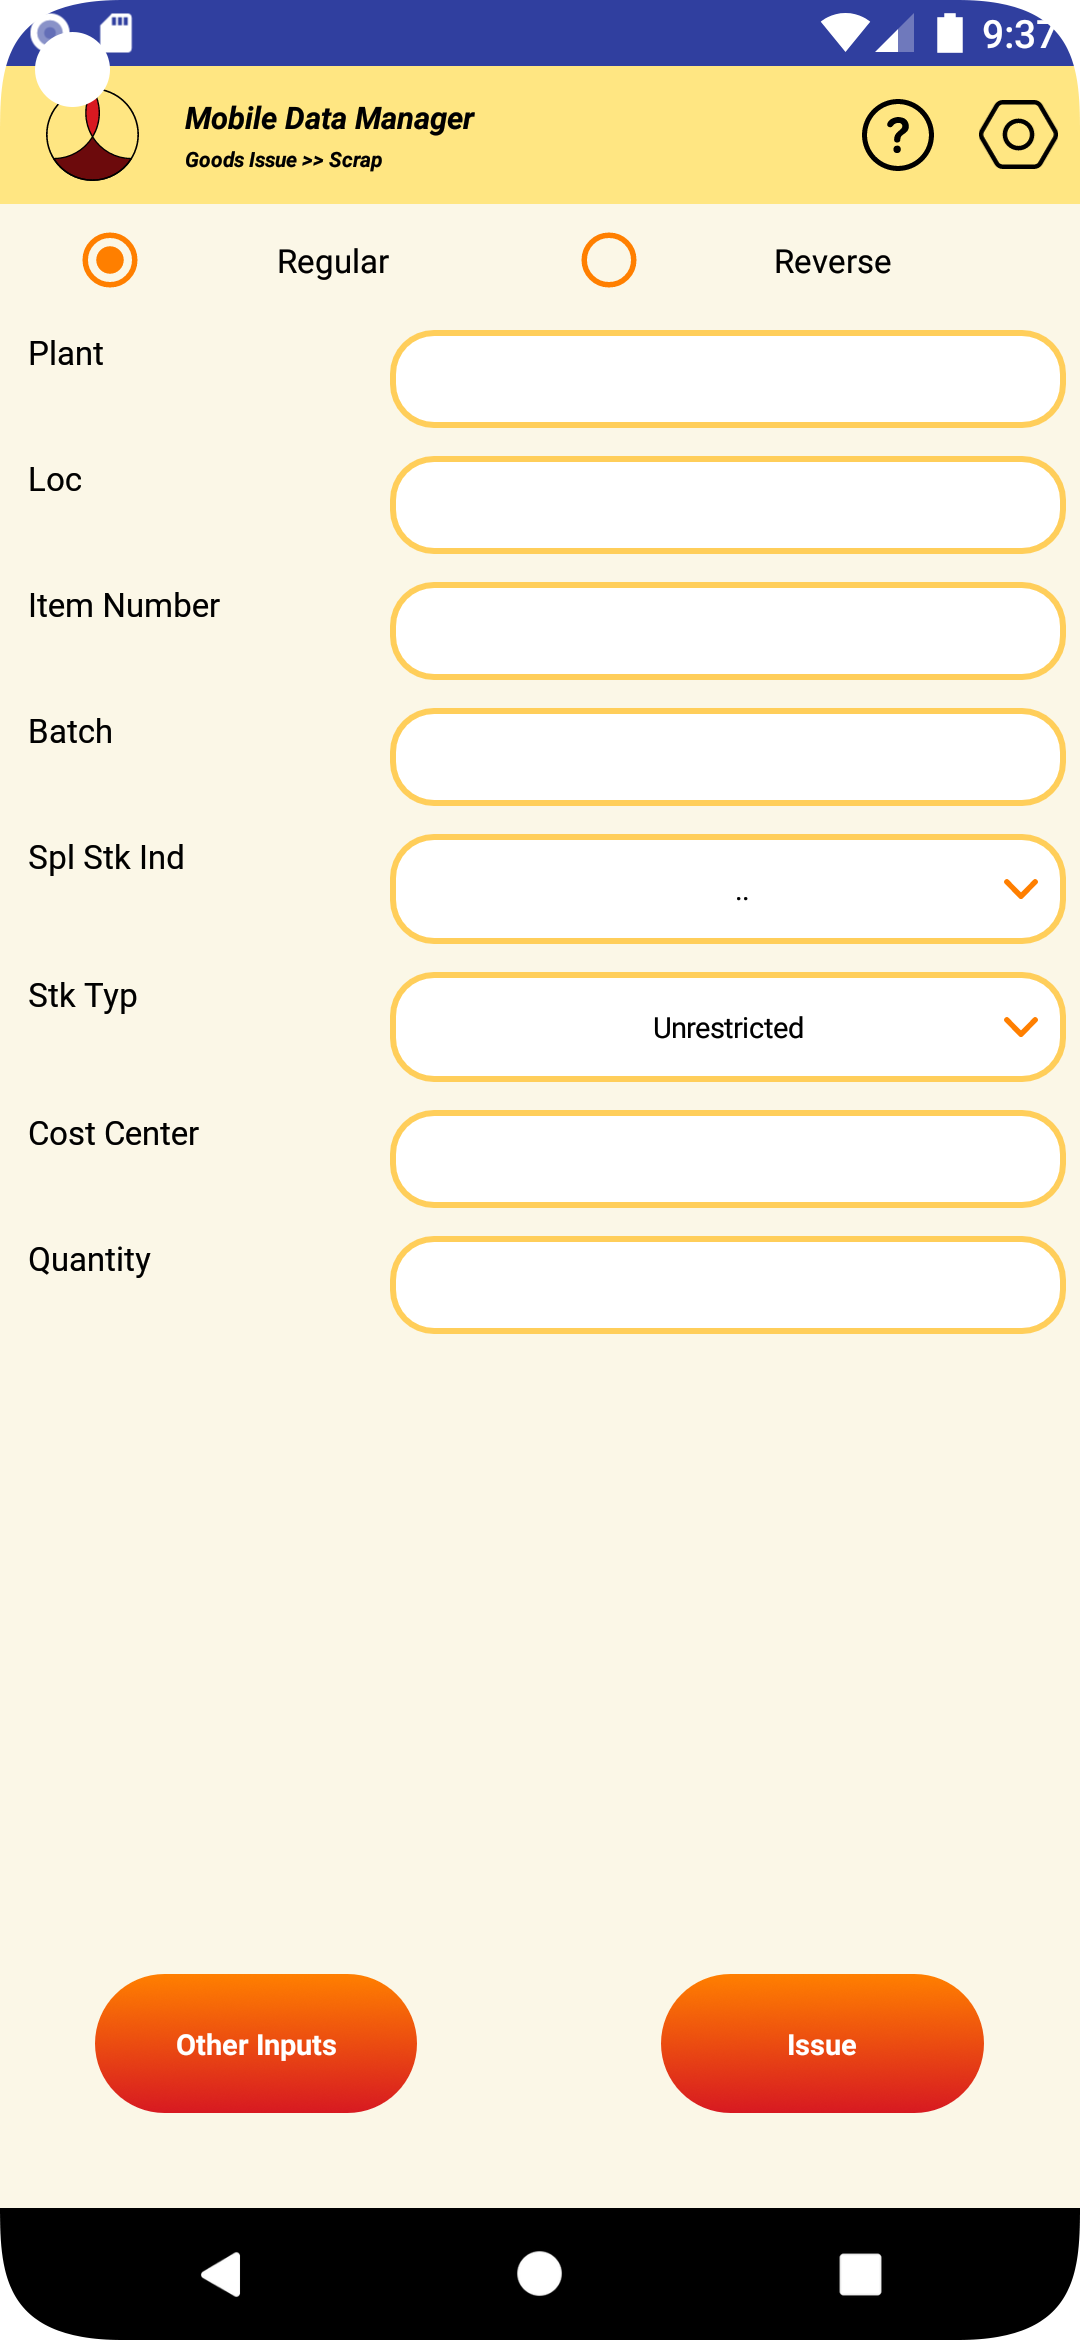
5.6.5 Enter the parameters of the material to be issued to the order. An example is shown below,
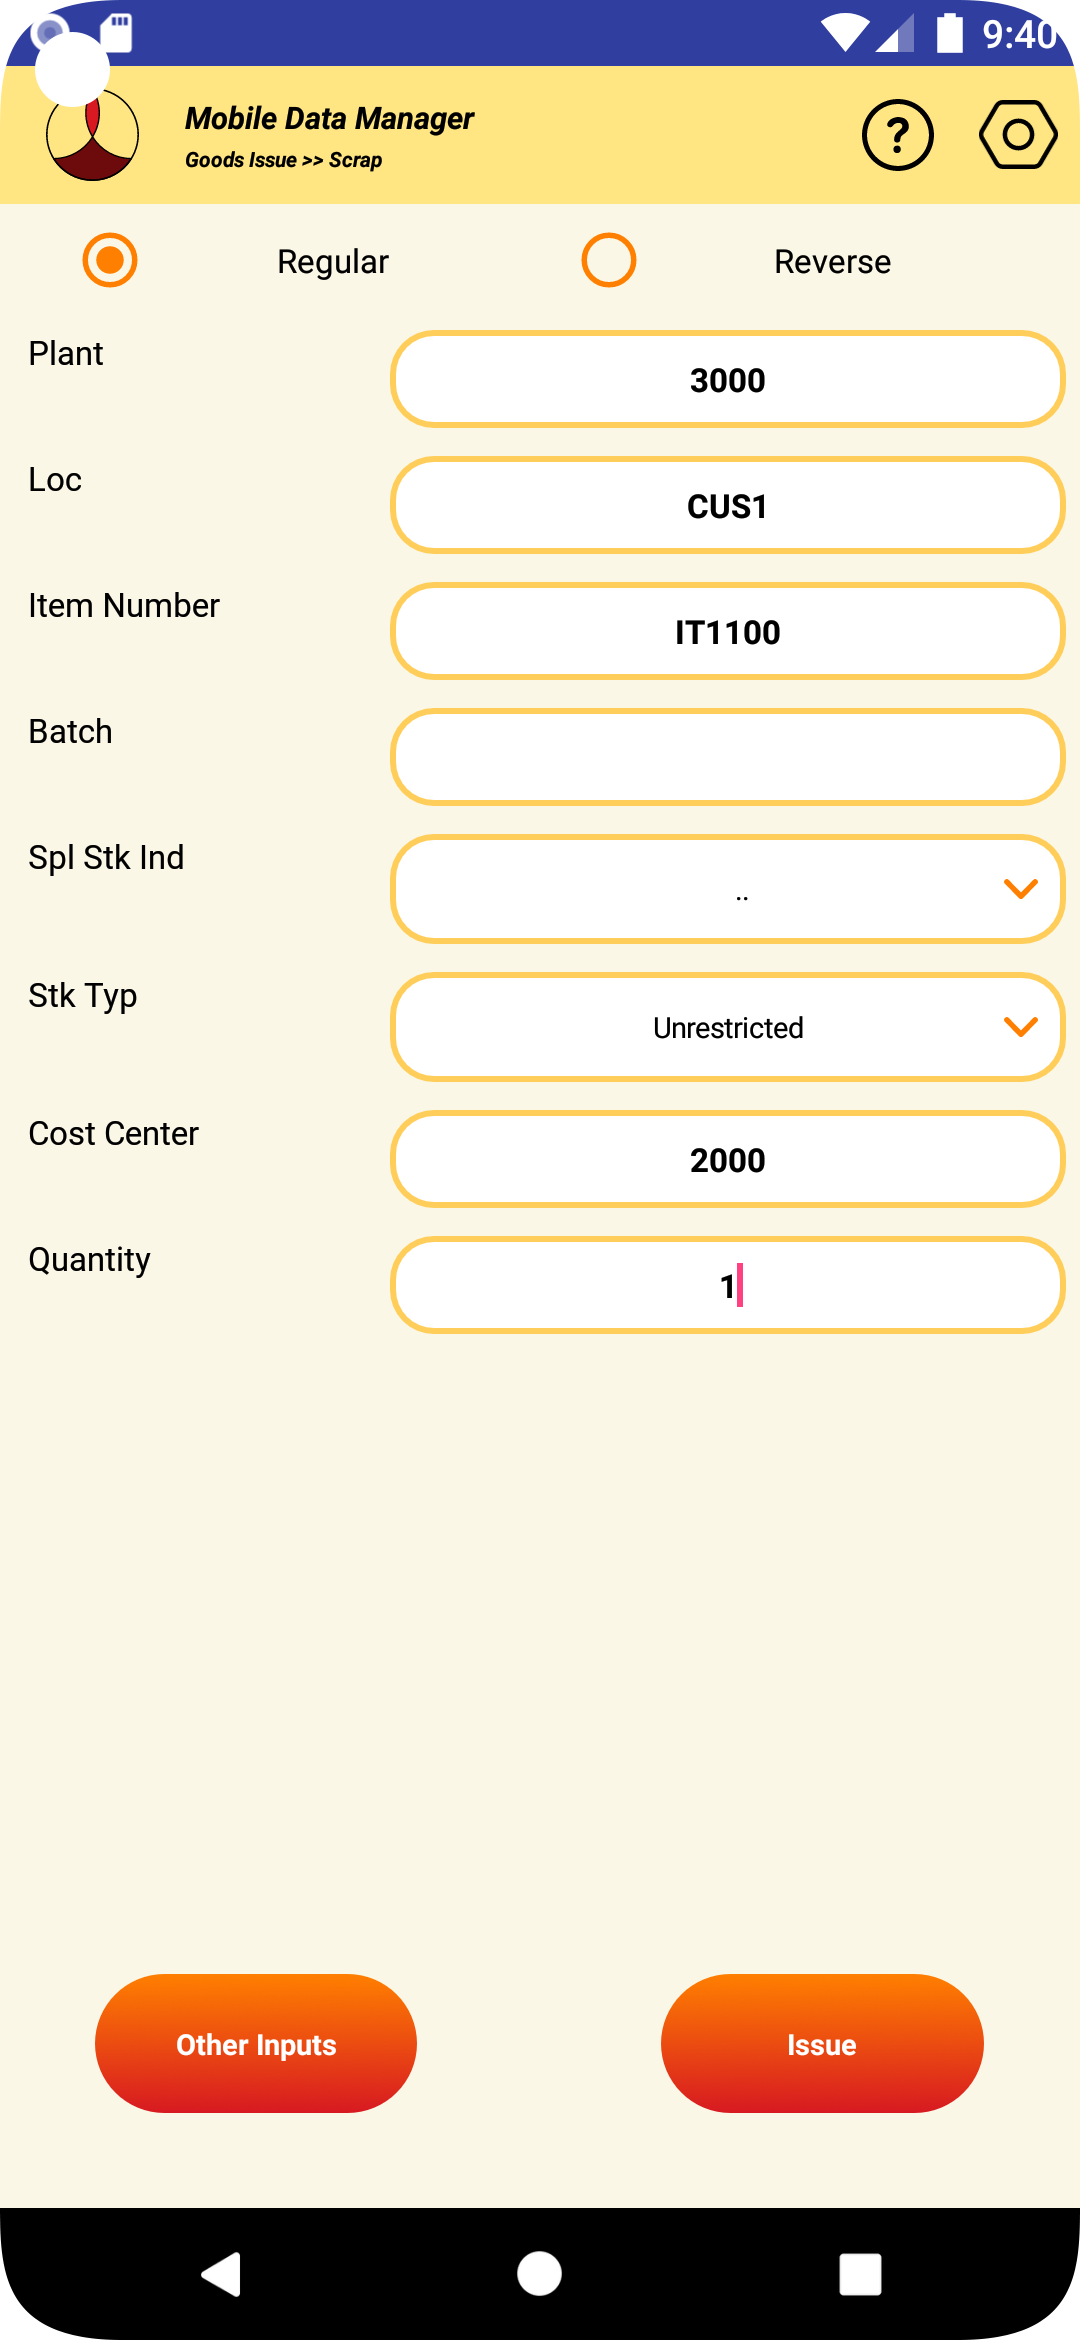
5.6.6 The optional other inputs needed when making the receipt can be entered by clicking the “Other Inputs” button.
5.6.7 After the values are entered, click on the “Issue” button.
5.6.8 If the transaction in SAP is successful, the material document number that is created will be displayed.

5.6.9 If the transaction fails for some reason, the appropriate error message will be displayed.
5.6.10 If the label printing is configured for the transaction, the label will be printed.
5.6.11 After the transaction the data in the screen will be cleared.
5.6.12 If no further issues are planned, pressing the back button will take back to the issue type screen.
6. GOODS MOVEMENT
6.1 TRANSFER ORDER LIST
6.1.1 To browse the list of Transfer Orders from the main screen “Goods Movement

6.1.2 To browse the list of Transfer Orders from the main screen “Goods Movement The screen to select movement type will be displayed. Select “Browse TO List”

6.1.3 The screen to enter the filter parameters for browsing the transfer orders.

6.1.4 The warehouse number if defined in the global parameters in the settings, will get filled in automatically.
6.1.5 Enter at least one of the parameter such as transfer order number or transfer requirement number or work order number or sales order number, etc., and press ‘Download” to get the list of transfer orders.

6.1.6 If there are OPEN transfer orders exists that match the conditions, the same will be downloaded.
6.1.7 Select the “TO List” tab to view the list of transfer orders downloaded.

6.1.8 To further process the individual transfer order, click on the “PICK TO” of the specific transfer order.
6.1.9 Press the back button will take back to the movement type selection screen.
6.2 CONFIRMATION OF TRANSFER ORDER
6.2.1 To work on the Transfer Orders, select “Goods Movement” from the main screen.

6.2.2 Select “Transfer Order” from the movement type selection screen

6.2.3 The following screen to get the TO information will be displayed.

The warehouse will be automatically populated if its defined in the global setting.
6.2.4 Enter the transfer order number and press enter to download the transfer order. The transfer order header information such as document date, entered by, TR number, etc., as shown below.

6.2.5 To view the list of line items in the transfer order select the “Items” tab in the header. Information such as material, description, plant, storage location, warehouse, etc., will be displayed.

6.2.6 To transfer the material, select the line item against which the transactions needs to be performed.
6.2.7 The line item selected will be highlighted as shown in the picture below.

6.2.8 To transfer the line item, select the “Transfer” tab header in the screen.

6.2.9 Details of the transfer line item selected will be displayed in the top of the screen.
6.2.10 On the bottom of the screen, the mandatory inputs that are needed to make the transfer will be displayed. The type of mandatory inputs needed will be set in SAP by the system administrator.
6.2.11 The optional other inputs needed when making the receipt can be entered by clicking the “Other Inputs” button.
6.2.12 The type of optional inputs that can be entered will be set in SAP by the SAP administrator.
6.2.13 Enter the mandatory inputs required for each field.

6.2.14 Once the values of mandatory and optional inputs are entered, click on the “Transfer” button.
6.2.15 If any of the fields entered doesn’t match with the values of the line selected or any mandatory inputs were missing, the appropriate error message will be displayed.
6.2.16 If the transaction in SAP is successful, the line item confirmation will be displayed.

6.2.17 If the transaction fails for some reason, the appropriate error message will be displayed.
6.2.18 If the label printing is configured for the transaction, the label will be printed.
6.2.19 After the transaction the data in the screen will be cleared and the transfer order list items will be refreshed.
6.2.20 If no further transfers are planned, pressing the back button will take back to the order issue type screen.
6.3 GENERIC TRANSFER ORDERS - SINGLE ITEM
6.3.1 To perform or create an adhoc Transfer Orders, select “Goods Movement” from the main screen.

6.3.2 Select “Generic” from the movement type selection screen.

6.3.3 The following screen to get the create and confirm the transfer order will be displayed.

6.3.4 The details such as plant, storage location and warehouse will be populated automatically, if they are defined in the global settings.
6.3.5 Enter the details of the material, batch, storage types, bins to be transferred. An example is shown below.

6.3.6 The optional other inputs needed when making the transfer can be entered by clicking the “Other Inputs” button.
6.3.7 After entering the inputs, to create and confirm the transfer order, click on the “Transfer” button.
6.3.8 If the transaction in SAP is successful, the transfer order created and confirmed will be displayed.

6.3.9 If the transaction fails for some reason, the appropriate error message will be displayed.
6.3.10 If the label printing is configured for the transaction, the label will be printed.
6.3.11 After the transaction the data in the screen will be cleared.
6.3.12 If no further transfers are planned, pressing the back button will take back to the selection of movement type screen
6.4 GENERIC TRANSFER ORDERS - MULTI ITEMS
6.4.1 To perform or create an adhoc Transfer Orders for multiple items, select “Goods Movement” from the main screen.

6.4.2 Select “Generic Transfer Multi Items” from the movement type selection screen.
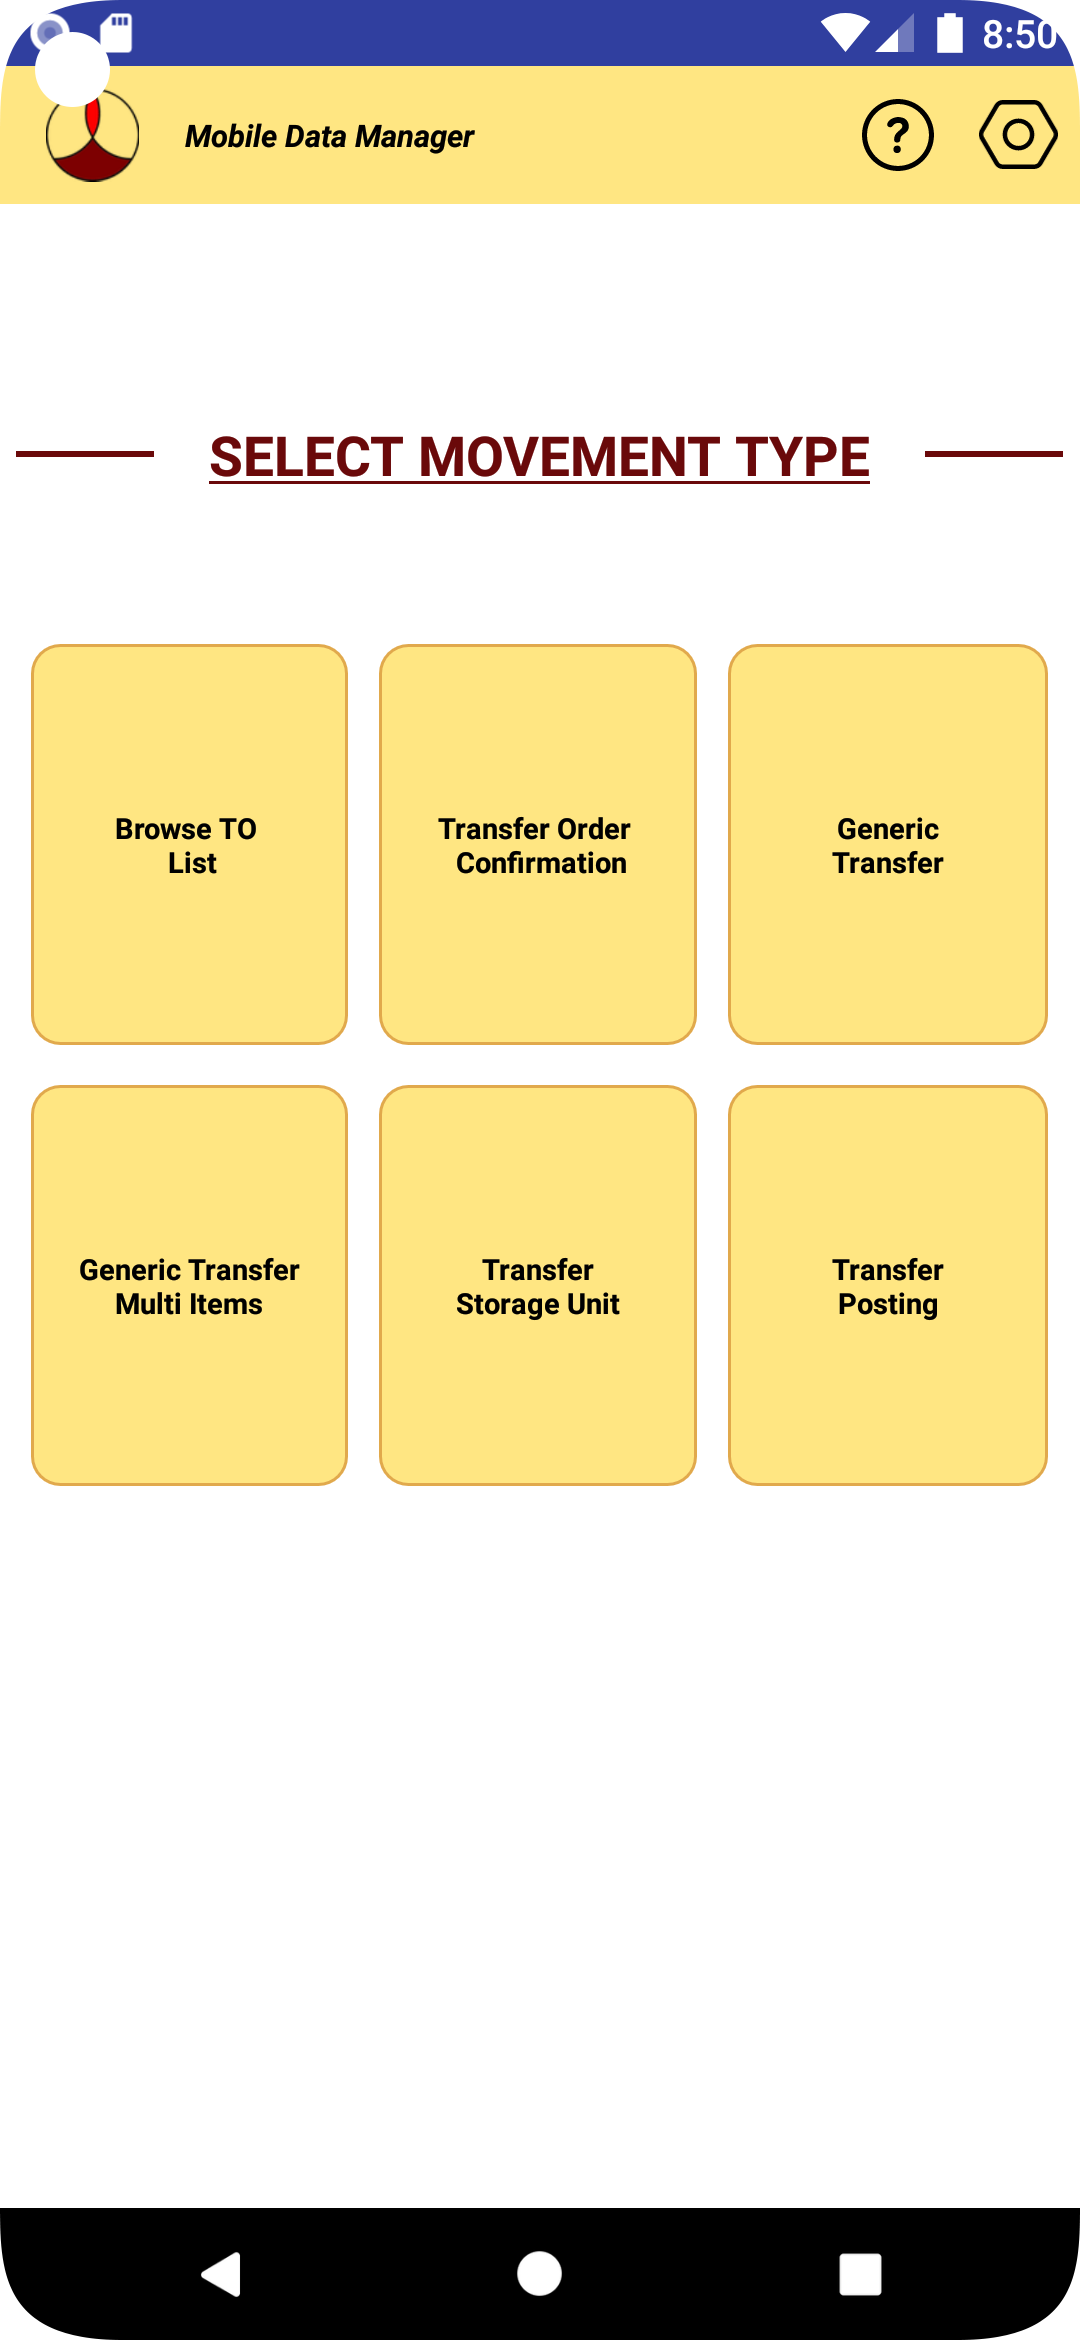
6.4.3 The following screen to create and confirm the transfer order for multiple items will be displayed.
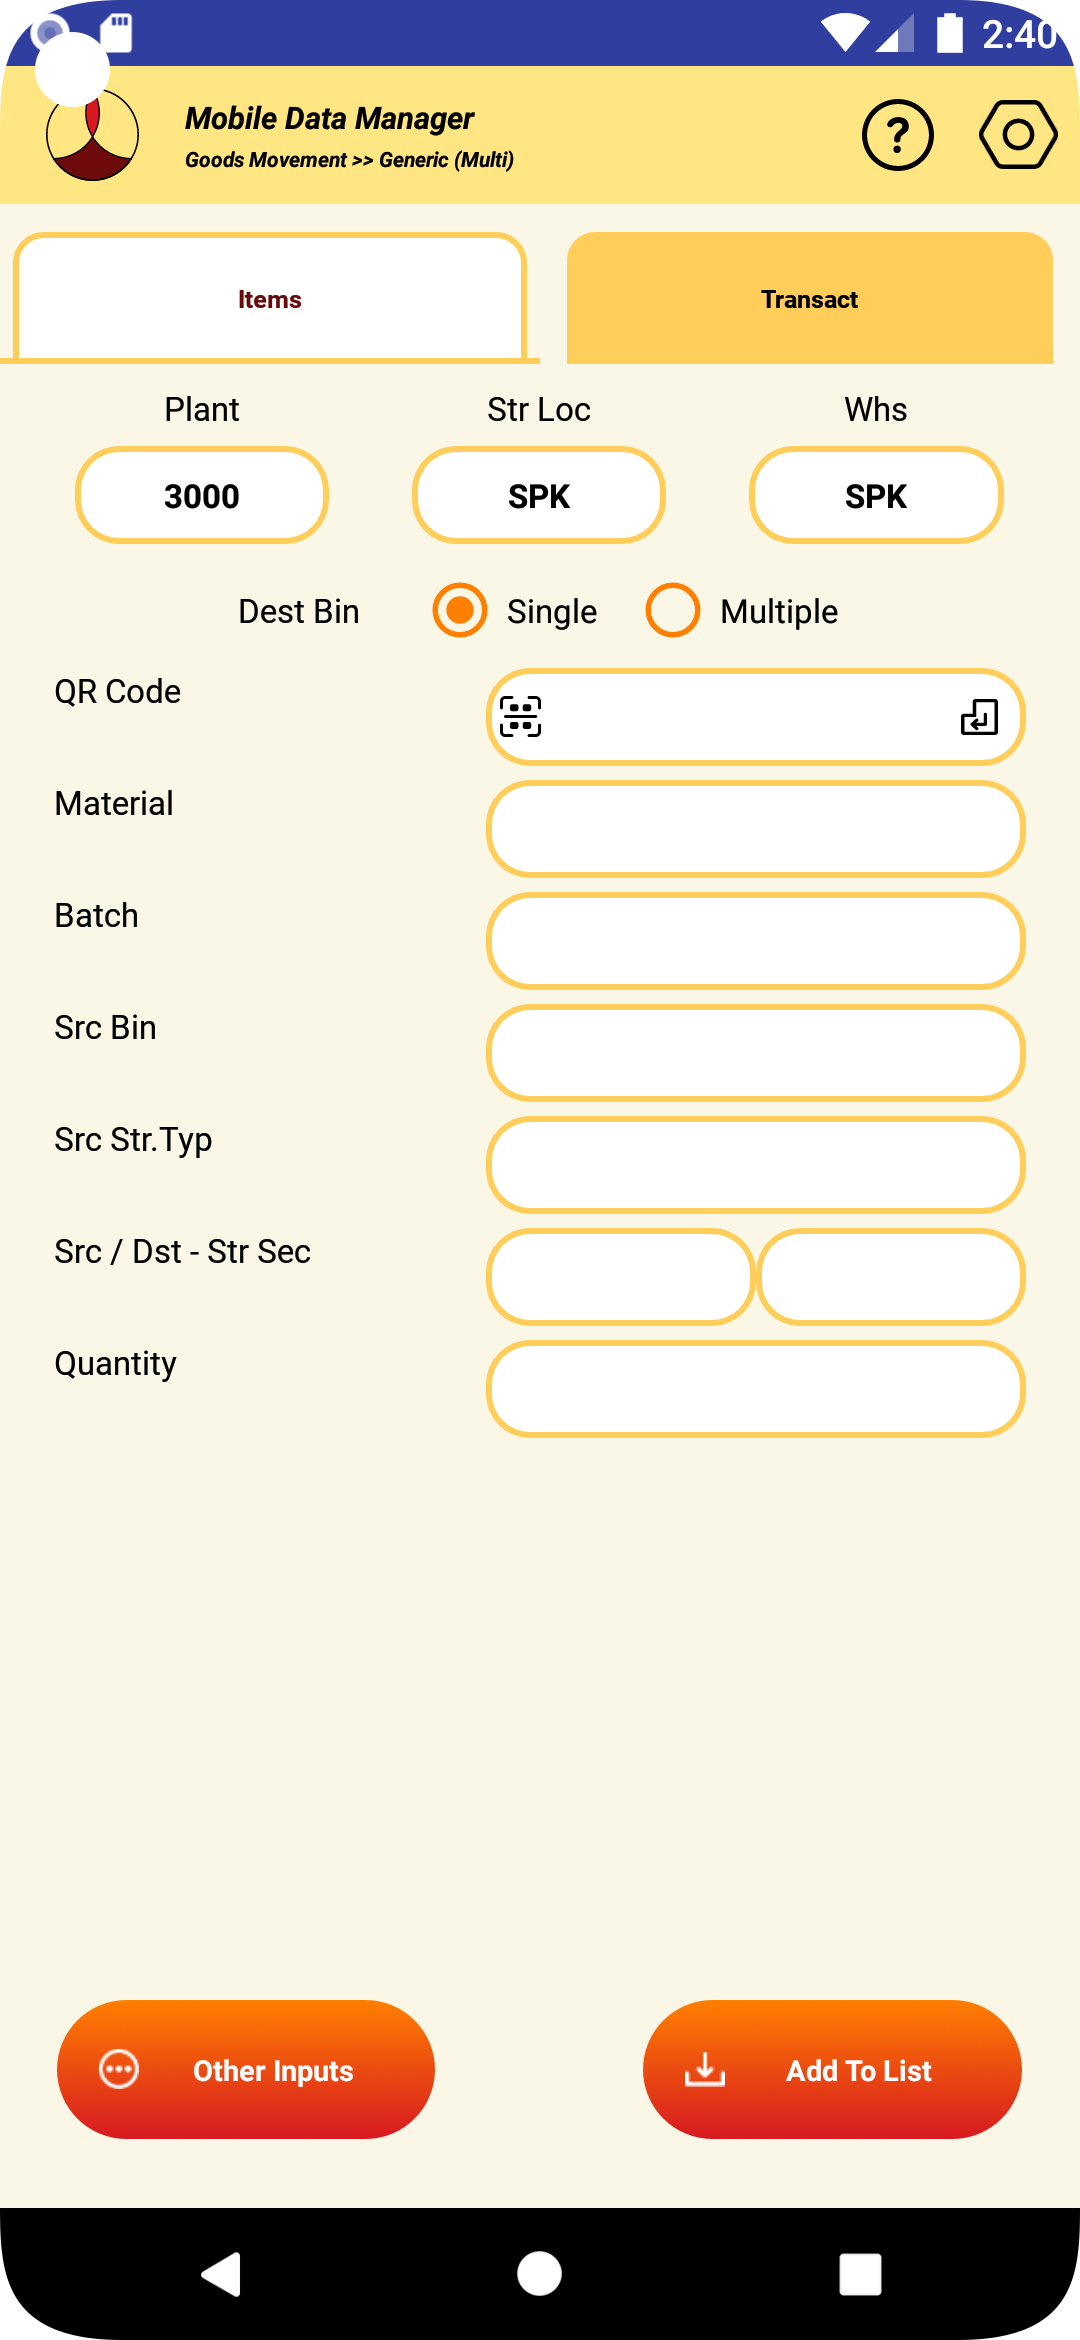
6.4.4 The details such as plant, storage location and warehouse will be populated automatically, if they are defined in the global settings.
6.4.5 Make the appropriate selection of whether all items are getting transfered to same bin or different bins. If the option of single bin is selected, information regarding destination bin and storage type will be prompted at the time of posting the transaction. For multiple destination bin, the destination details will appear in the same screen.
6.4.6 Enter the details of the material, batch, storage types, bins to be transferred and press the add to list button. An example is shown below. If the validation of the input are sucessfull, the item will be added to the transaction list. Repeat the same for the next item to transact.
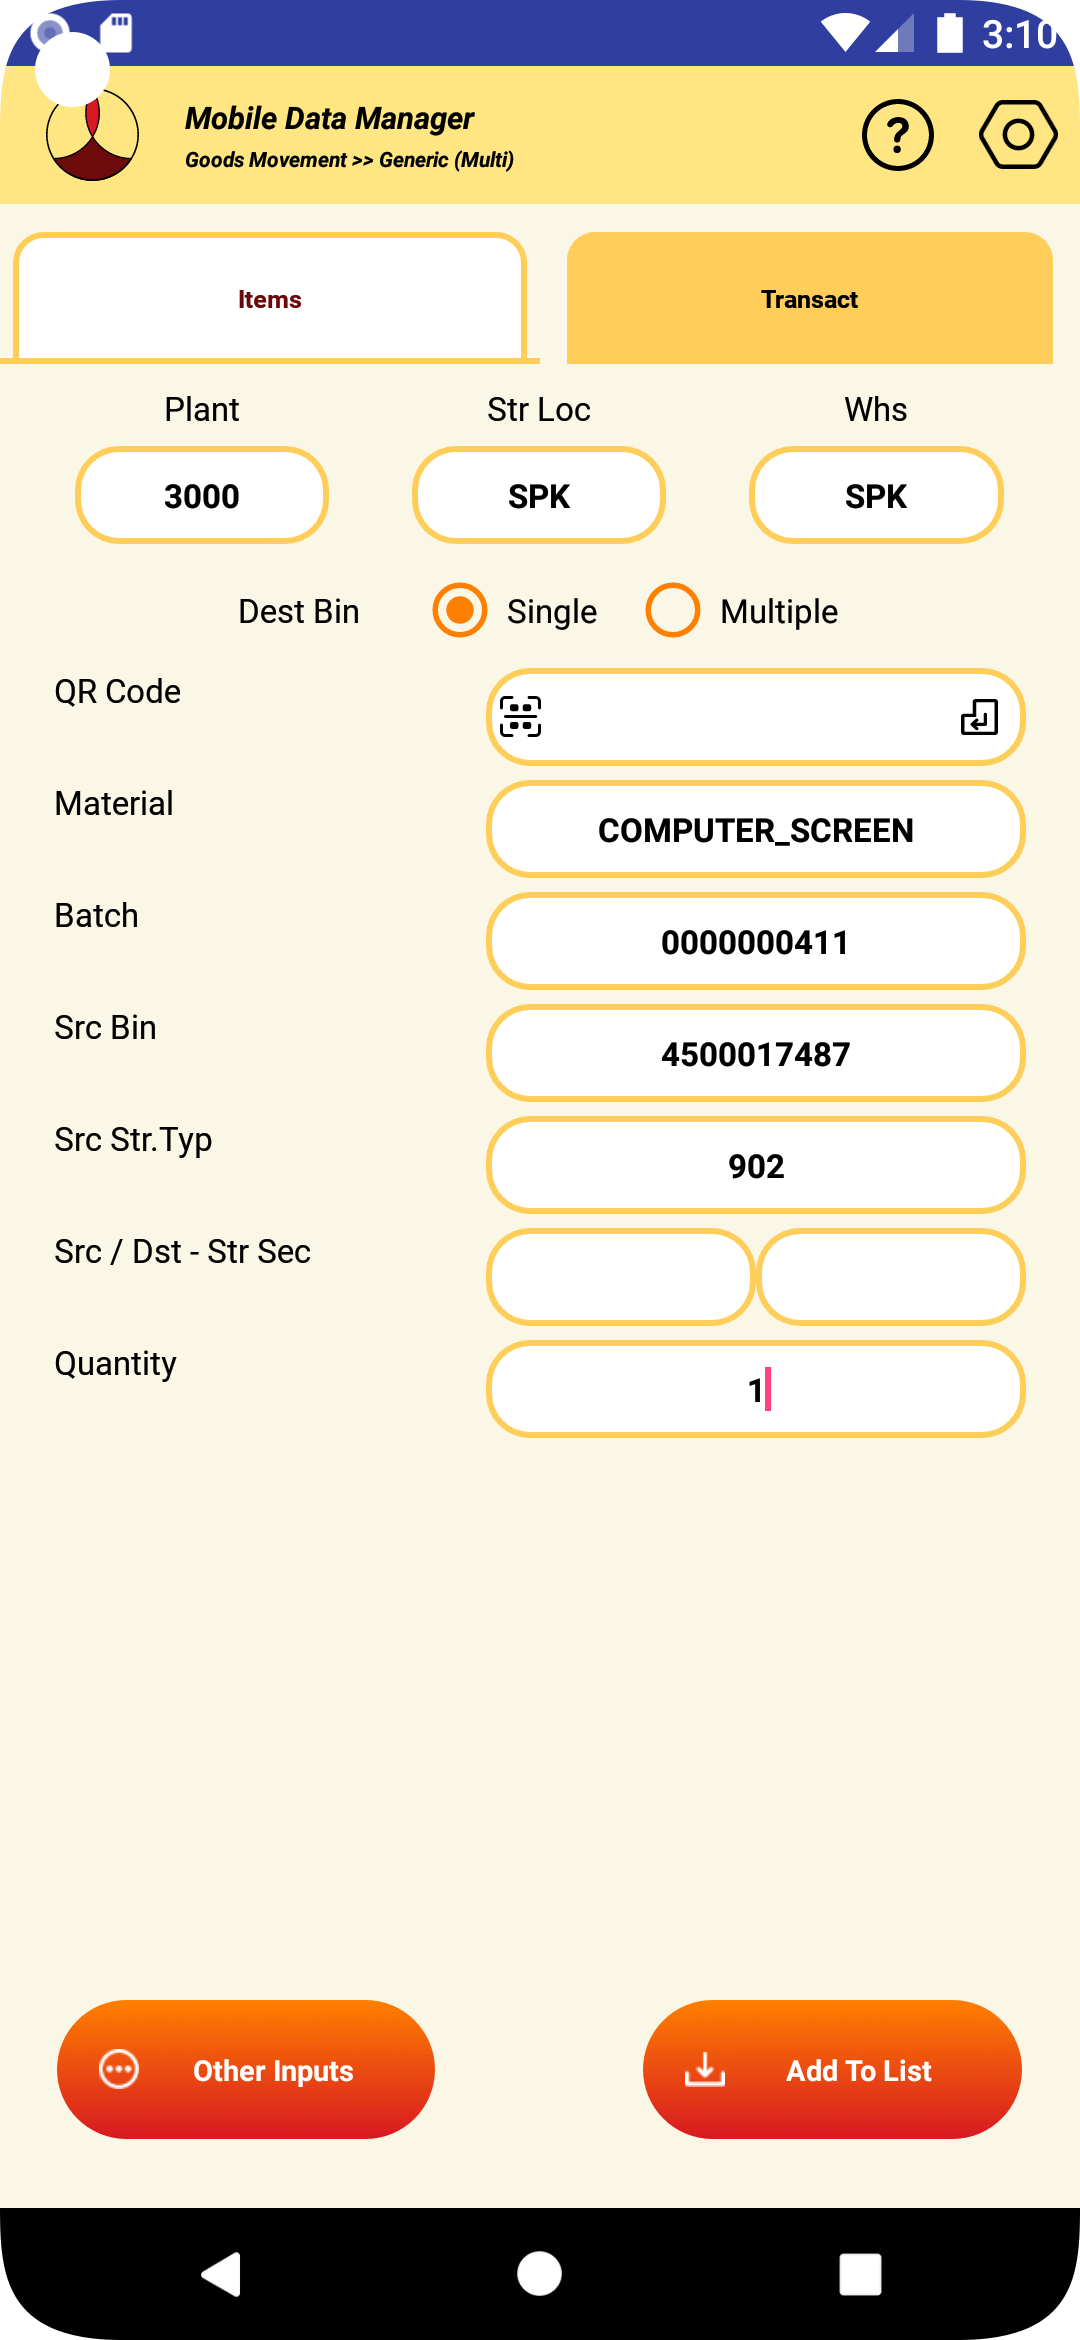
6.4.7 The optional other inputs needed for an item can be entered by clicking the “Other Inputs” button.
6.4.8 After entering all the items, to create and confirm the transfer order, click on the “Post Transaction” button.
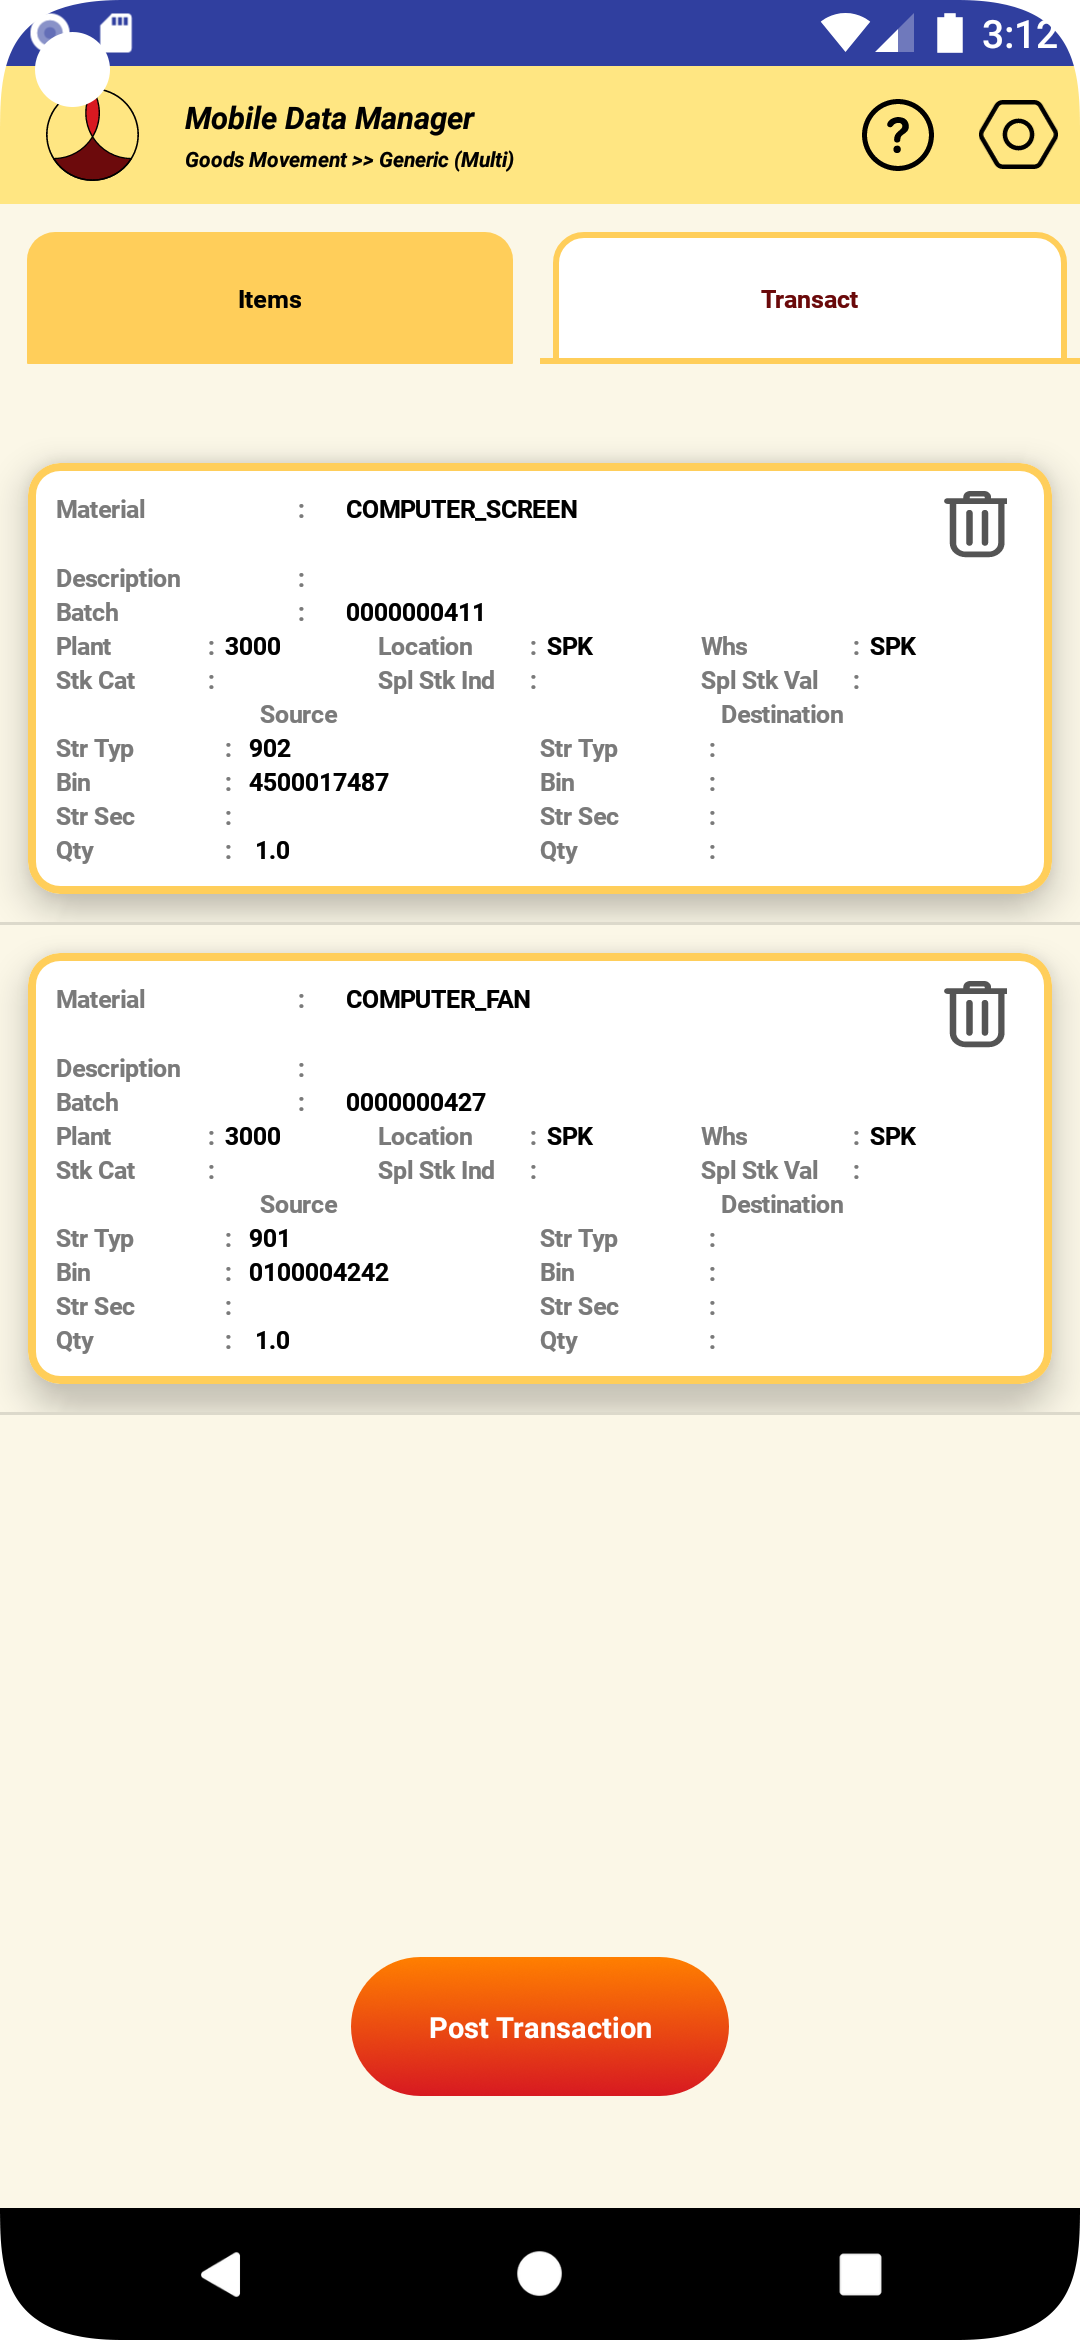
6.4.9 If the request is to transfer all item to same destination bin, the following screen asking for destination bin details will be prompted. Fill the detination bin details.
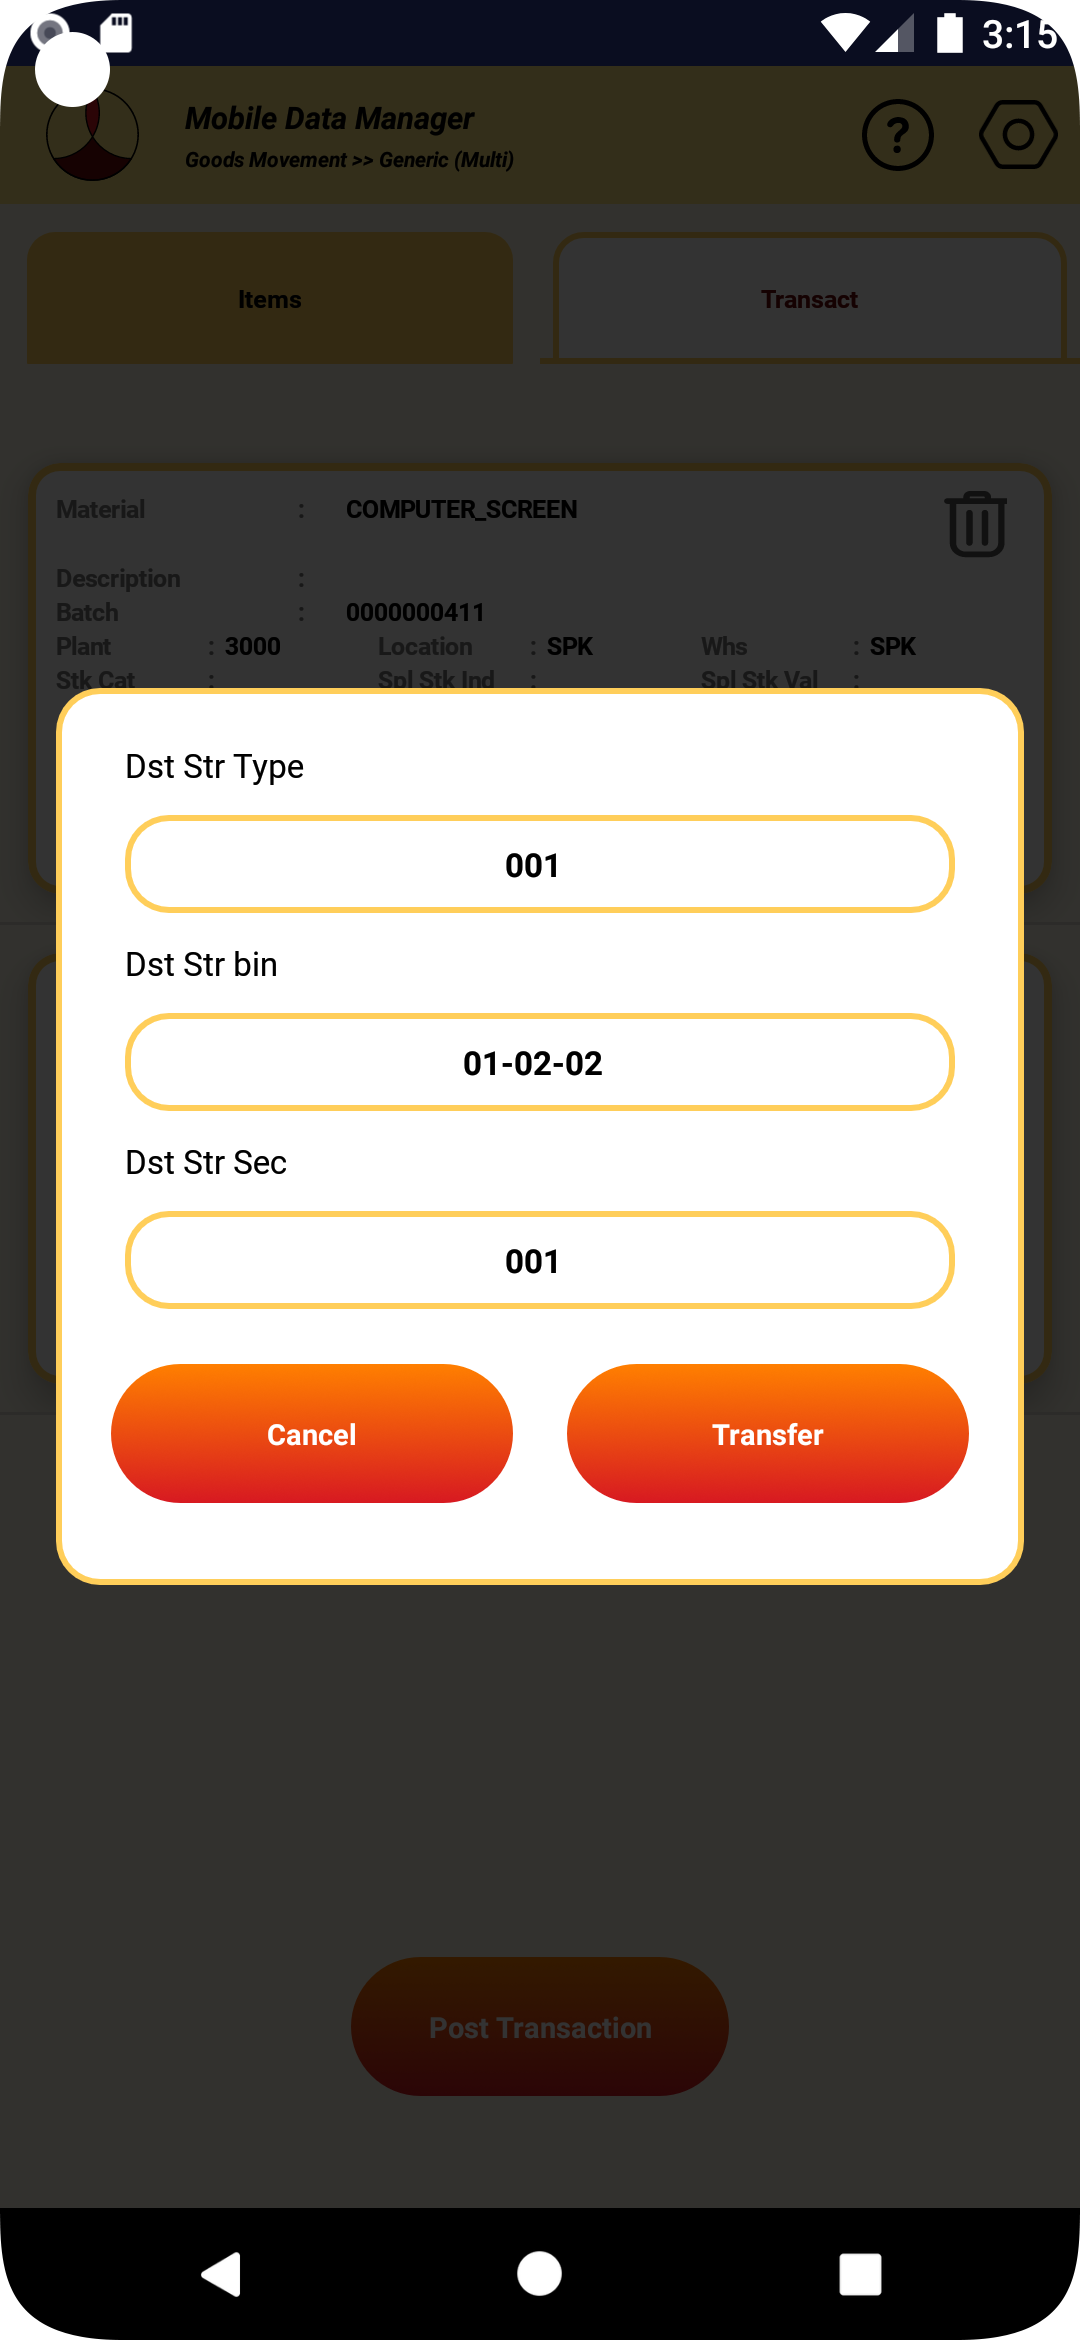
6.4.10 If the transaction in SAP is successful, the transfer order created and confirmed will be displayed.
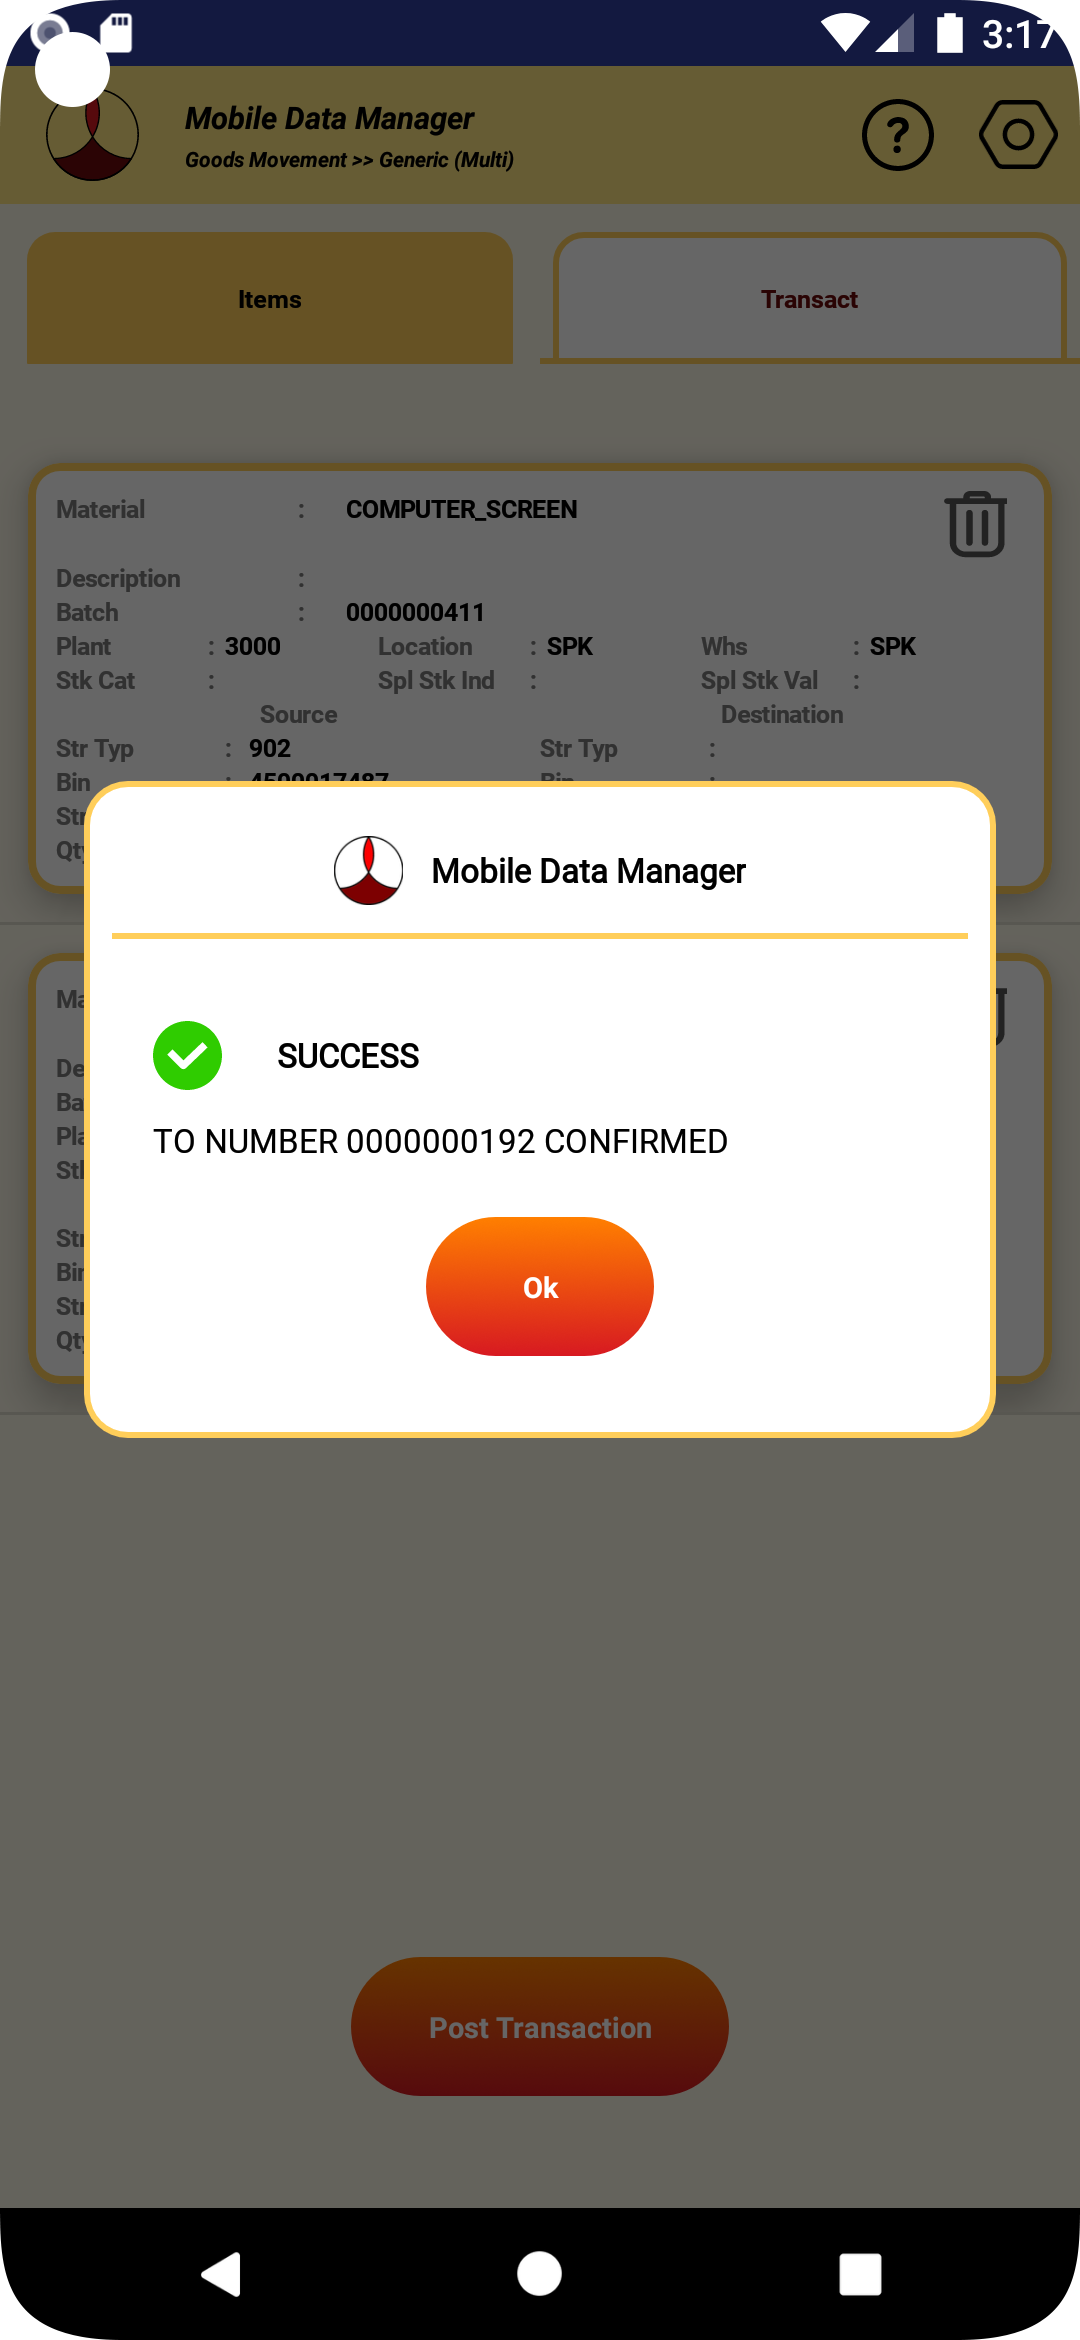
6.4.11 If the transaction fails for some reason, the appropriate error message will be displayed.
6.4.11 If the label printing is configured for the transaction, the label will be printed.
6.4.12 After the transaction the data in the screen will be cleared.
6.4.13 If no further transfers are planned, pressing the back button will take back to the selection of movement type screen
6.6 TRANSFER HANDLING UNITS
NOTE: Only those handling units that were received through goods receipt section of the MDM can be transfered through this screen.
6.6.1 To create and confirm transfer order for the whole handling unit, select “Goods Movement” from the main screen.

6.6.2 Select “Transfer Handling Unit” from the movement type selection screen.

6.6.3 The following screen to get the create and confirm the transfer order will be displayed.
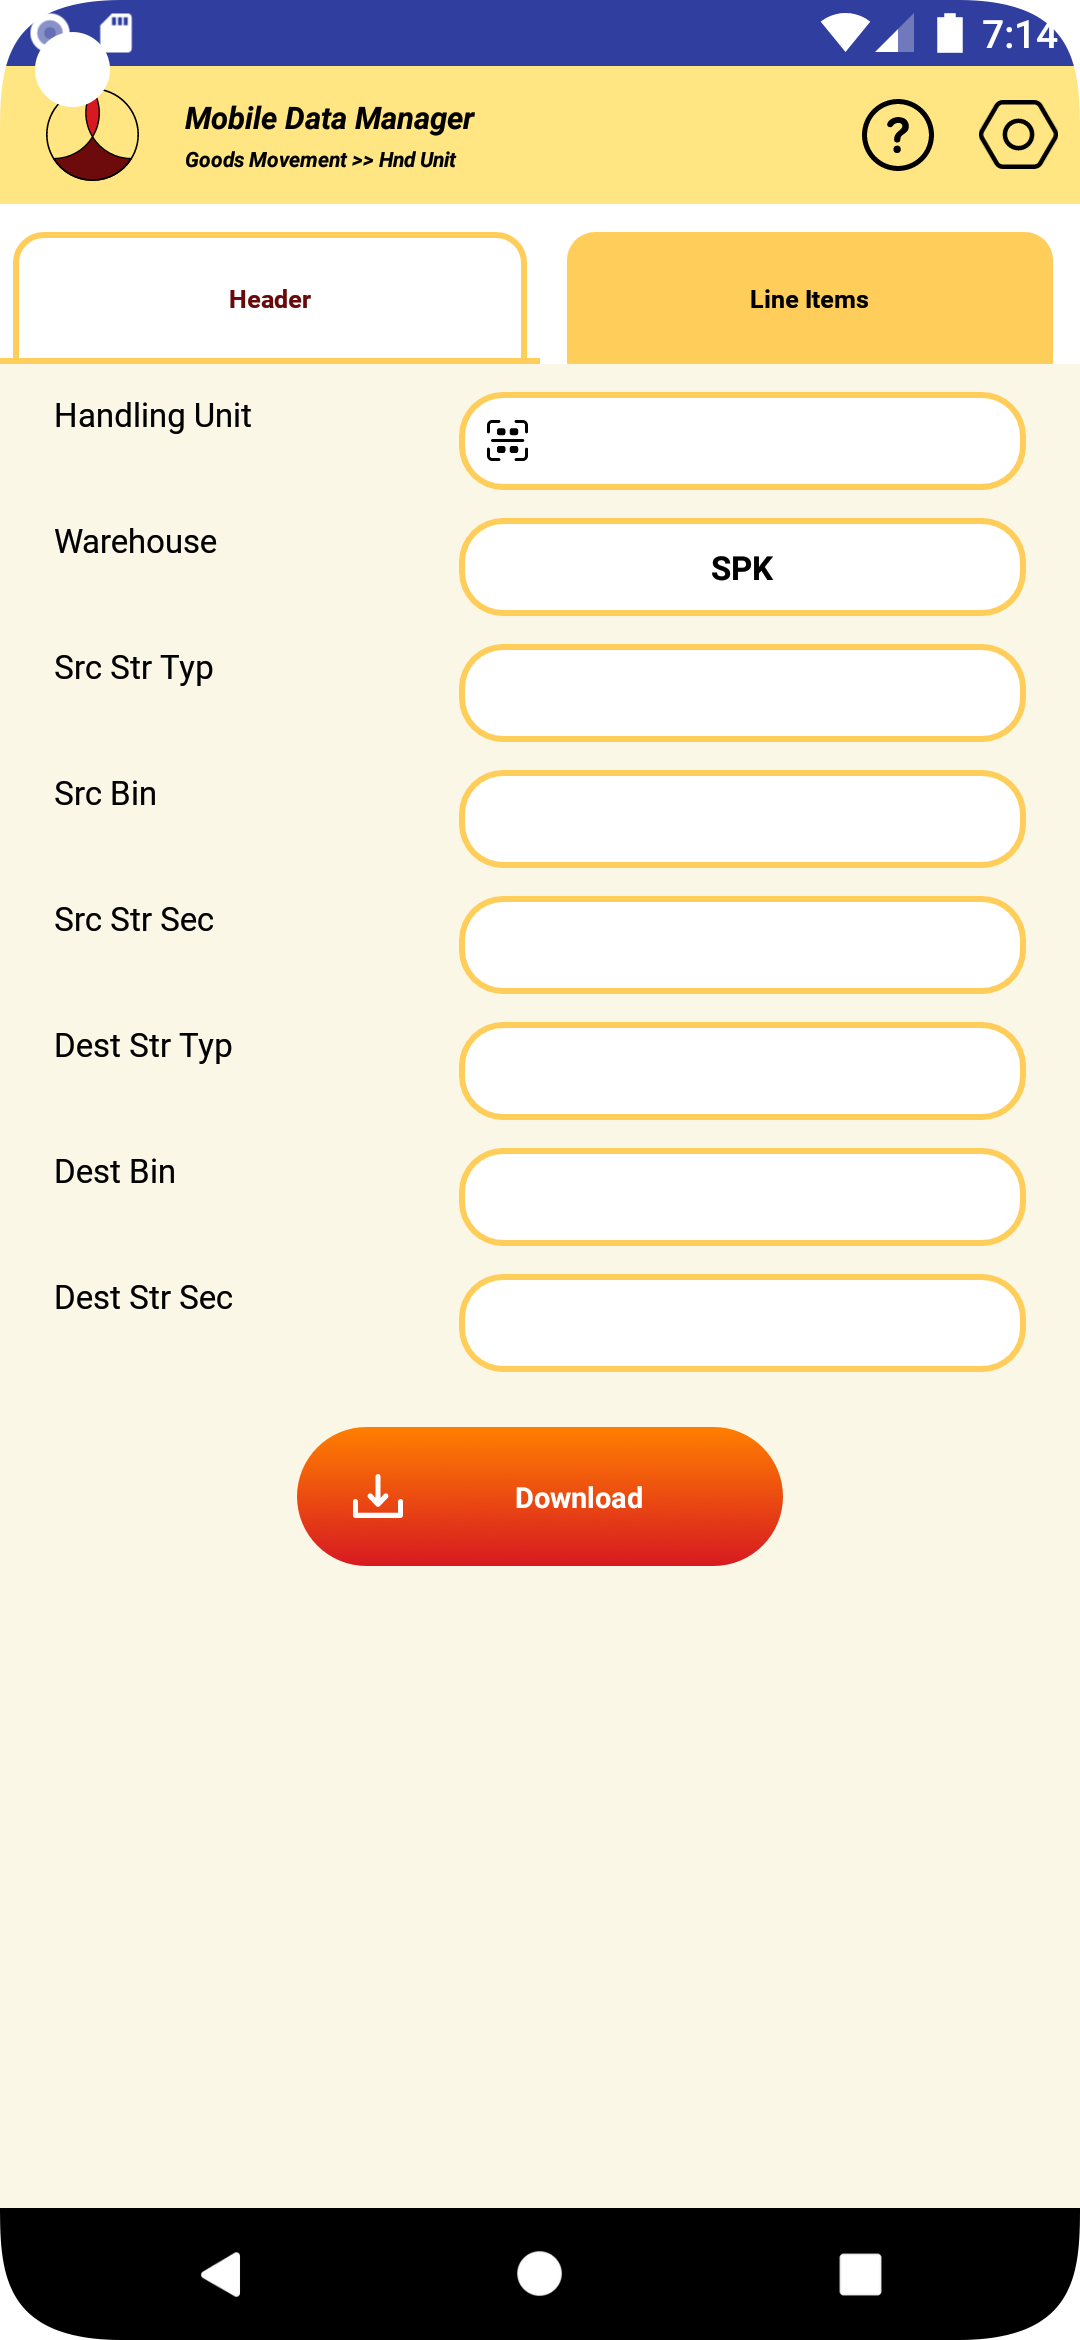
6.6.4 The warehouse details will be populated automatically, if they are defined in the global settings.
6.6.5 Enter the details of the handling unit, warehouse, source storage type and source storage bin and press download. An example is shown below.
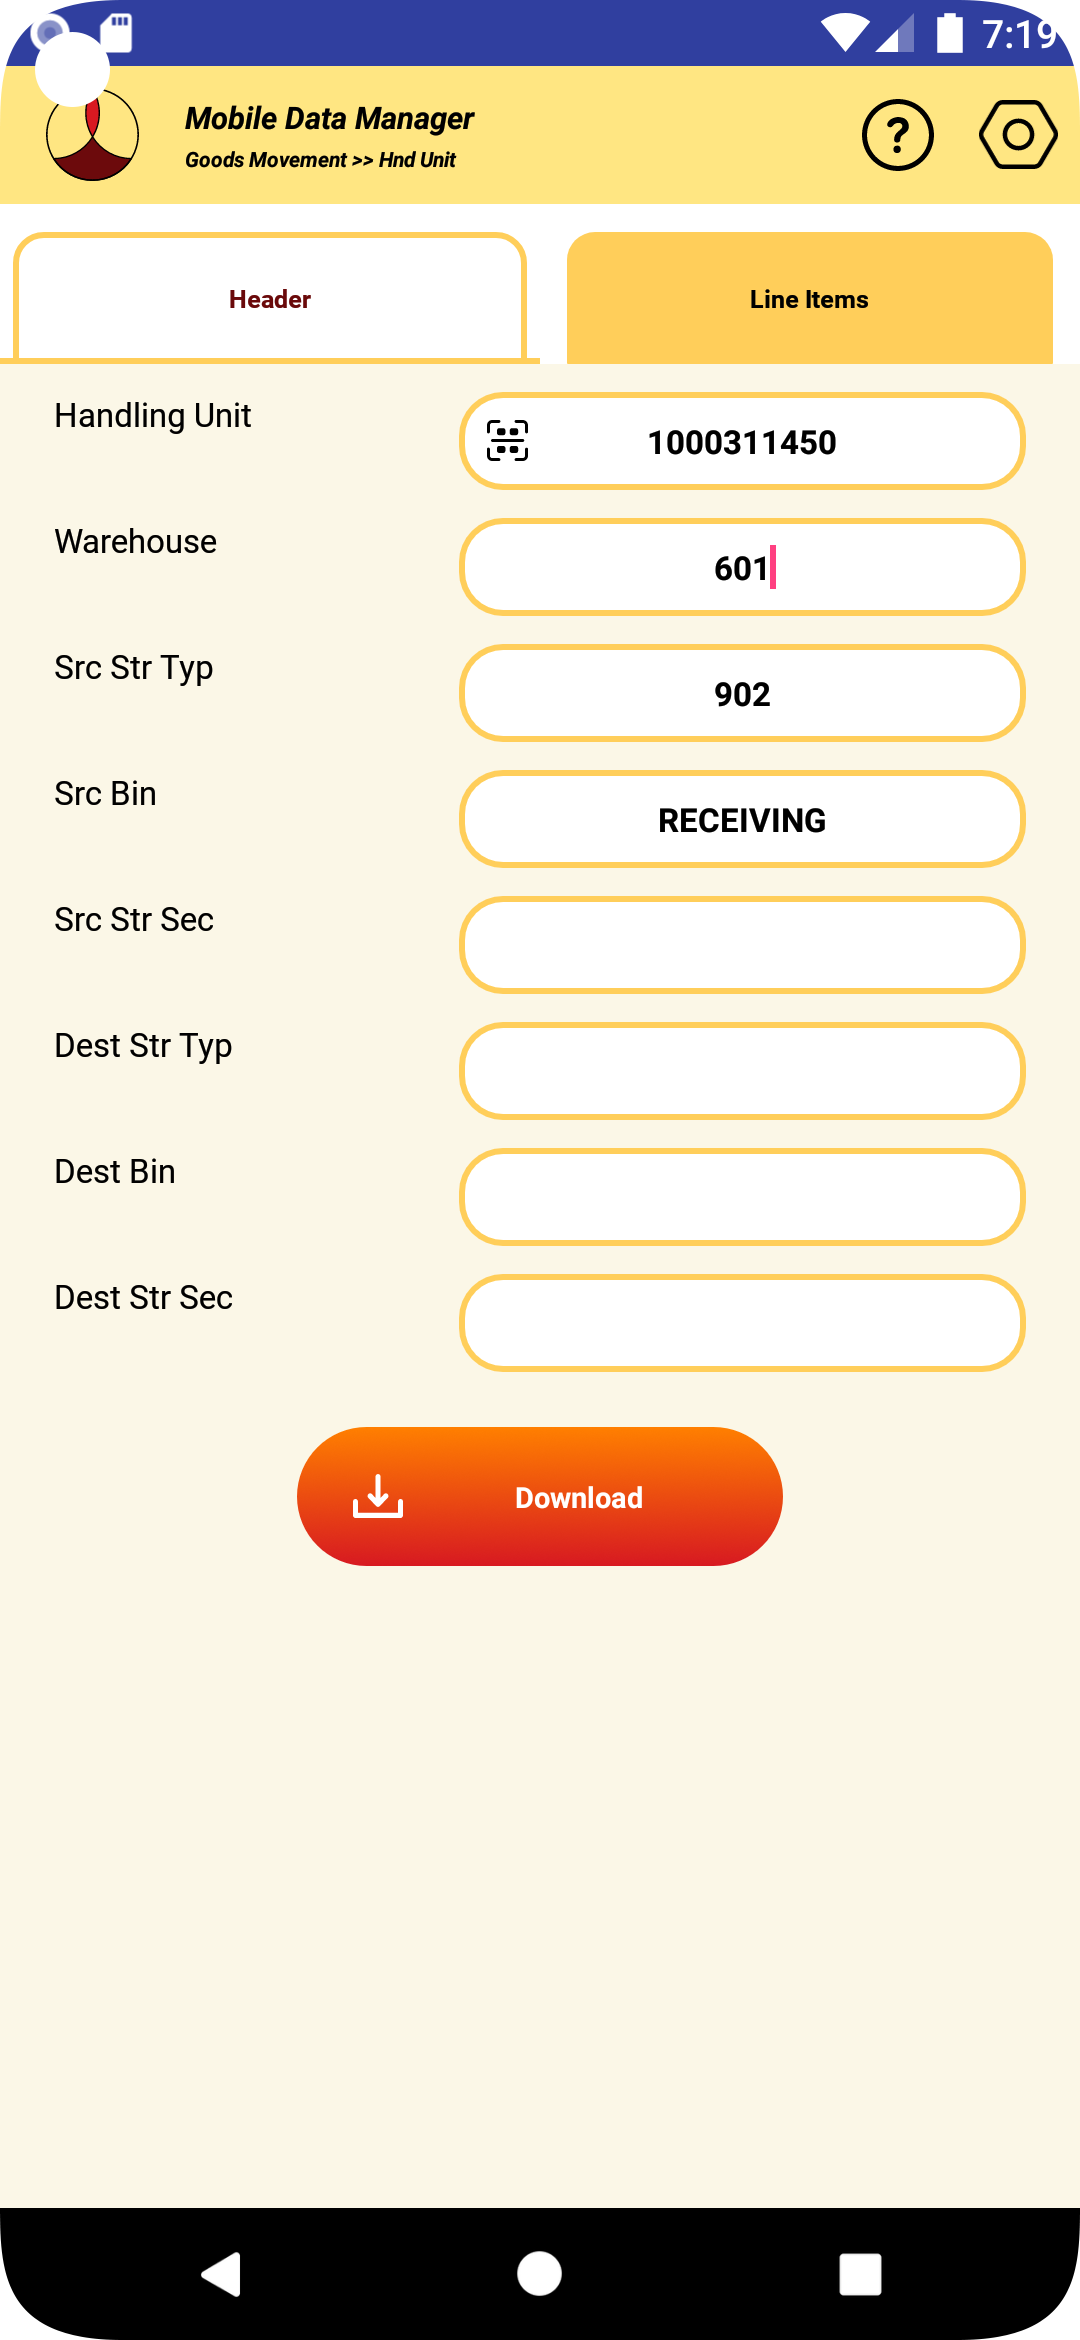
6.6.6 The items present in the handling unit and available in the source storage bin will be downloaded and displayed in the line items as shown below. By default all the quantity available will be populated in the quantity to transfer input field.

6.6.7 If requried make any adjustments for the quantity to receive. Enter the destination bin and storage type in the header screen and click on the “Transfer” button to create and confirm the transfer order.
6.6.8 If the transaction in SAP is successful, the transfer order created and confirmed will be displayed.
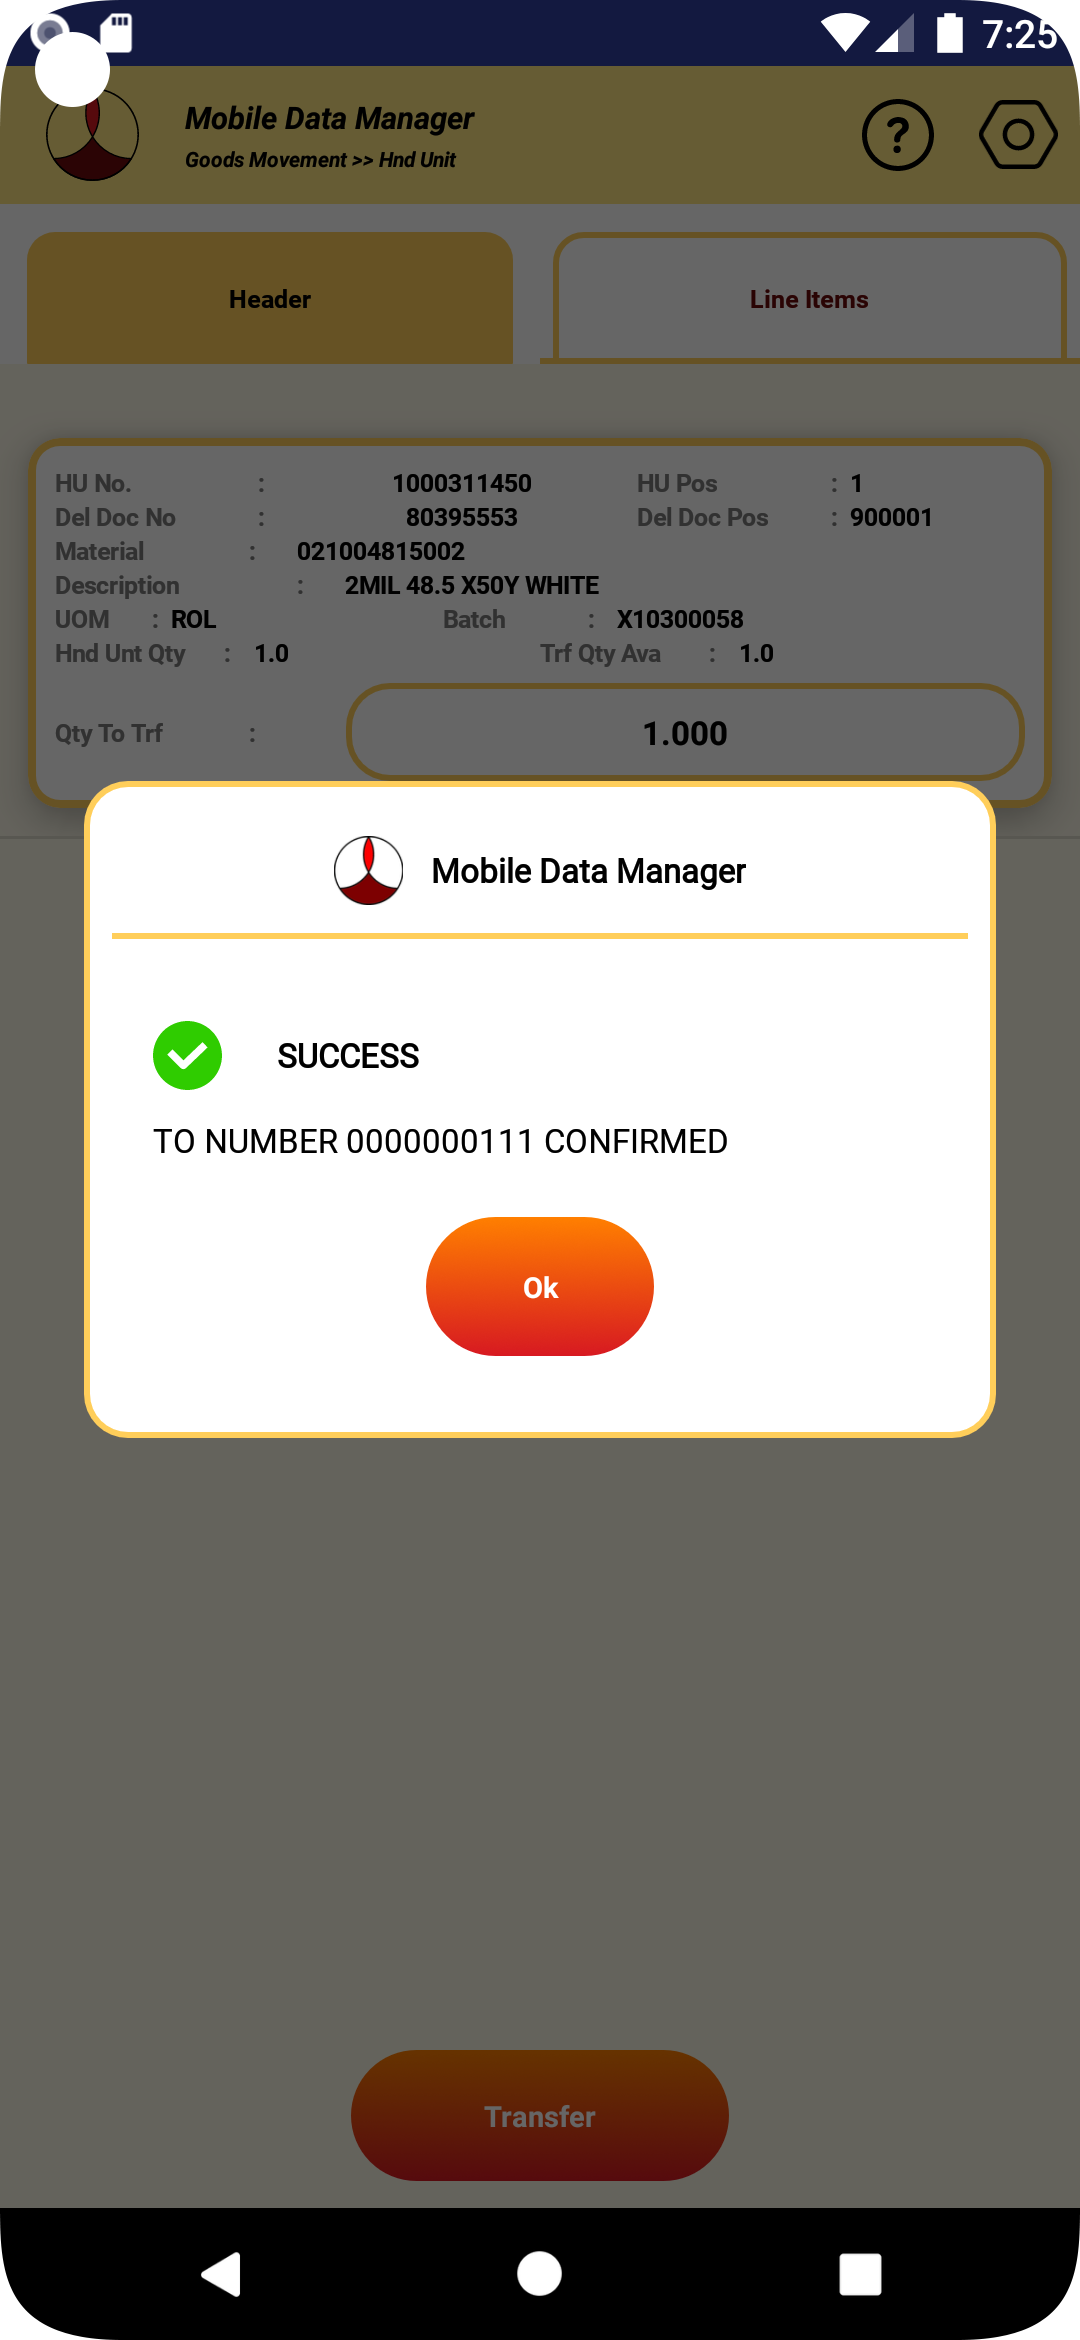
6.6.9 If the transaction fails for some reason, the appropriate error message will be displayed.
6.6.10 If the label printing is configured for the transaction, the label will be printed.
6.6.11 After the transaction the data in the screen will be cleared.
6.6.12 If no further transfers are planned, pressing the back button will take back to the selection of movement type screen
6.7 TRANSFER POSTINGS
6.7.1 To perform transfer posting of the materials, select “Goods Movement” from the main screen.

6.7.2 Select “Transfer Posting” from the movement type selection screen.
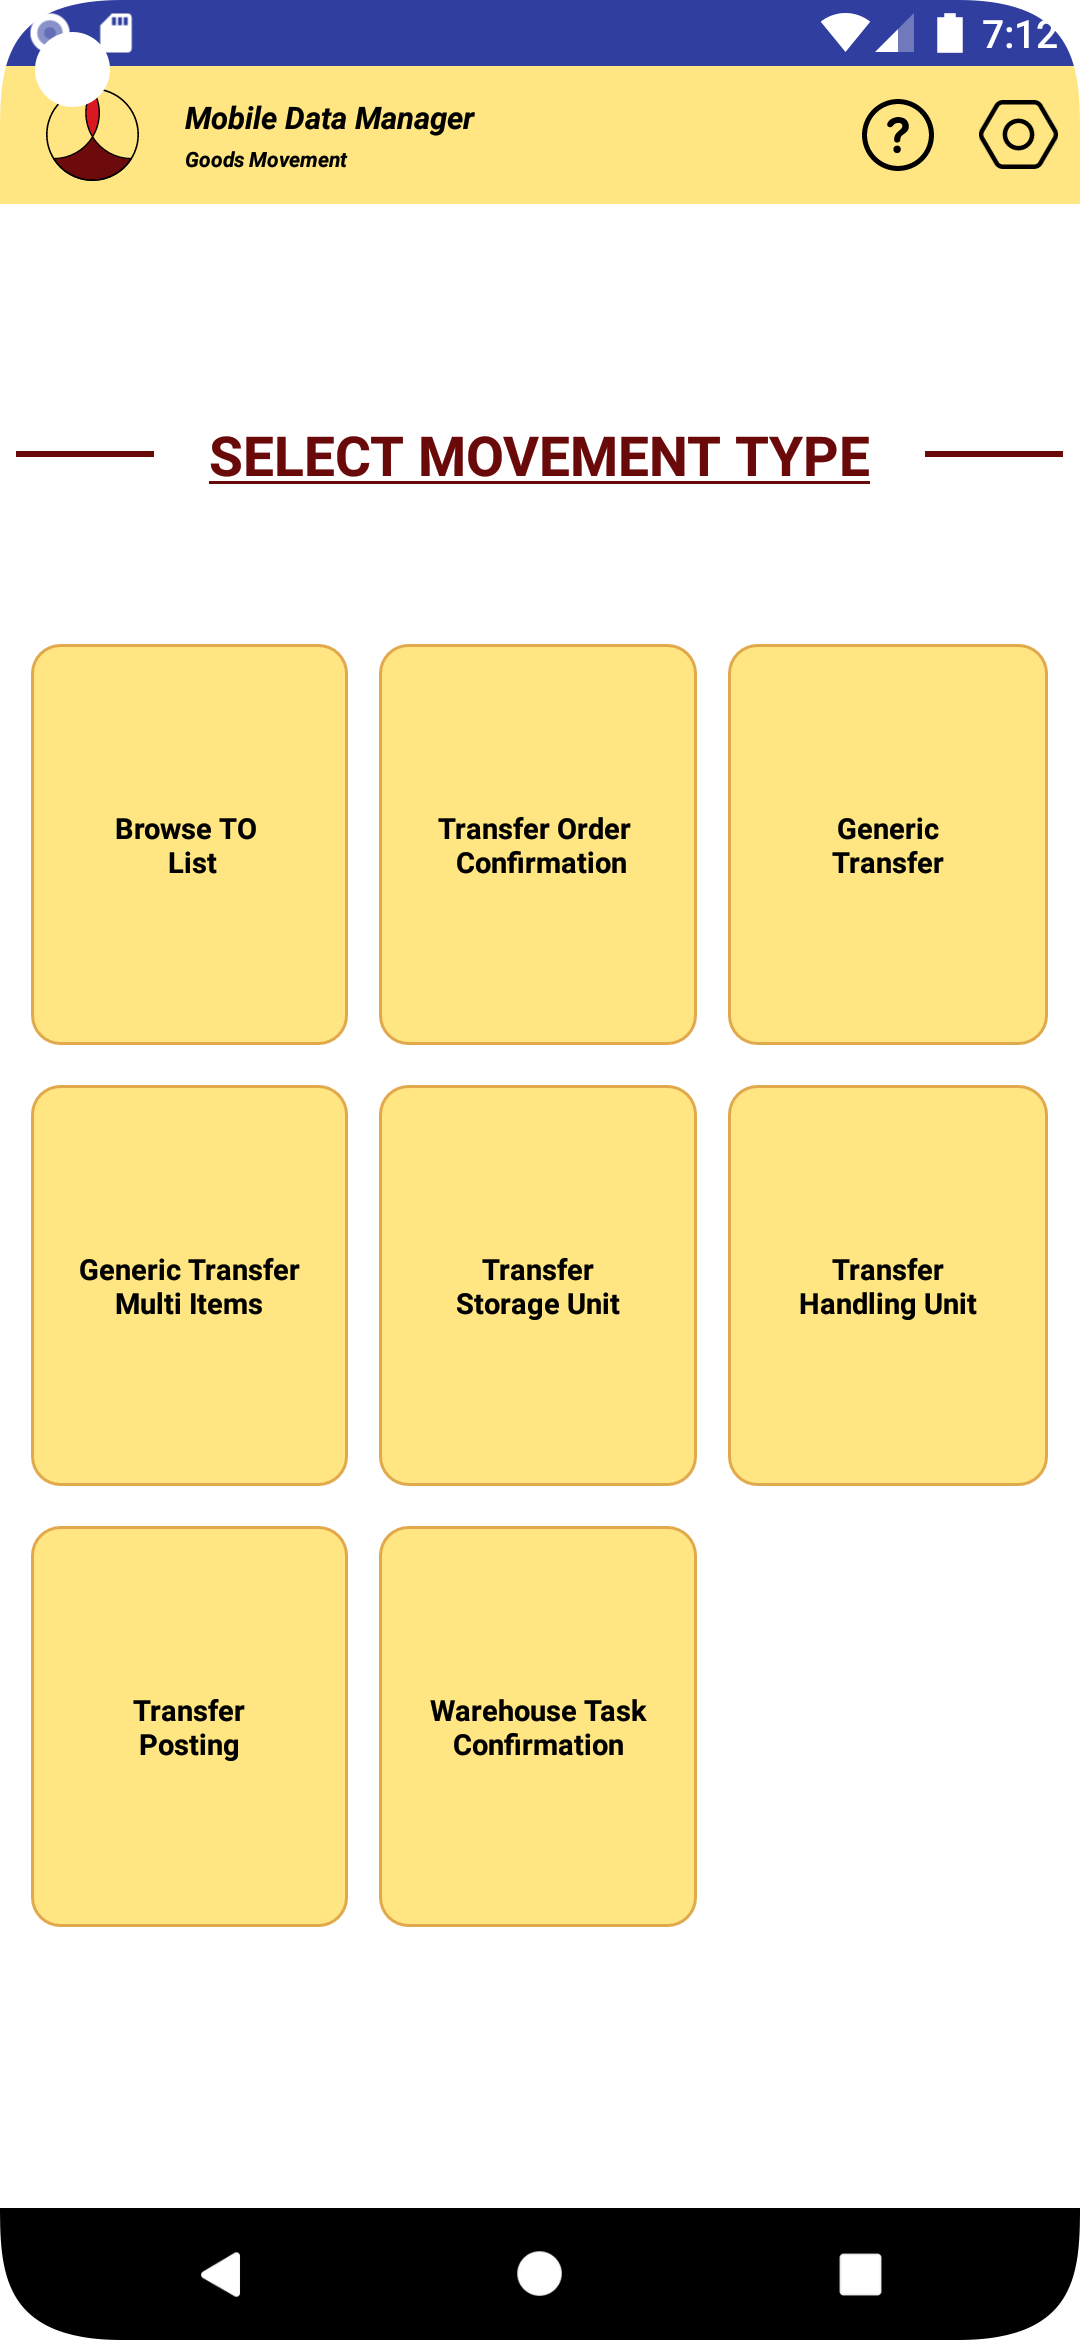
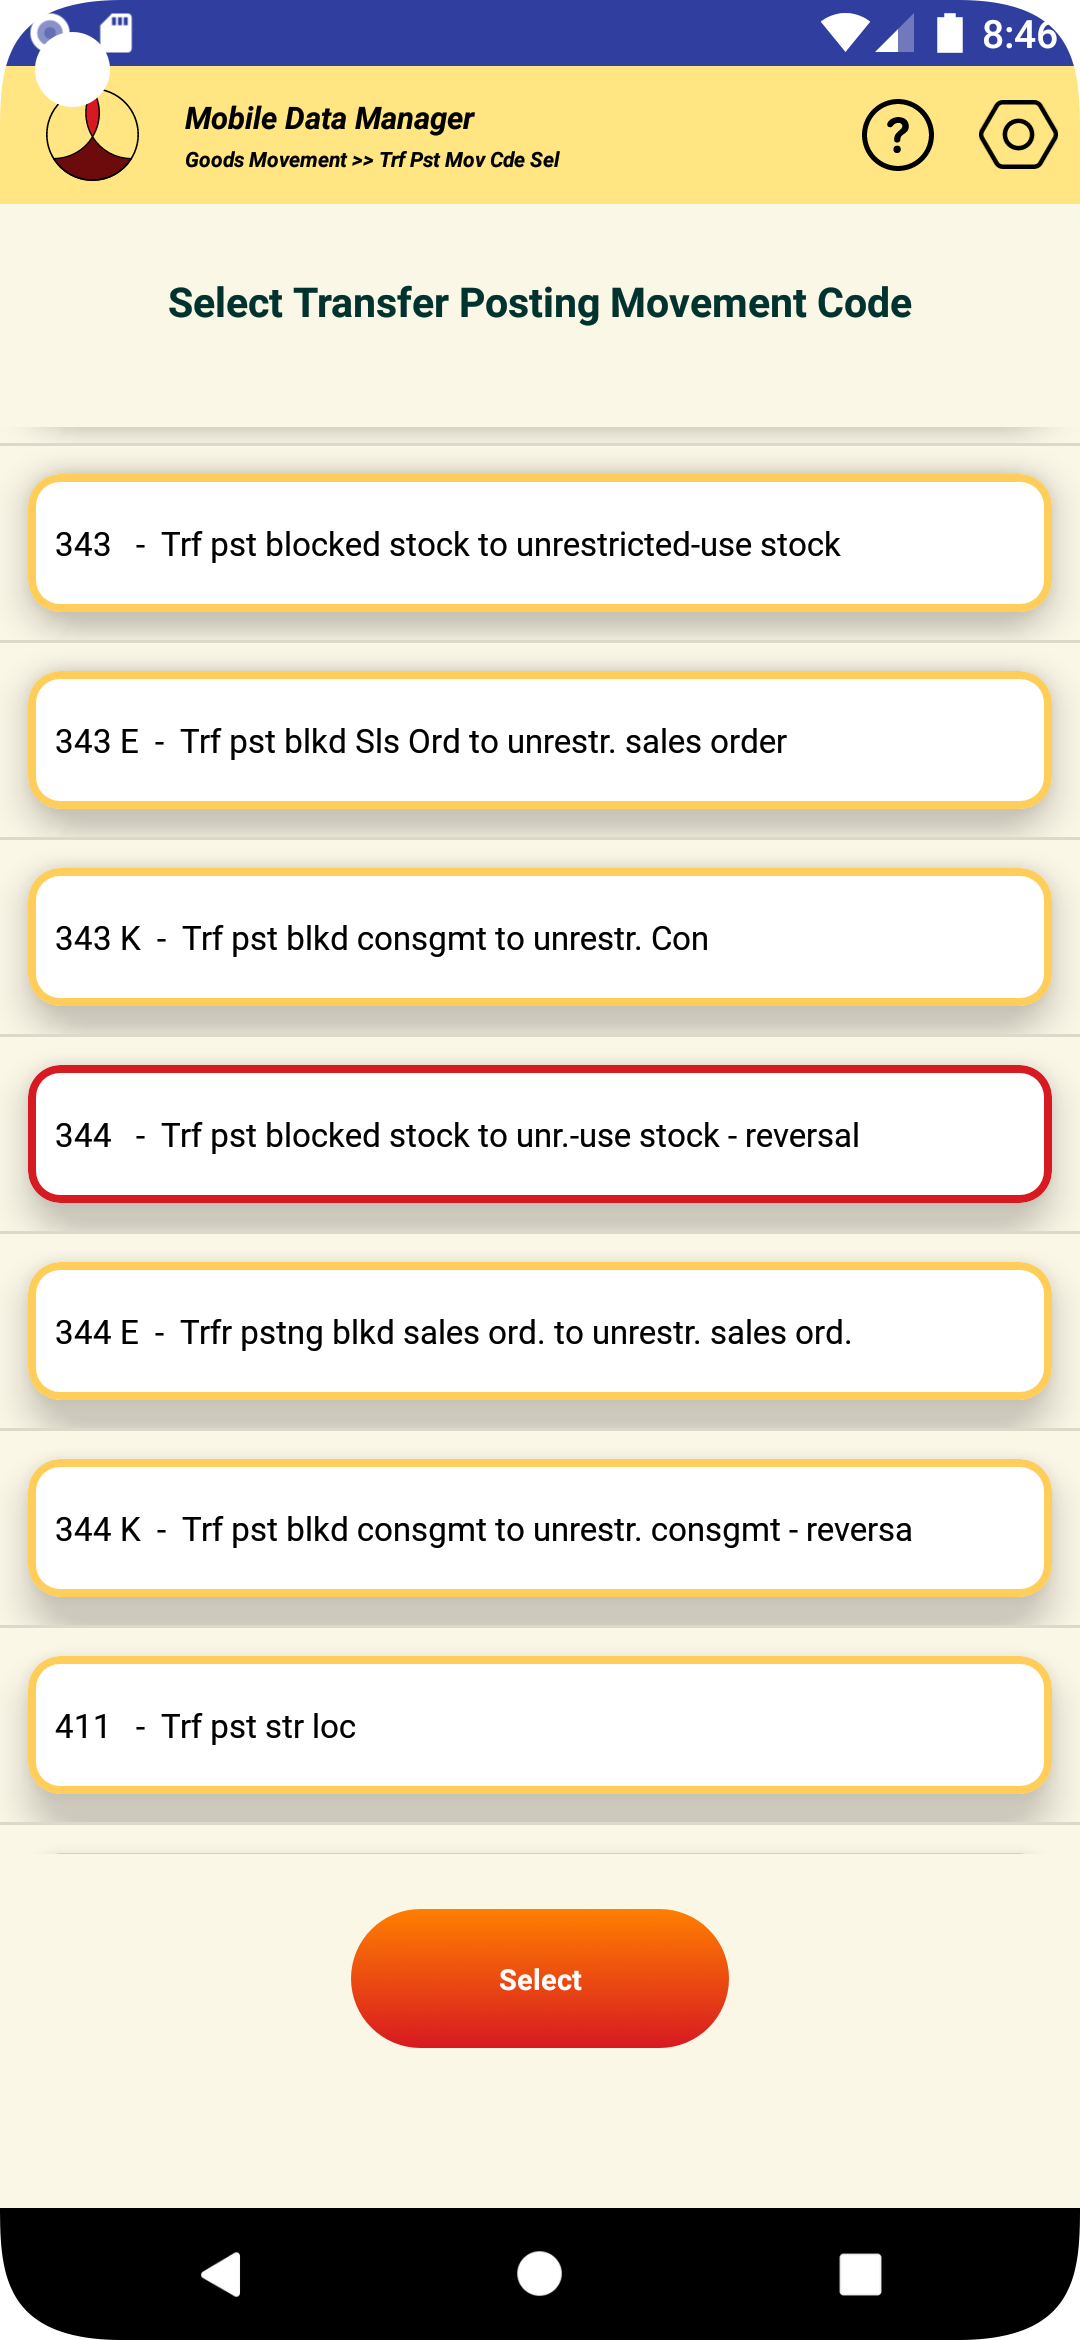
6.7.3 The following screen showing the list of available movement codes for transfer posting will be displayed.
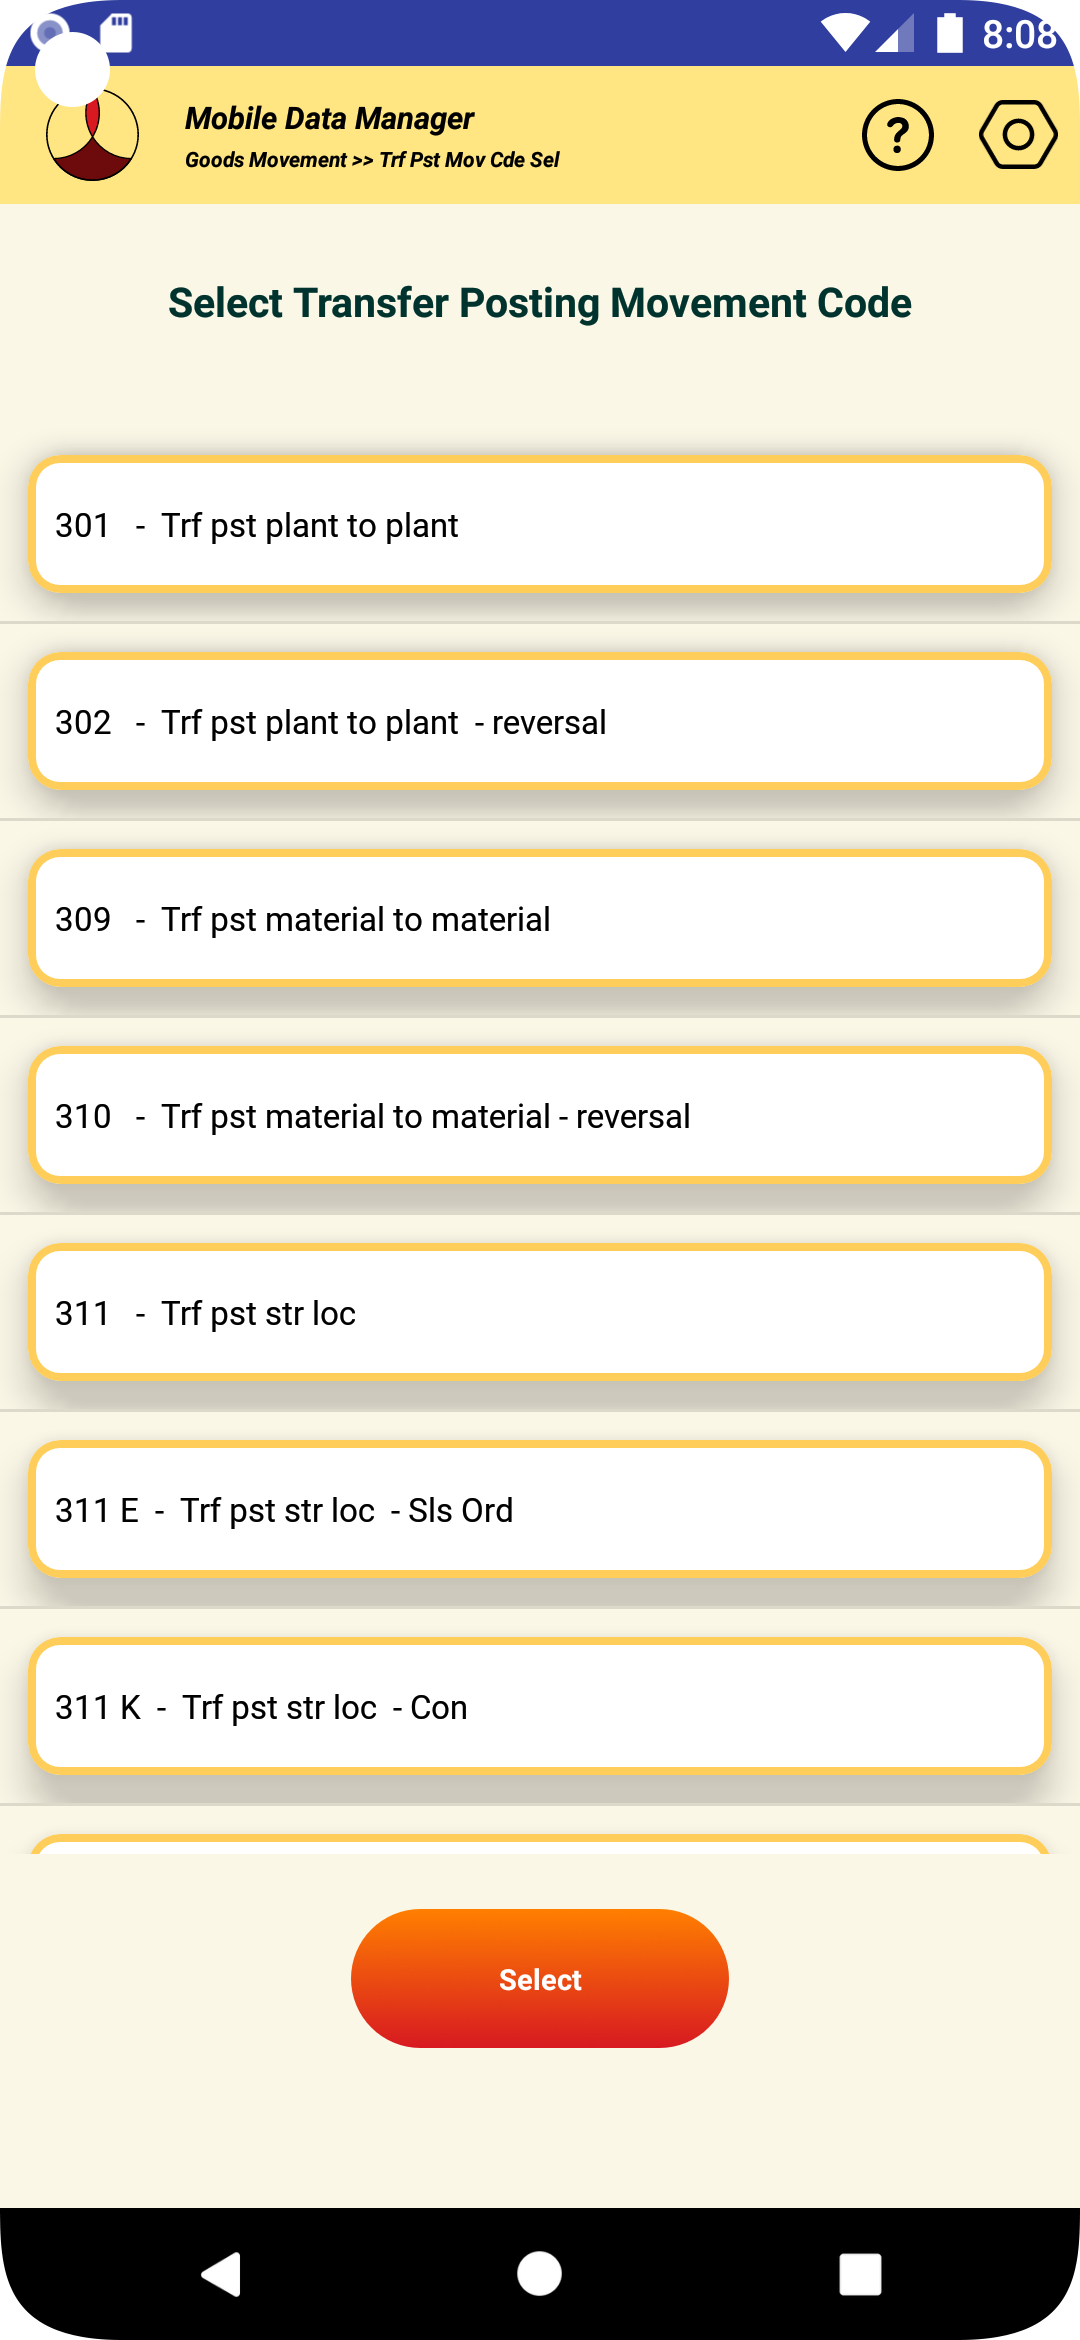
6.7.4 Select the movement code and desired and press the "Select" button.
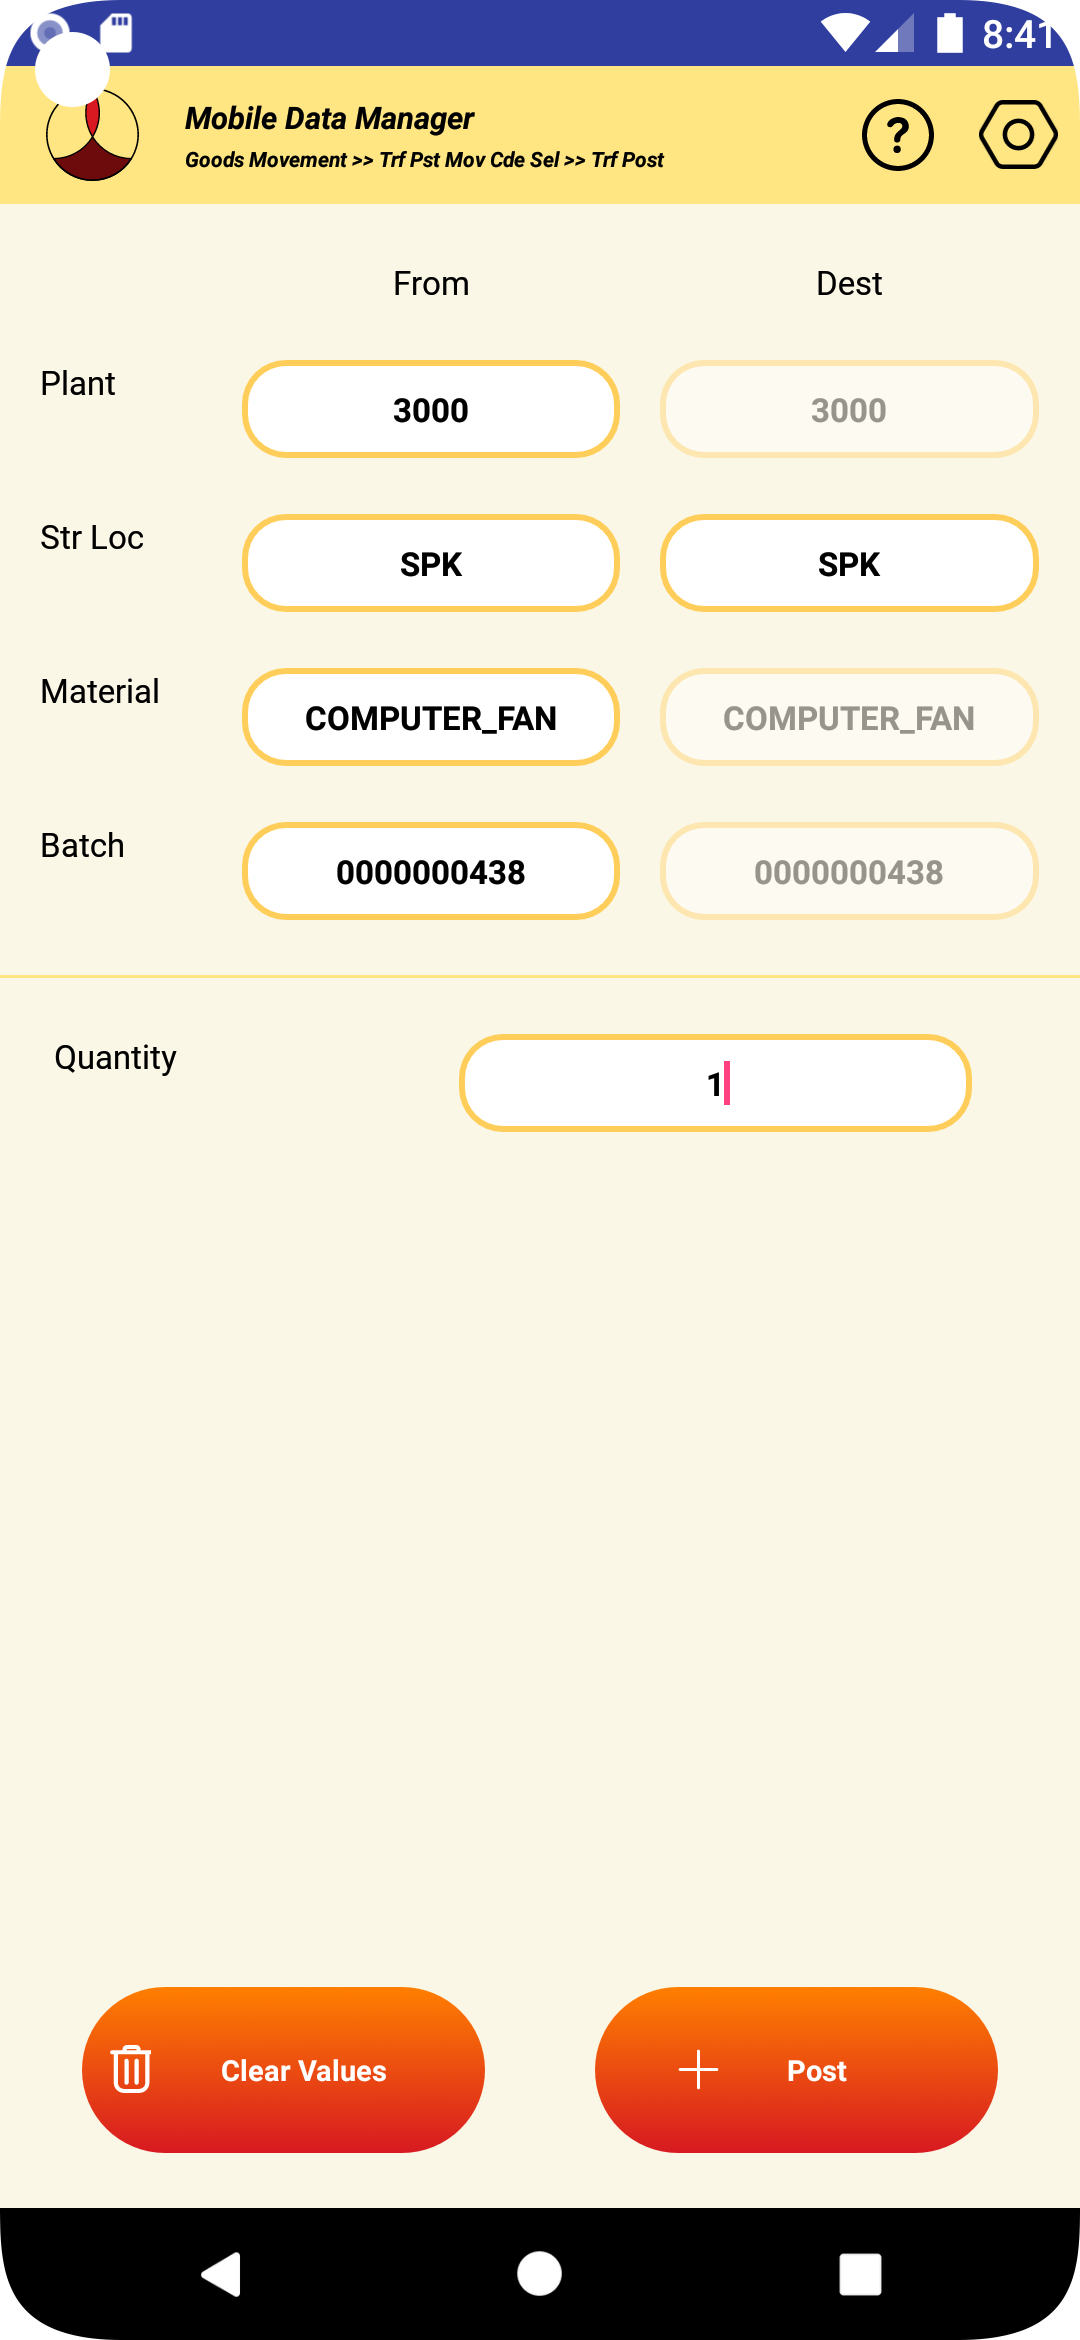
6.7.5 The screen with the required inputs will be shown.
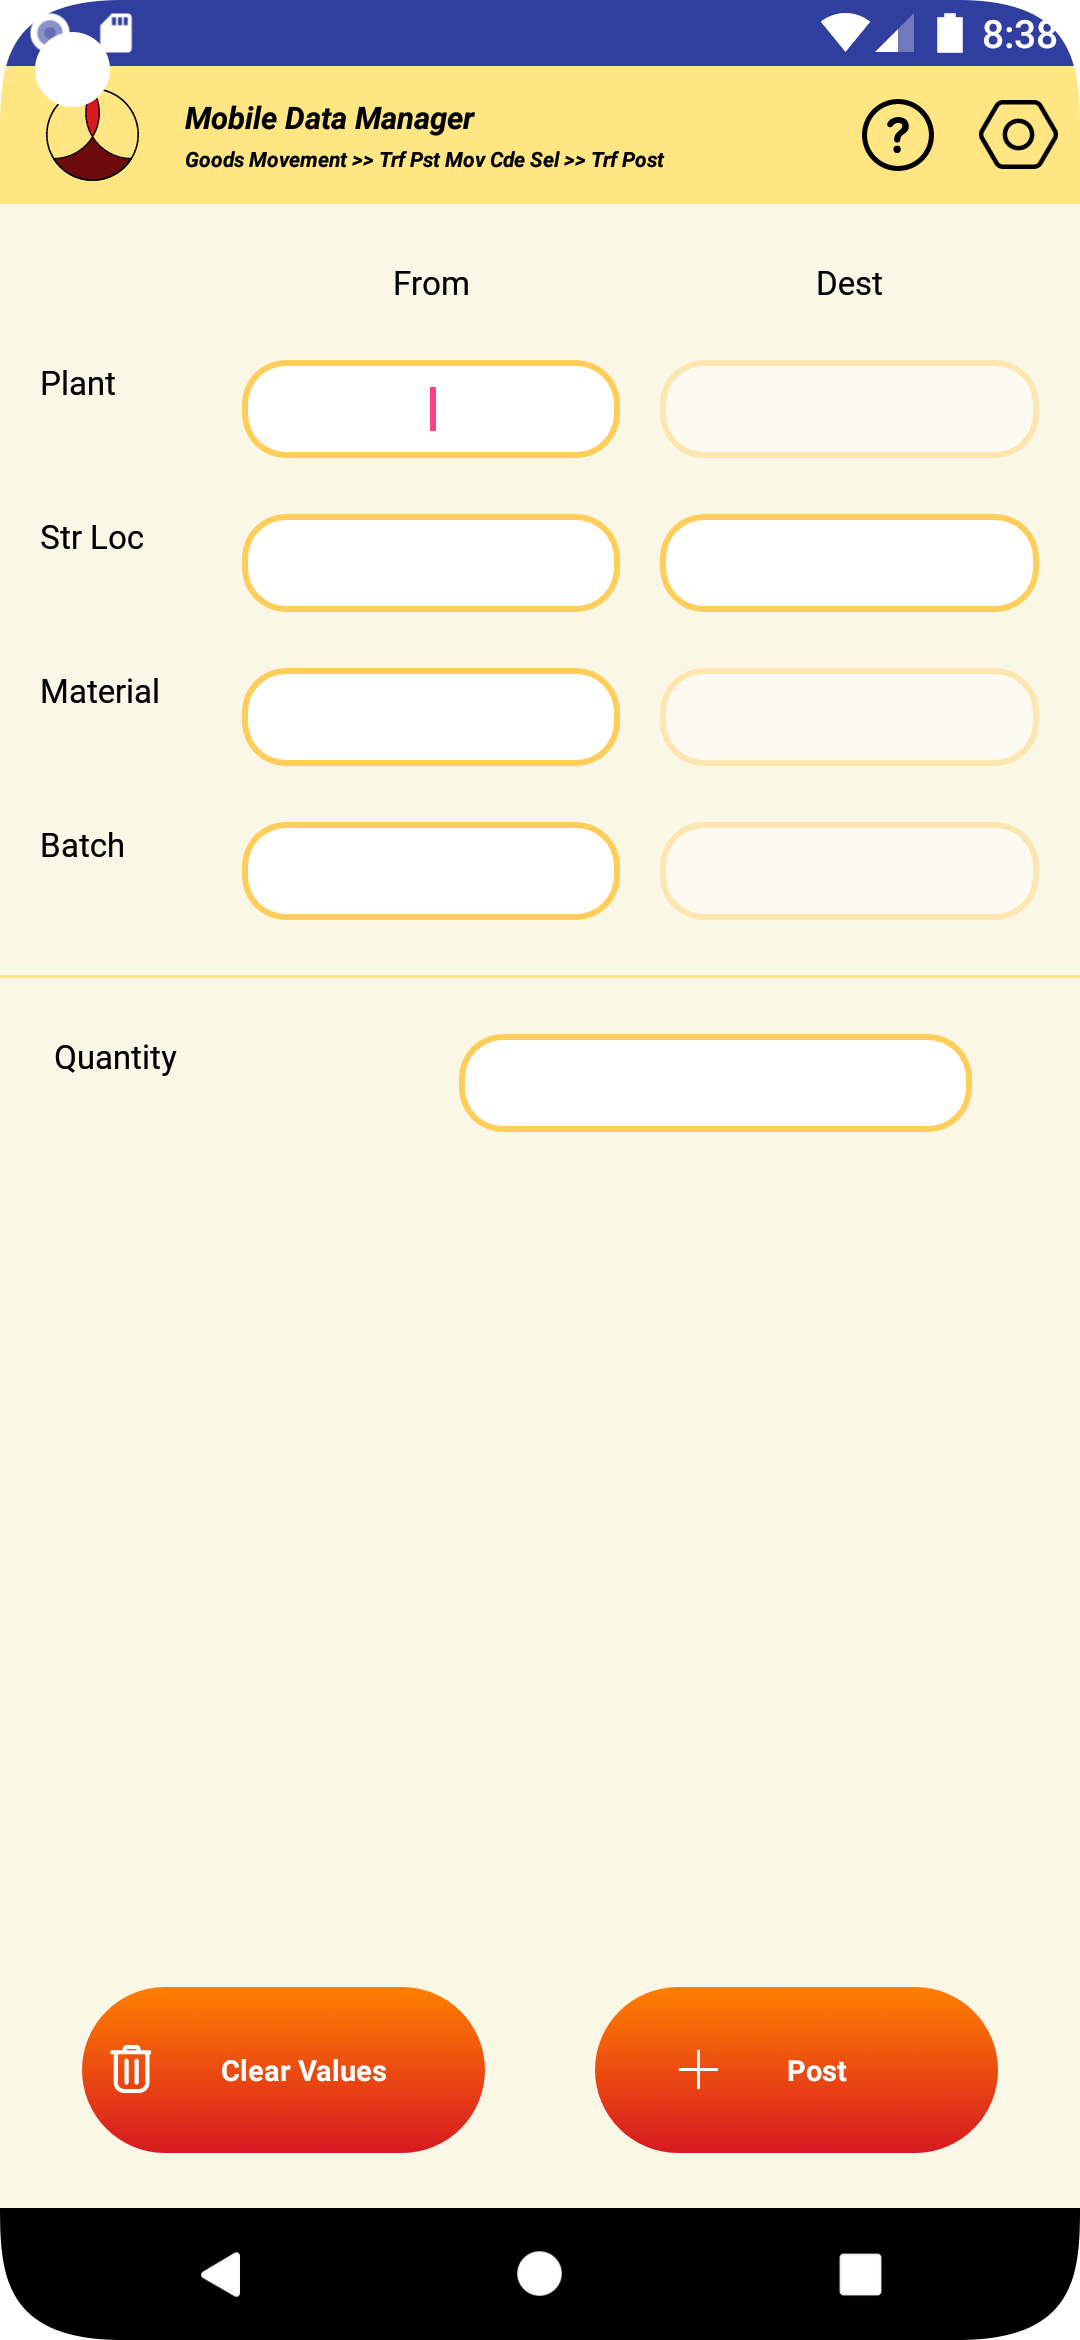
6.7.6 Fill the required inputs and press "Post".
6.7.7 If the transaction in SAP is successful, the transfer order created and confirmed will be displayed.
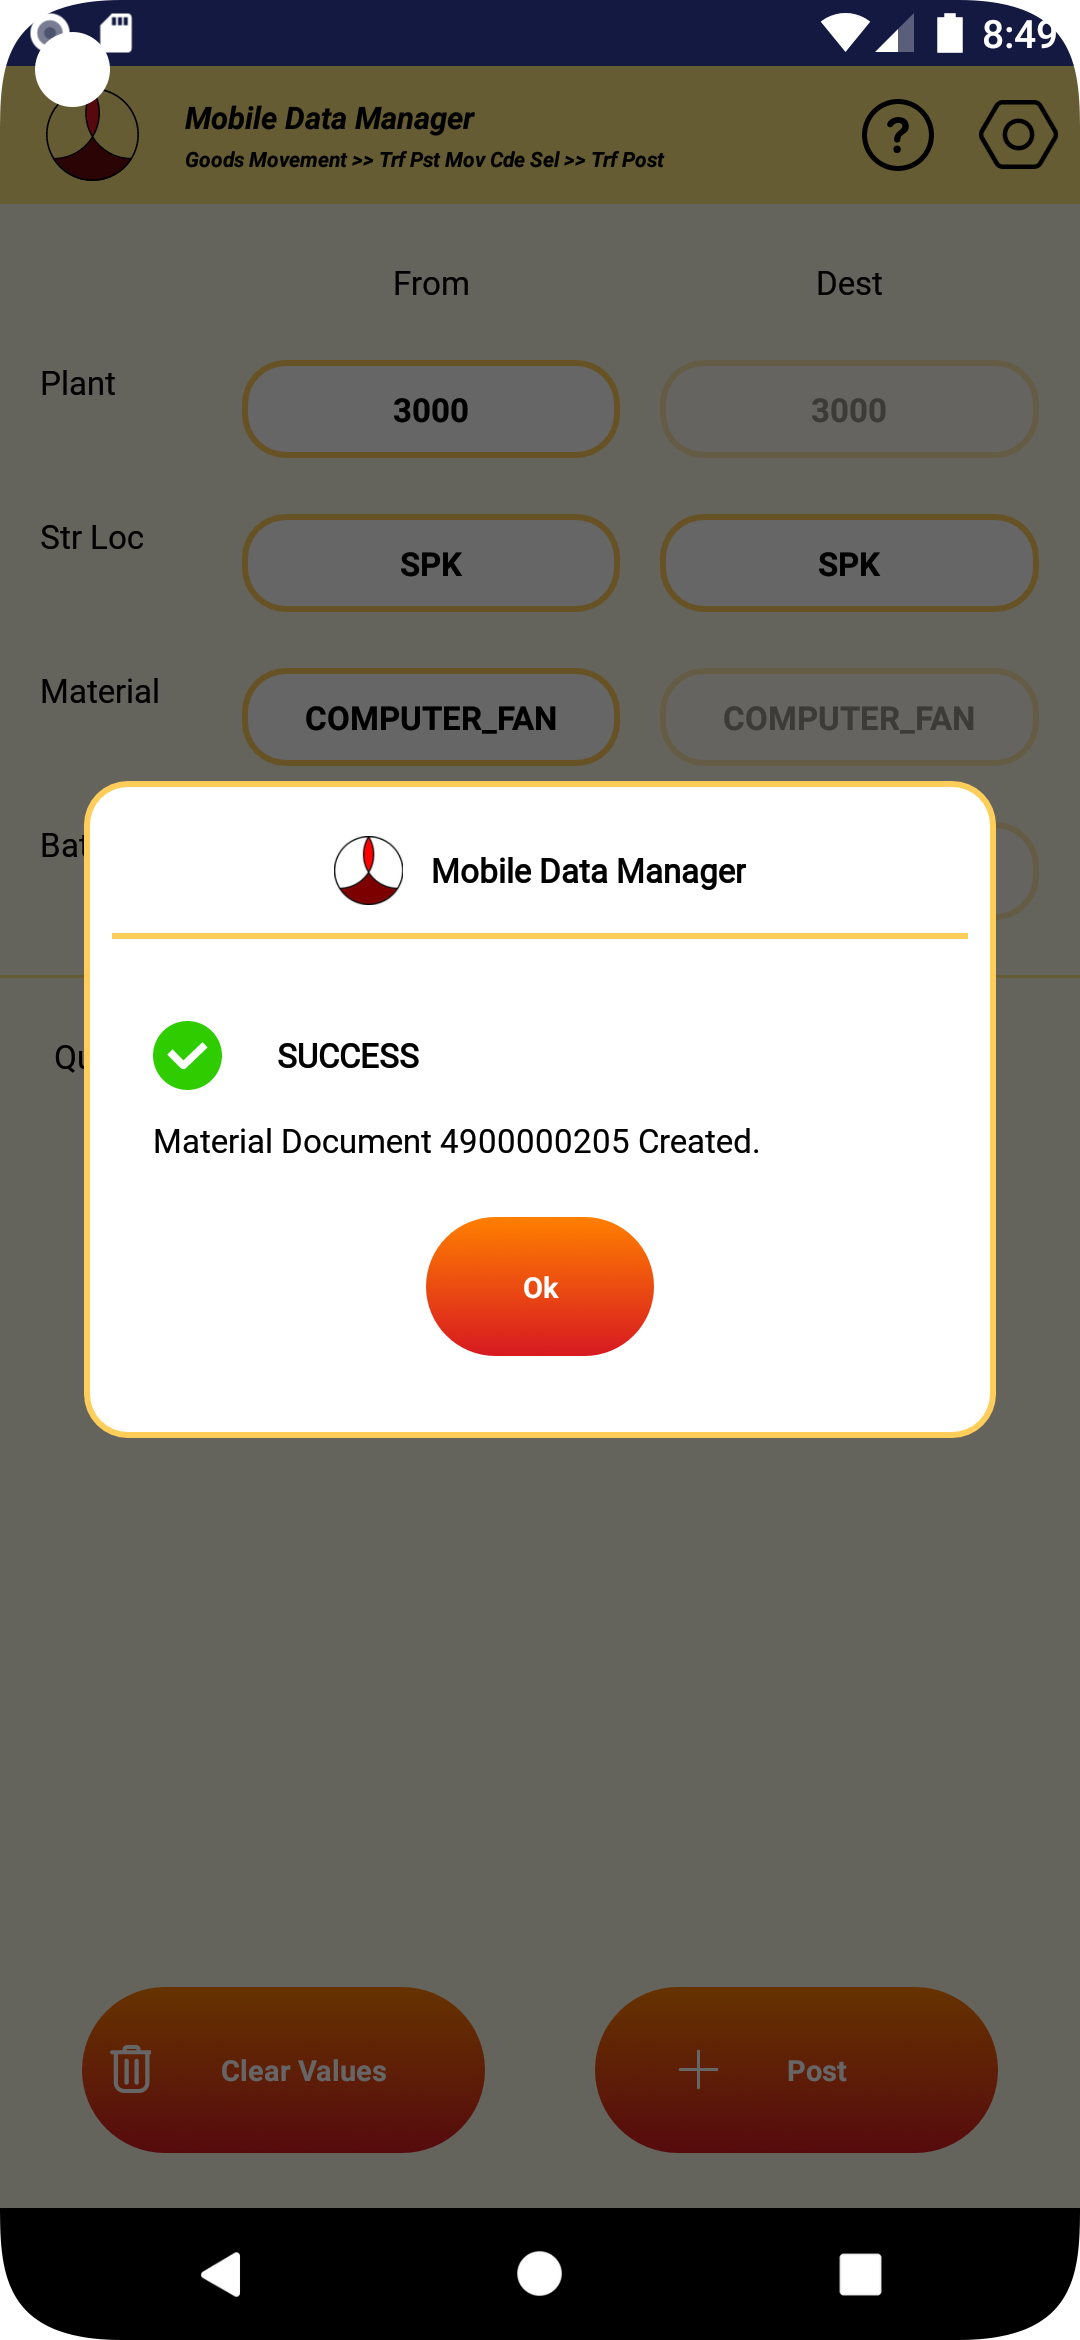
6.7.8 If the transaction fails for some reason, the appropriate error message will be displayed.
6.7.9 If the label printing is configured for the transaction, the label will be printed.
6.7.10 After the transaction the data in the screen will be cleared.
6.7.11 If no further transfers are planned, pressing the back button will take back to the selection of movement type screen
6.9 EWM WAREHOUSE TASK CONFIRMATION
6.9.1 To perform transfer posting of the materials, select “Goods Movement” from the main screen.
6.7.2 Select “Transfer Posting” from the movement type selection screen.
6.7.3 The following screen showing the list of available movement codes for transfer posting will be displayed.
6.7.4 Select the movement code and desired and press the "Select" button.
6.7.5 The screen with the required inputs will be shown.
6.7.6 Fill the required inputs and press "Post".
6.7.7 If the transaction in SAP is successful, the transfer order created and confirmed will be displayed.
6.7.8 If the transaction fails for some reason, the appropriate error message will be displayed.
6.7.9 If the label printing is configured for the transaction, the label will be printed.
6.7.10 After the transaction the data in the screen will be cleared.
6.7.11 If no further transfers are planned, pressing the back button will take back to the selection of movement type screen
7. GOODS SHIPMENT
7.1 OPEN DELIVERY DOCUMENTS LIST
7.1.1 To browse the list of delivery documents available for picking, select “Goods Shipment” from the main screen.

7.1.2 The following screen to select the options type for processing the delivery documents will be displayed.

7.1.3 Select “Open Delivery Documents List” to download the list of delivery documents. The following screen to enter the selection criteria will be displayed.

7.1.4 Enter at least one of the selection criteria, like the example shown below and click on download button.

7.1.5 If there are any delivery documents available that meet the criteria, they will be downloaded. To view the downloaded list, select the “Del Docs” tab in the header.

7.1.6 If the transfer order for the delivery document already exists the order number will be displayed.
7.1.7 To create a transfer order for the delivery, click on “Generate TO”.

7.1.8 If the transfer order generation is successful, the order number will be displayed. The list will also be refreshed to display the transfer order number.

7.1.9 To pick material and confirm the transfer order, click on the “Pick TO”. The screen to select the transfer order will be displayed as shown below. It needs to be observed there could be multiple transfer orders exist for a single delivery document.

7.1.10 Select the TO that needs to be picked and confirmed. The transfer order picked will be displayed. Refer to section 6.2 on picking and confirmation of a transfer order.
7.1.11 If there are additional transfer orders for the delivery document, the procedure 7.1.9 and 7.1.10 has to be repeated.
7.1.12 Use the device navigation to exit the delivery document listing screen.
7.2 PICK DELIVERY DOCUMENT
7.2.1 To pick the transfer orders associated with a delivery document, select “Goods Shipment” from the main screen.
7.3 PACK DELIVERY DOCUMENT
7.1.1 To pick and confirm the transfer order associated with a delivery document, select “Goods Shipment” from the main screen.

7.1.2 The following screen to select the options type for processing the delivery shipments will be displayed.

7.1.3 The Under select shipment type - Select Transfer orders to start processing open transfer orders.
7.1.4 The Warehouse number & Transfer order number needs to be entered.
7.1.5 The details of the Transfer order with the associated delivery document is displayed.
7.1.6 Go to the items tab to display the associated line item to be picked & processed. Select the line item and go to Transfer Tab.
7.1.7 The material, batch , quantity information along with the source & destination bin data is entered and validated. Press the Transfer icon to process the transfer order
7.1.8 Press Yes to confirm the transfer order
7.1.9 Message displayed after the transfer order is successfully confirmed.
7.1.10 The details of the Transfer order with the associated delivery document is displayed.
7.4 OPEN SHIPMENT LIST
7.2.1 To pick the transfer orders associated with a delivery document, select “Goods Shipment” from the main screen.
7.5 PICK SHIPMENT
7.2.1 To pick the transfer orders associated with a delivery document, select “Goods Shipment” from the main screen.
7.6 PACK SHIPMENT
7.2.1 To pick the transfer orders associated with a delivery document, select “Goods Shipment” from the main screen.
7.7 PICK AND PACK SHIPMENT
7.2.1 To pick the transfer orders associated with a delivery document, select “Goods Shipment” from the main screen.
7.8 PICK DELIVERY (EWM)
7.2.1 To pick the transfer orders associated with a delivery document, select “Goods Shipment” from the main screen.
7.9 PACK DELIVERY (EWM)
7.2.1 To pick the transfer orders associated with a delivery document, select “Goods Shipment” from the main screen.
7.10 PICK AND PACK DELIVERY (EWM)
7.2.1 To pick the transfer orders associated with a delivery document, select “Goods Shipment” from the main screen.
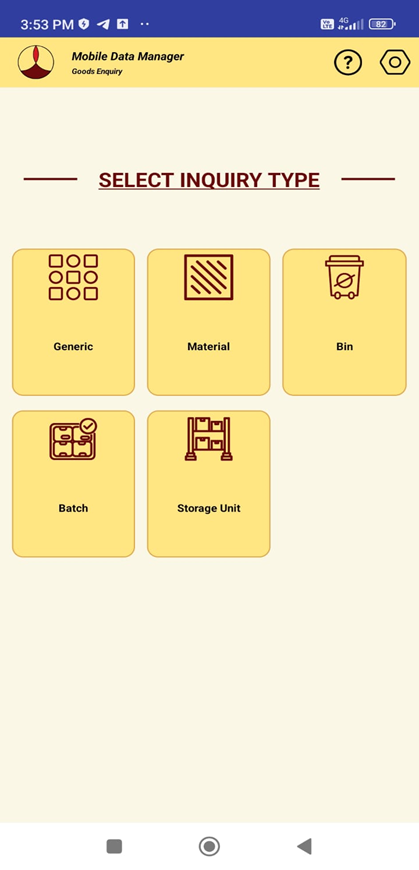
8. GOODS INQUIRY
8.1 MATERIAL
8.1.1 To browse the inventory list based on the material number from the main screen select “Goods Inquiry”

8.1.2 Select “Material” option from the inquiry type screen.

8.1.3 The following screen to download the inventory based on material will be displayed.

8.1.4 The plant, storage location and warehouse will be populated by default if the same were set up in the global settings. These parameters are optional. The search will be filtered based on the values entered.
8.1.5 Enter the value for the material for which the inventory needs to be downloaded and press enter.

8.1.6 The inventory if available for the material will be downloaded and listed as shown below,

8.1.7 Pressing the back button will take back to the selection of inventory inquiry type screen.
8.2 BIN
8.2.1 To browse the inventory list based on storage bin from the main screen select “Goods Inquiry”

8.2.2 Select “Bin” option from the inquiry type screen.

8.2.3 The following screen to download the inventory based on material will be displayed.

8.2.4 The plant, storage location and warehouse will be populated by default if the same were set up in the global settings. These parameters are mandatory. The search will be filtered based on the values entered.
8.2.5 Enter the value for the bin for which the inventory needs to be downloaded and press enter.

8.2.6 The inventory if available at the bin will be downloaded and listed as shown below,

8.2.7 Pressing the back button will take back to the selection of inventory inquiry type screen.
8.3 BATCH
8.3.1 To browse the inventory list based on batch from the main screen select “Goods Inquiry”

8.3.2 Select “Batch” option from the inquiry type screen.

8.3.3 The following screen to download the inventory based on batch will be displayed.

8.3.4 The plant, storage location and warehouse will be populated by default if the same were set up in the global settings. These parameters are optional. The search will be filtered based on the values entered.
8.3.5 Enter the value for the batch for which the inventory needs to be downloaded and press enter.

8.3.6 The inventory if available for the batch will be downloaded and listed as shown below,

8.3.7 Pressing the back button will take back to the selection of inventory inquiry type screen.
8.4 GENERIC
8.4.1 To browse the inventory list based on generic search criteria, from the main screen select “Goods Inquiry”

8.4.2 Select “Generic” option from the inquiry type screen.

8.4.3 The following screen to download the inventory based on generic search will be displayed.

8.4.4 The plant, storage location and warehouse will be populated by default if the same were set up in the global settings. Enter the additional search criteria as needed. The search will be filtered based on the values entered.

8.4.5 After entering the value press the download button.
8.4.6 The inventory if available for the batch will be downloaded and listed as shown below,

8.4.7 Pressing the back button will take back to the selection of inventory inquiry type screen.
8.5 STORAGE UNIT
8.5.1 To browse the inventory list based on the Storage Unit from the main screen select “Goods Inquiry”
8.5.2 Select “Storage Unit” option from the inquiry type screen.
8.5.3 The following screen to download the inventory based on Storage Unit will be displayed.
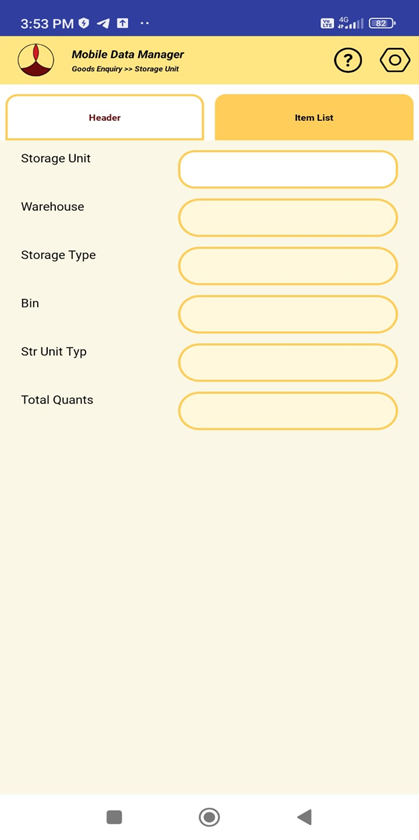
8.5.4 Enter the value for the Storage Unit for which the inventory needs to be downloaded and press enter.
8.5.5 The inventory if available for the Storage Unit will be downloaded and listed as shown below,
8.5.6 To review the Storage Unit list in the document, click on the “Items” in the header tab.
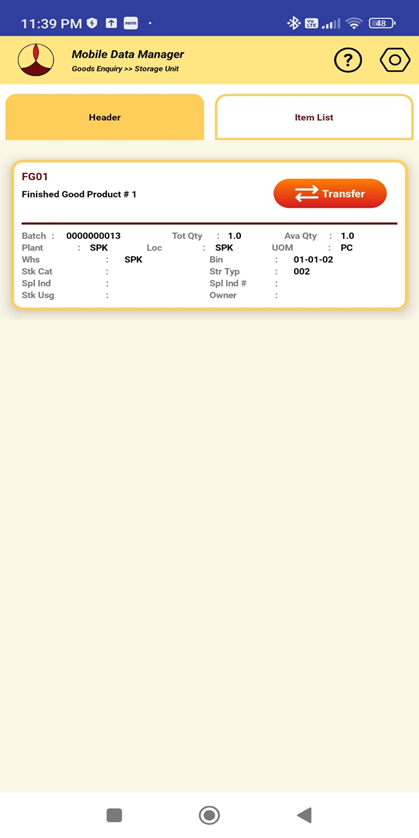
8.5.7 Pressing the back button will take back to the selection of inventory inquiry type screen.
9. GOODS COUNT
9.1 INVENTORY MANAGEMENT
9.1.1 To record the results of inventory count at inventory management level, from the main screen select “Goods Count”

9.1.2 Select “Inventory Management” option from the results recording screen.

9.1.3 The screen to download the physical inventory document will be displayed as shown below

9.1.4 The document year will be defaulted to current year and can be changed as per requirement.
9.1.5 To download the physical inventory document type the document number and press enter.

9.1.6 The header details such as plant, location, reference, creation date, etc., of the document will be displayed.
9.1.7 To review the material list in the document, click on the “Items” in the header tab. All the open lines in the document will be listed as shown below,

9.1.8 To record the results for the material select the line from the list. The selected item will be highlighted as shown below,

9.1.9 To enter the count results select the “Confirm” tab in the header, the details of the selected item will be displayed in the top of the screen.

9.1.10 Enter the details of the material, batch and quantity and press confirm.

9.1.11 If the transaction in SAP is successful, the confirmation message will be displayed.

9.1.12 If the transaction fails for some reason, the appropriate error message will be displayed.
9.1.13 After the transaction the data in the screen will be cleared and the open line items will be refreshed.
9.1.14 If no further recording of the results are planned, pressing the back button will take back to the selection of results recording selection type screen.
9.2 WAREHOUSE MANAGEMENT
9.2.1 To record the results of inventory count at warehouse management level, from the main screen select “Goods Count”

9.2.2 Select “Warehouse Management” option from the results recording screen.

9.2.3 The screen to download the inventory record will be displayed as shown below

9.2.4 The warehouse will be defaulted from the global settings and can be changed as per requirement.
9.2.5 To download the inventory record type the record number and press enter.

9.2.6 The header details such as storage type, reference, creation date, etc., of the document will be displayed.
9.2.7 To review the material list in the document, click on the “Items” in the header tab. All the open lines in the document will be listed as shown below,

9.2.8 To record the results for the material, select the line from the list. The selected item will be highlighted as shown below,

9.2.9 To enter the count results, select the “Confirm” tab in the header, the details of the selected item will be displayed in the top of the screen.

9.2.10 Enter the details of the material, batch, quantity, etc as shown in the screen below.

9.2.11 The other inputs needed when entering the count results can be entered by clicking the “Other Inputs” button.
9.2.12 After entering the inputs press confirm to submit the transaction to SAP.
9.2.13 If the transaction in SAP is successful, the confirmation message will be displayed as shown below

9.2.14 If the transaction fails for some reason, the appropriate error message will be displayed.
9.2.15 After the transaction the data in the screen will be cleared and the open line items will be refreshed.
9.2.16 If no further recording of the results are planned, pressing the back button will take back to the selection of results recording selection type screen.
9.3 EXTENDED WAREHOUSE MANAGEMENT
9.3.1 To record the results of inventory count for extended warehouse management, from the main screen select “Goods Count”
9.3.2 Select “Extended Warehouse Management” option from the results recording screen.
9.3.3 The screen to download the inventory record will be displayed as shown below

9.3.4 The warehouse will be defaulted from the global settings and can be changed as per requirement.
9.3.5 To download the inventory record type the record number and press enter.
9.3.6 The header details such as storage type, reference, creation date, etc., of the document will be displayed.
9.3.7 To review the material list in the document, click on the “Items” in the header tab. All the open lines in the document will be listed as shown below,

9.3.8 To record the results for the material, select the line from the list. The selected item will be highlighted as shown below,

9.3.9 To enter the count results, select the “Confirm” tab in the header, the details of the selected item will be displayed in the top of the screen.

9.3.10 Enter the details of the material, batch, quantity, etc as shown in the screen below.

9.3.11 The other inputs needed when entering the count results can be entered by clicking the “Other Inputs” button.
9.3.12 If there are new items present in the, select the "New Item" tab and populate the details that is asked for in the screen.
9.3.13 After entering the inputs press confirm to submit the transaction to SAP.
9.3.14 If the transaction in SAP is successful, the confirmation message will be displayed as shown below

9.3.15 If the transaction fails for some reason, the appropriate error message will be displayed.
9.3.16 After the transaction the data in the screen will be cleared and the open line items will be refreshed.
9.3.17 If no further recording of the results are planned, pressing the back button will take back to the selection of results recording selection type screen.
10. GOODS PROCESSING
10.1 ORDER CONFIRMATION
10.1.1 To record the work order processing results such as quantity completed or time expended in an operation, from the main screen select “Goods Processing”

10.1.2 The screen to download the work order information and to record the results as shown below will be displayed.

10.1.3 Enter the order number and operation number and press enter.

10.1.4 The order information such as material, unit of measurement, operation activity information, etc., will be downloaded and displayed as shown in the screen below.

10.1.5 To record the quantities of the operation, select the “Quantities” tab in the header. Enter the quantities such as yield, scrap or rework information. To enter the operation activity processing times, select “Activities” tab in the header. Enter the processing time against each activity.

10.1.6 In the “Order” tab in the header, if the quantity and time confirmations are final, check the Final Confirmation check box. To clear any reservations held against the order, check the Clear Reservation check box. To post the transaction in SAP, click on the “Post” button.
10.1.7 If the confirmation is successful, the message of time ticket created will be displayed.

10.1.8 If there are any error in processing the transaction appropriate error message will be displayed.
10.1.9 If no additional confirmations are planned, pressing the device back button will take to processing type selection screen.
11. LABEL
11.1 PRINTER SETTINGS
11.1.1 The printer for the labels will be based on the default settings made by the administrator in SAP.
11.1.2 The user can override the printer where the label for different types of transactions are printed.
11.1.3 To associate labels with specific printers after logging in, from the main screen select “Settings”

11.1.4 Select “Labels” from the headers tab. The screen to add or delete the label-printer associated as shown below will be displayed.

11.1.5 To add a new association, click on the “+” or add button in the top right corner. The following screen displaying the list of available labels and the list of available printers.

11.1.6 Click on the label, to display all the list of labels as shown below.

11.1.7 Select the label for which the printer needs to be set. Repeat the same for selecting the printer.

11.1.8 After the selection, press the “Add/Update” button to add the new association to the existing list.

11.1.9 Press “Save” to save the values.
11.1.10 The transactions that generate the label added will send the print to the associated printer.
11.2 LABEL REPRINTS
11.2.1 To reprint the labels for any transaction, from the main screen select “Labels”

11.2.2 The following screen listing the available labels will be displayed.

11.2.3 Click on the label type that needs to be reprinted. The screen to print will be displayed. The parameters that are associated with the label that needs to be provided by the user will be displayed. The parameters that are associated with each label type is set by the SAP administrator.

11.2.4 Enter the parameters and click on the print button at the bottom of the screen.

11.2.5 If the print is successful the command sent message will appear as shown below, otherwise an appropriate error message will appear.

11.2.6 If the print is successful the command sent message will appear as shown below, otherwise an appropriate error message will appear.
11.2.7 If the print is successful the command sent message will appear as shown below, otherwise an appropriate error message will appear.